Tuesday, February 18, 2014

Epic Fail

Ha!  You can tell I'm relatively new to this world of blogging.  I've just now realized that when I delete comments on the comments tab, I'm actually deleting the comment.  Here this whole time, I thought I was just deleting the comment notification.  Epic fail.  So, apologies to anyone who's noticed a comment of theirs disappearing.  It was wholly unintentional.

Along the theme of epic fails, my dress form bit the dust today.  Apparently, the court panniers were just too much for her to handle.  She had a good run, though.  I figure that with all of the heavy Victorian bustle gowns that I've hung on her, it was bound to happen eventually.


So sad.  :(

On the bright side, though, a replacement has been ordered.  I went with the Dritz Twin-Fit Dress Form, Full Figure.  Ordering through Amazon, I was able to get it at a much better price than if I'd purchased it in the store.  Until it gets here, I'll just have to set aside the petticoat for the court dress and work on something else.  Perhaps I'll start drafting out a pattern for the bodice.

Monday, February 17, 2014

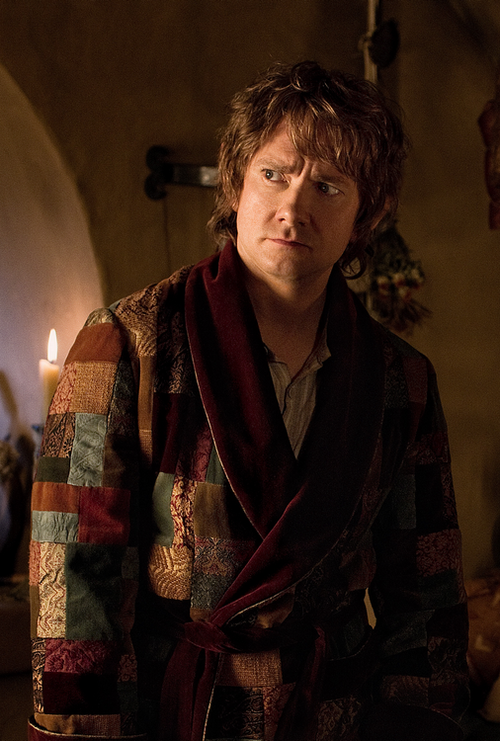
Project Summary: Bilbo's Dressing Gown from The Hobbit: An Unexpected Journey (2012)

I have a Honey, and my Honey has a particular affinity with Hobbits. So, when the first of the Hobbit movies came out, of COURSE he needed to have himself a new costume. We collectively latched onto the idea of the dressing gown. Him because it was quircky and awesome, me becaue I could turn my head to the side and go "How the f*** did they make that?" One of the things that I love about this hobby is figuring things out bit. I've not seen a lot of people attempt this particular project, so I really wanted to put what I learned out into the world. Hopefully, it'll help someone else.
In one of the early sequences of The Hobbit: An Unexpected Journey, we Bilbo settling down in his tidy dining room to eat his dinner in peace. As Tolkien fans know, Bilbo’s dinner (and his life) are interrupted by a company of dwarves. During this key sequence of the movie, Bilbo is seen wearing a quaint and cozy patchwork dressing gown.


The dressing gown appears to have been made out of a patchwork of velvets in a variety of solids colors and prints. The patchwork appears to have a random pattern. It has a solid burgundy velvet collar, cuffs and belt with piping on terminal edges that is light (but not white or ivory) in color and appears to have a very small pattern on it. Looking at the screen caps from the back, it appears that the back of the dressing gown could possibly be from three pieces with princess-style seams, which would give the garment a bit more of a fitted look. However, I could just as easily reason in my head that those were folds in the fabric. Seeing as how working with the quilting was going to be a challenge enough in it's own right, I went with the easier interpretation and went ahead and made the back a flat piece with a straight line seam down the center. Any fitting was then done at the side seams.

The pattern I used as a launching point was Butterick 3648 Making History: Dickens St. Nicholas/Ghost of Christmas Past. I chose this for simplicity's sake: I already had it on hand and it was 'close enough". I figured a bathrobe couldn't be that hard to cobble together. So I adjusted the sleeves to be a bit more tube-like and the robes shorter and less full.


I made a muslin mock up out of an unremarkable cotton print from my stash. It was important to keep in mind that heavy fabrics will stand out more and this was taken into account in the fitting. Hem allowances for collar, cuff and bottom hem were taken into account. Grain lines were marked onto the mock up pieces, which was critically important for matching the patchwork layer.

The muslin mock up was disassembled and laid out as a guide for assembling the patchwork layer so that I wouldn't have to quilt any more of the velvet than absolutely necessary. It appears that the dressing gown is made of quilted velvet, sewn together in squares and rectangles to form a completely randomized pattern. The next step was to sort out what, if any, sort of pattern was used in the organization of the quilting. A couple of black and white prints of the costume helped me focus. I used the base of Bilbo's ear as a size reference and then outlined all of the places where I could identify the shape, then extrapolated from there.


This is what I could come up with as far as a recognizable pattern.  A few of the 8-square blocks had a repeated pattern and I could identify four distinct arrangements.  For each block, I penciled in what color/pattern arrangements were present.


While it was impossible to find the exact fabric patterns that were used in the movie, we compiled a set of fabrics to give the same impression of texture and color in the original. Some fabrics were used in the form in which they were purchased; other pieces of fabric were dyed into one or more colors to create more variety in the final piece.

When choosing fabrics, I wanted to stick to natural fibers. This gave the benefit of breathability, and also the opportunity to adjust the colors of some basic light colored solids to increase variety. Choices were further weeded down by systematically ignoring all stretch or panne velvets that were available. I was left with the choice between cotton and silk, and went with cotton because of the appropriate prints I could find and relative affordability. While a few of the patches in the final garment are presented in the exact color in which they came, many more were dyed to that color by Michelle and I. I purchased large quantities of solid colored velvet in light blue and ivory, then cut them into 1/8 yard pieces and dyed them in small batches using Dharma Fiber Reactive dyes to yield a stunning array of blues, greens, golds, reds and browns.

All of the velvets and lining material for this costume were purchased online from Denver Discount fabrics. They did not have the appropriate color of burgundy for the trims, so that was also dyed by hand using the Buttercream velvet and Dharma Fiber Reactive dye in Burgundy. The 100% cotton chambray lining was originally purchased in peach, but the fabric was a poor match for the velvets and was also thrown into the burgundy dye bath. The cotton print for the piping was pulled from my stash and was originally a pale lavender. To help it blend in with the earthier tones of the velvet patchwork, the print was dyed with a mix of maroon and brown Rit dye, giving it a much more muted color.

My honey was conscripted to help with the cutting and labeling of squares, in addition to doing much of the ironing which had to happen to every seam. Trying to keep the nap going in the same direction for all pieces was a pain in the rump. What we ended up doing was to use chalk arrows drawn on the back of each piece.

SO many little squares and rectangles.

A plain cotton muslin was dyed a dusty rose and used as lining.  Once each of the body and sleeve pieces were fully quilted, I used the lining pieces to cut out the pattern piece from the quilting.  The lapel is made from two 3" wide strips of velvet that were tappered to 2" at their terminal ends, then attached to a cotton backing with piping along the seam.  The cuffs have velvet on the inside and out, with piping along the terminal seam.  The belt is simply two long strips of velvet sewn right sides together, then turned right side out.  The hem was turned up and sewn by hand to avoid obvious stitch lines on the velvet.


Photo by official CC30 photographer, Richard Man.


Photo by official CC30 photographer, Richard Man.

Photo by official CC30 photographer, Richard Man.

The hairy feet, Honey did all by himself.  I had nothing to do with that, beyond the generous tip left for the housekeeping staff for cleaning up the dusting of curly dark hairs off of our bathroom floor.  We entered the Sci-Fi/Fantasy Masquerade at Costume Con 31 (May, 2013) where it received a Workmanship Award for Best Journeyman. Such a well dressed hobbit.


As a fun side project, I made up a small quilt to use up the leftover materials.  The quilt is made exactly like the robe, with lining and piping scraps pieced together for the backing, and rows of piping along both edges of the burgundy velvet border.  It's too small to be a lap blanket, but it should look lovely hanging on the guest room wall.


Saturday, February 15, 2014

HSF'14 #3: Pink! 1770s Court Panniers

I've spent the last week or so working on the panniers for my 18th Century Court Gown project.  The current HSF challenge was pink, which I'll admit, I wasn't too thrilled about.  I'm not really a fan of the color.  However, I've been trying to make a point of making foundation garments and underpinnings in colors other than white.  Not for any aesthetic purpose, mind you, but for practical reasons.  I store most of my costumes hanging up in zippered wardrobes, which makes it difficult to tell one white cotton blob apart from any other.  Ergo, color.  So I thought, what the hell.  This is already a ridiculous project.  Let's make it just that little bit sillier and make the panniers pink.

I picked up a few yards of white cotton sheeting from Dharma Trading Co and dyed it up in the washing machine.  I thought I'd chosen a nice, subdued shade of pink.


I was wrong.  That cotton sucked up the dye like it was dying of thirst, and what I ended up with was a violently Pepto-Bismol shade of pink.  Well, whatever.  It's underwear.  Life goes on.
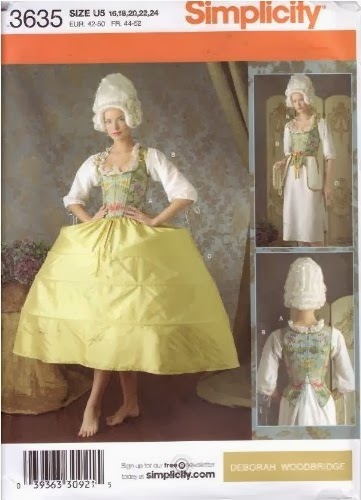

I used Simplicity 3635 as a base for making the panniers.  

I had picked up the pattern second hand, though.  And while all of the pattern pieces were present, the instructions were not.  However, with only three pieces and a general idea of what the thing was supposed to look like in the end, I was confident I could figure it out.  One of the first things that I needed to change, though, was the width.  I took an image of the dress I was recreating and superimposed my measurements onto it.  As I am both tall and big, the dress was going to have to be stupid wide.  Like, 78 inches wide at the hem.  *pause for a fit of giggles over just how ridiculous my hobby can be*  Ahem.  As you can see, I wasn't taking the maths too seriously.  The diagram was done up in MS Paint and all measurements were approximate.  


Measuring out the pattern pieces, they would give me about 54" width at the hem (of the panniers, which would still be 6-8" above the floor).  Assuming that the petticoat and then the skirt of the dress would each add about 2" to the width, I needed the panniers to give me a total of 70".  Below is the rough sketch I did up to show where I wanted to add the width.  I had originally planned to cut additional center front and back pieces to get the extra width, but it turned out that my fabric was wide enough for me to just add 8 inches to the CF/CB and cut the front and back pieces on the fold.  


This is what I came up with:


I seriously spent like five minutes just sitting there laughing at the monstrocity, texting pictures to my costumer friends.  While there were certainly a few gowns with this kind of shape (such as the one below) that had that gentle sloping sides, it wasn't what I was looking for.


Mantua 1755-60, the Victoria and Albert Museum

So, where did I go wrong?  I think the problem here was that, although I widened the front and back of the panniers, I was still gathering the topmost portions into a waistband.  This resulted in the bottom being wider than the top.  I went back and took a triangle-shaped piece out of the center front and back that was 8" wide at the base, tapering into a dart about three inches below the waist band.  This lessened the circumference of the bottom hoop by 16", while affecting the upper hoops less.


MUCH better.
The gathers at the top of the petticoat should also give a bit more of a boost over the top edges, so I think this rendition will do just fine.  I set the dress form up on the dining table so that I could adjust the ties without having to lay on the floor.  The other big change I made from the pattern was to shift all of the ties over 3" closer to the center.  In the photo of the first draft, you can see how the hoops keep sagging  By shifting the ties, the tension gets distributed a bit more evenly.  The ties are attached with safety pins for the time being, as I'm still playing with their placement.  I'm having trouble getting the spaces between the hoops to stop collapsing like an accordion.  If changing the tie placement doesn't fix it, I may go back and put a few pieces of boning in to force them to stay apart.

Ties connecting front and back of the pannier give it an oval shape.
But not quite oval enough.  Gotta tighten those ties a bit more!

The thing is entirely machine sewn.  I opted to use bone casing instead of making channels or loops from the cotton.  It saved a lot of time (but cost a lot more).  My hope was that the casing would help soften the lines of the hoops a bit, so that I can get away with just the one petticoat between them and the skirt of the dress.  I left the spaces at the side for accessing pockets extra wide and bound the raw edges white cotton bias tape.  

I'm also considering ordering some of the hoop connectors from Farthingales, so currently, the hoops just overlap each other inside the channels by about 10".  I wanted to make sure that the entire contraption was easy to pack for air travel, so any of the more permanent methods of connecting the cut ends just wasn't going to work.


Info for the Historical Sew Fortnightly:

Pepto-Pink Panniers!
The Challenge: #3 Pink
Fabric: White cotton sheeting, dyed "coral" pink.
Pattern: Simplicity
Year: 1770s
Notions:  3/4" bone casing, 1/2" cotton twill ties, 3/8" poly satin ribbon, white cotton bias tape and stupid amounts of hoop steel.
How historically accurate is it? Hmm... 7/10.
Hours to complete: about 14, including sketching out the pattern and dyeing the fabric.
Total cost: totally guessing, but probably around $80 US.  Hoop steel and bone casing is pricey stuff.

Friday, February 14, 2014

Well, that didn't work: applying the Burn Test to determine fabric content.

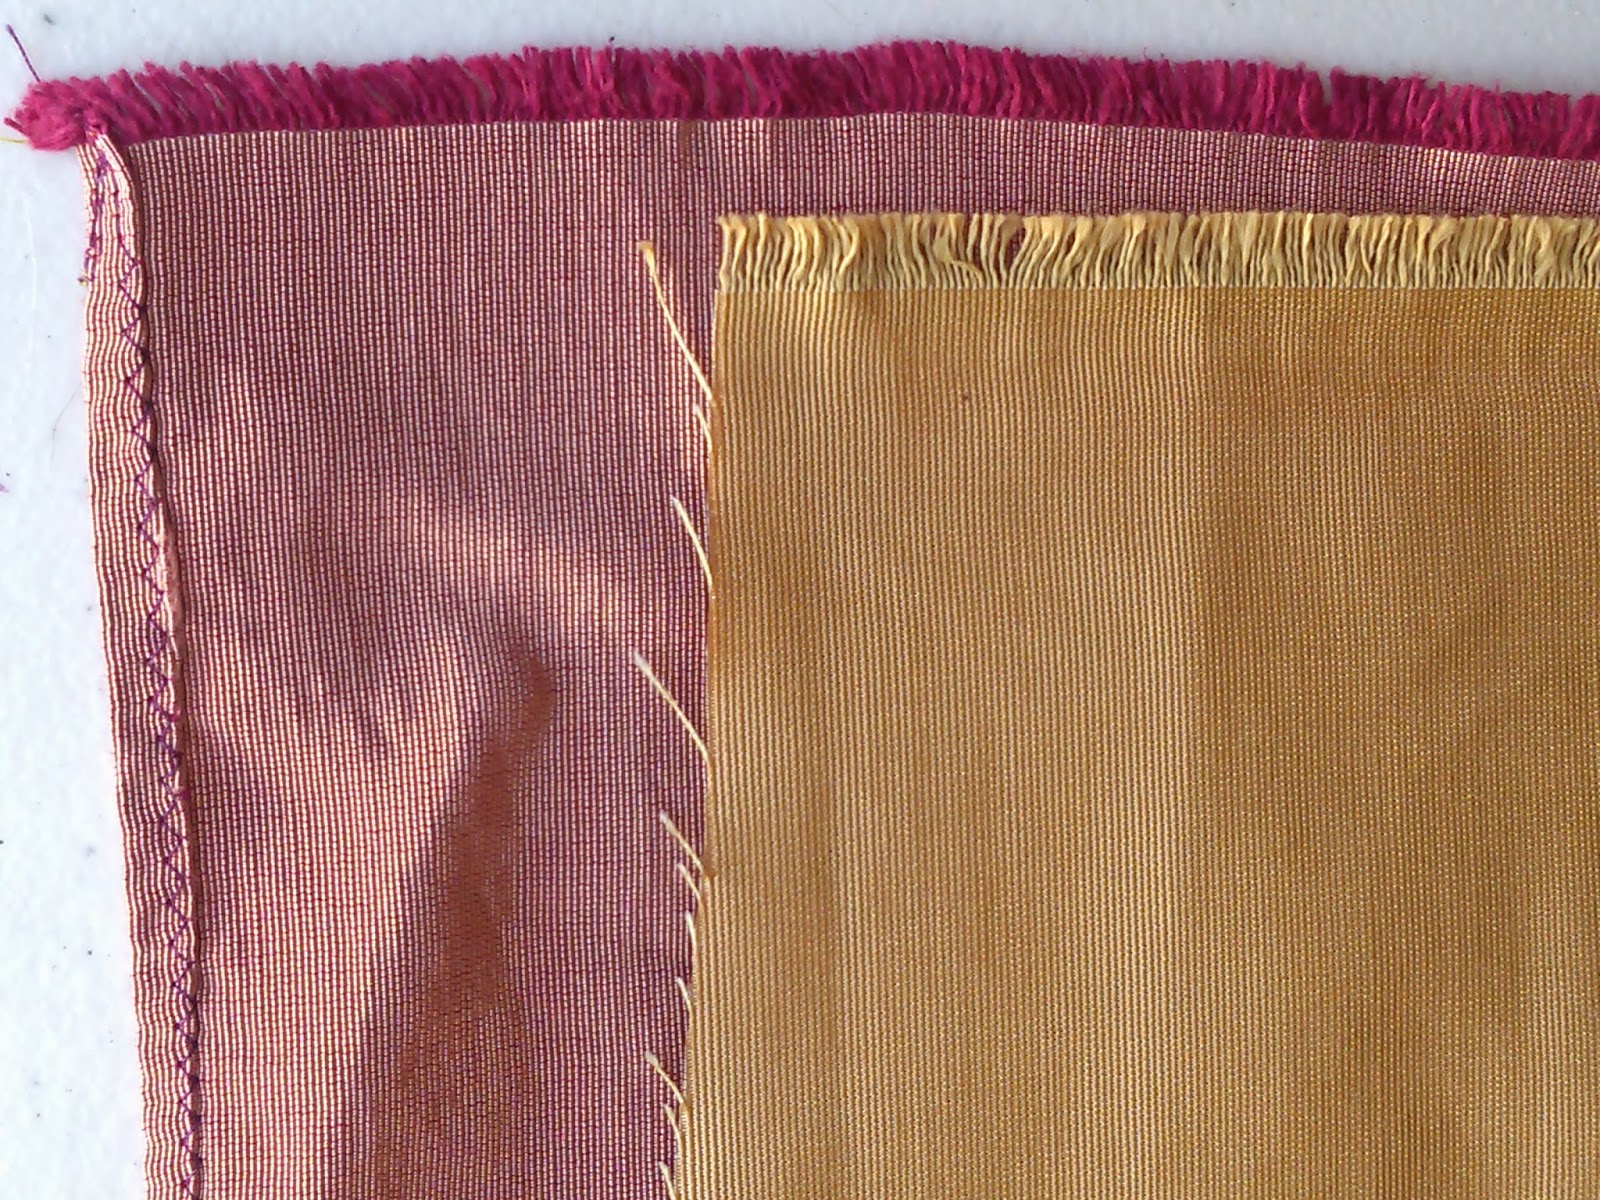
Monday was a "dye all the things" day for me.  I did up the pink cotton sheeting for my court panniers, then dyed this wicked cool gold rayon faille that I got for super cheap from a discount fabric store online.  The idea was to try to find a way to keep the cost of my 18th Century Court Gown project from getting too out of hand.  Well, you certainly get what you pay for, and that cheap rayon fabric ended up being just that - cheap.  It came out of the dye bath with only the weft threads having picked up the dye.

Dyed fabric on the left, vs a swatch of the un-dyed fabric on the right.


Well.  Opps.  However, the mystery provided me with an excellent opportunity to practice the burn test method of determining fabric content.  You can find helpful flow charts all over the internet, but I use the following one, sourced from a Burda Style article:

from Burda Style


Since my warp and weft fibers were obviously different, the first thing I needed to do was to separate them.  I used a stick pink to pull out a finger full of the thicker weft threads, leaving about an inch or so of the very fine gold weft threads anchored in a fabric base.  The gold threads were so very fine, I felt like I had to leave them anchored to something or else risk a flutter of burning threads going every which way.

Picking out the threads with a stick pin.

First up was the red warp threads.  I rolled the threads into a small bundle and held them with a pair of tweezers over an old aluminum mint tin that I keep around for just this purpose.  I was already confident that they were some sort of natural fiber, since they did take up the dye.  What I discovered that the fabric readily burned, and did not self-extinguish (had to blow/tap it out or it would burn until it was gone).  The fibers charred (as opposed to melting) and they smelled like burning paper.  After tapping out the flame and letting it cool, rubbing the burnt end between my fingers showed the grey ash to be soft and crumbly.  Burn test says it must be cotton, ramie or rayon.  Since the website where I bought the fabric claimed it was 100% rayon, I'll guess that's what it is.


Next up are the gold weft fibers.  The fibers burned and were not self-extinguishing.  They kinda melted, though, and really did smell a bit like vinegar (I was never convinced that part of the flow chart was going to be legit, but yeah, vinegar).  Once it had cooled, the black ash turned out to be hard and kinda lumpy.  Burn chart says: acetate or triacetate.


A rayon acetate blend is mostly likely what I ended up with.  Acetate fibers would not have taken the dye.  And it makes the ludicrisly cheap price make more sense now.  Acetate IS dirt cheap.  Lesson learned.  Will have to be emailing that website back, because, yeah.  False advertising there.  But oddly enough, I'm not terribly upset.  Just thoughful.  I kinda LIKE the way it turned out.  It's a pretty color, albeit a bit fleshy looking.  I could go ahead and make the court gown as I was planning, only in this slightly different color.  Or I could make a different style of court gown out of this fabric, as I don't think the fur would look as nice up against this new, blended color.  Nah, I'll probably just have to toss this failed experiment into the stash and make another attempt at buying the fabric in the red I needed in the first place.

Perhaps I'll instead use it for that open front gown I was wanting to try.  It's an interesting enough color on it's own.  Some self-fabric embellishments would look fine on it.  A pinked rouching, or perhaps some poufs.  OMG, now that I'm picturing it, an open front, flesh-colored gown with ruched robings totally looks like a labia and I'm laughing my arse off, thinking of pairing that with a dark brown hedgehog wig and a terribly innappropriate stomacher.  And what would my DATE wear?  A dick suit?  Sounds like the perfect opportunity to break out the stupid high wig for a Macaroni style court suit.  

Ahem.  Anywho.  Maybe I should think on it.

Ten yards of fleshy-pink rayon-acetate faille, as well as five yards of the un-dyed gold.


Sunday, February 2, 2014

HSF'14 #2: Innovations, the Korean Ayam

It was about this time last year that I was completing my hanbok.  With it, I wore my then chin-length hair pinned back into a teeny tiny pony tail, over which I stuck a chignon bun that I made out of false hair.  Well, now my hair is MUCH shorter and I've run into a bit of a cunnundrum.  What do I wear on my head when I don't have any hair?  So I turned to the internet in search of an alternative.  The ridunculously huge and complex wigs looked like fun, but this is a costume that I'd like to wear for long periods of time and a big wig would just be too heavy.  And also, I hate wigs.  So instead, let's look at hats. 

http://en.wikipedia.org/wiki/Ayam_(cap)  
The one that really caught my eye was the ayam, also known as an aegeom.  It's a traditional winter cap worn by Korean women during the Joseon period (1392-1910).  The ayam has curved lower edges, to allow it to fit snug to the head.  The crown is traditionally made of black silk, with a red flannel lining, or possibly lined in fur for added warmth.  Lighter versions can be worn in the spring and autumn.  The upper 4-5cm is finely quilted, and long ribbons, or deurim, hand down the back.  There is a silk tassel (often red) attached to at least the front, or center front and back.  Flat braids or strings of jewels or pearls link the front and back of the ayam.

Quality photos of ayam from the Joseon period were difficult to come by.  So here are a few of the for purchase ones I was able to find and use to help me make my own:

http://www.hanbok-boutique.com/ayam-korean-hat-hanbok-hat-m-a-001.html


http://www.hanbok-boutique.com/ayam-korean-hat-hanbok-hat-m-a-001.html


http://www.sonjjang-hanbok.com/

http://www.sonjjang-hanbok.com/

While modern options include a variety of colors and lavish floral embroidery, I wanted mine to be simple and elegant. This way, I could pair it with a brightly colored modern hanbok just as easily as one of an older, more subdued style. Plus, I wasn't about to drop $50 + international shipping on something I was fairly certain wasn't going to fit my fat head when it arrived.

I had a cardboard party hat from New Year's laying around, and the crown of it seemed to be about the right angle.  So I separated it from the brim, stuffed it on my head and had a friend draw in the proper curves and crown height with a marker.


We had to cut a few slits in it to make the bottom fit better, then add in the forehead curve, but below you can see the finished pattern piece. The pattern is 4" high at center front, 5.5" high at center back, and fits on a head with a 23" diameter.


I wrote the basic instructions and notes directly onto the single pattern piece, so that I'll have them when I need them.  Here they are in text form, for those who can't read my handwriting.

Cut 1 (or two, depending on stiffness) of stiff interfacing of piece AB.
Cut one of lining fabric with 1/2" excess on all sides.
Cut the pattern along the blue dotted line, dividing the pattern into pieces A and B.  Cut one of piece A of outer fabric with 1" excess on all sides.  Cut one of piece B of outer fabric with 1/2" excess on all sides.
Cut one each of interfacing of pieces A and B.

To assemble:
- I used 1/2" seams throughout, except where noted otherwise.
- lay Piece A of outer fabric on top of Piece A of interfacing.  Sew in bands of cording until you run out of interfacing to anchor it to.  Attach a row of contrast piping on the top and bottom, then fold the seam allowance on the piping to the back.
- lay Piece B of outer fabric on top of Piece B of Interfacing.  Attach a row of piping to lower edge and fold seam allowance to the back.
- Sew piece B of outer layer onto interfacing AB.  Sew piece A of outer layer on top of piece B.
- Fold outer layer of ayam in half, right sides together, and sew up the center back seam.  Turn right side out.
- Fold lining in half, right sides together, and sew up the center back seam with a 5/8" seam.
- Pin inside out lining to the wrong side of the outer layer and hand stitch the lining to secure it.
- Rejoice, as the really tedious part is behind you!

The rest, I think, is fairly self-explanatory.  Make or acquire tassels and decorative knotwork by whatever method works for you.  String some beads, pearls, semi-precious stones along the sides, connecting center front and center back.  You could use a wide ribbon to make a passable deurim, if you're so inclined.  I left out any decorative embroidery on the body of the hat, but may give that a go on any future attempts.

Ta da!


And it wasn't my intent when I started this project, but this will totally work for the current Historical Sew Fortnightly challenge.  Looking back over the project, I think the most wondrous innovation has got to be the faux pearls, as I am a huge fan of using them to dress up costume projects.  Big Bead, Little Bead has a wonderful article on the history of man-made pearls (among many others).  Mine are made of glass with a 'pearly' coating, a style of bead whose European manufacture was really picking up in the mid to late 1800s.

The Challenge:  HSF'14 #2
The Innovation:  glass faux pearls
Fabric: a synthetic black brocade that a friend brought back from Korea, red polyester something-or-other. Stiff collar interfacing for the foundation.
Pattern:  we made it up. 
Year:  late 19th c.
Notions:  polyester thread, silk cords and threads for the tassels, glass pearls, rayon cord for the knot, and cotton yarn for the couching.
How historically accurate is it?  Mmm, it's hard to judge.  The only pictures I could find from this time period were small paintings, reproduced in books.  If anyone out there comes across a link to a dated museum example, do share.  But until then, I'm just going to have to call this one a best guess.
Hours to complete:  maybe 8-ish.  Making the tassels and attaching them to the knot work took the most time.
First worn:  not yet
Total cost:  from stash, but even guessing, I'd say under $10.


References:
- http://en.wikipedia.org/wiki/Ayam_(cap)
- http://www.bigbeadlittlebead.com/guides_and_information/history_of_faux_pearls.php
- http://www.hanbok-boutique.com/
- http://www.sonjjang-hanbok.com/
- http://thetalkingcupboard.wordpress.com/2013/04/17/a-guide-to-joseon-hairstyles-and-headgears/
- Decorative Fusion Knots: A Step-by-Step Illustrated Guide to New and Unusual Ornamental Knots by J. D. Lenzen

Costume College, 2014

I just went through and made my reservations for Costume College.  Sooooo excited, as this will be my very first year going.  But oh my gods, what should I wear?  My Honey is coming along, too, but will only be joining me for the gala, so that's only one extra costume, there.  I've already laid claim to a design for the the 18th Century Court Ensembles:

Queen Maria Carolina of Naples-Two Sicilies, née Archduchess of Austria

Over the course of the next month, I'm going to be tackling the court panniers and the petticoat.  These conveniently fit under the next two HSF challenges: Pink and Under it All.  I had wanted to avoid doing white under bits, so I'm dyeing up the fabric for the panniers a lovely coral pink (pink enough to count, not so pink as to make me twitch).  I'll need to find myself an ivory fabric for the petticoat, though.  And I also got in the fabric for the dress itself.  I found a rayon faille on sale from Denver Fabrics that I'm going to dye up cardinal red.

I've also been tossing around some ideas with Honey about his costume.  By far, the most exciting option seems to be recreating the outfit worn by Sir John Acton, an Englishman employed by the queen to reform the the state's army (and whom the gossip mongers of the time assumed she was carrying on an affair).  I just love the black with the primary colors.  Not the fancy pants you're used to seeing in men's court-appropriate fashions.  Does anyone have an insight into what those sashes represent or if they're more complex than the sashes worn in beauty pagents?

Sir John Acton, 6th Baronet, c. 1811

The only drawback is that this painting dates over twenty years after the dress I'm doing from the 1770s.  But we'll see.  I'm still on the lookout for an earlier portrait of Sir John.  We'll see what I can come up with. While I think he'd look lovely in a pretty blue silk outfit, I don't think I could do the level of embroidery that I'd want in the time frame that we have.

A check of the Costume College Facebook page shows that the theme for the Friday Ice Cream Social is 'Club Ice'.  Hmm... maybe that Mr Freeze costume can get worn again, after all.  But do I really want to shave my head the day before having to wear a frankly ridunculous 18th century wig?  Perhaps that bag of wig tape will come in handy, after all.  The Thursday Pool Party and Sunday Tea still seem to be sans theme.  I suppose the court wear is going to prohibit me from doing anything too complex for them, anyhow.  But it'd be nice to be able to start plotting.

The discouraging of wearing costumes into the classrooms dissapoints me a bit, though.  While yes, I totally agree that large and elaborate costumes can be quite distracting, I'm sad to loose all those opportunities to wear the costumes that don't fit in a big social event.  Costume College veterans (alum?), how much of your day time is actually spent in classes and tours?  If there are actually large chunks of time spent loitering and socializing during the day, then yay!  More opportunities to wear the not-so-fancy stuffs.

Saturday, February 1, 2014

Project Summary: 1920s Poison Ivy

The first costume I want to talk about from our group of Batman villains is Poison Ivy.  This was by far my favorite character of all that I worked on.  I love this color and I love this character.  Poison Ivy is a villain who wields her sexuality as a weapon.  It was a super easy choice to assign that character to my bff, V, as it is my personal goal in this life to find her costumes that show off her super long legs.

The theme for our group was 1920s reinterpretations of the characters as they were presented in the Batman movies that came out while I was growing up.  Poison Ivy was featured in Batman and Robin (1997) and was played by Uma Thurman.  

Even though her cape here appears to be a burnout velvet, I really loved the light, fluttery hem of it.
It was this hemline that helped me chose how I wanted to realize this costume.


I loved how this character was done up in such a way as to take advantage of the long, lean lines.  She wasn't super busty or showing a lot of skin.  To capture her look, I went with a long, dropped waist dress with a handkerchief hem, which reminded me of the hemline on her cloak.  I started with the following pattern:

Folkwear #264: the Monte Carlo Dress

 For period inspiration, I found this little vintage number for sale on Etsy.

I used a silk chiffon, and flat lined the bodice with silk habotai, both of which were dyed emerald green.  The only adjustment to the pattern was to change the way the straps were put together.  The bodice is covered in tiny little o-shaped arrangements of gold seed beads and the neckline was outlined in alternating seed and bugle beads.  There is also one narrow sash of beading and embroidery that hangs down from the right hip.  I dyed up a scrap of silk velvet in a darker green, and used it to make ivy leaf appliques with couched gold silk beading thread for veins.  These were placed on the left shoulder and right hip.  The idea was to be balanced, without being symmetrical.  Litlle dangly bits of beading hang from the appliques on the shoulder.  


I also cut out an 8x80" strip of chiffon with angled ends for a scarf.  I didn't want to try to pair a lot of jewelry with this dress, as I thought the beading was rather taking care of the bling factor for us.  But her neck just looked too naked without something there.

For the hand bag, I just sketched out a rectangle on a piece of habotai that I dyed gold, then machine basted it to a piece of interfacing and stuck it in an embroidery hoop.  The pattern I just made up after looking at too many art deco designs.  I sketched on four horizontal lines and had V start beading them.  The rest just sort of developed as we went along.


The gloves were white nylon gloves bought from the party shop.  Everything on the internet said that nylon dyes up just like silk, and they were right!  We set V up in a pair of latex gloves to protect her skin, then put the nylon gloves over them and started painting.  The idea was to replicate the purple and red fingers on the characters leather gloves in the movie.


The shoes were simple enough.  A pre-owned and well worn pair of strappy heels were given a new life with a coat of gold leaf.  Simple, yet elegant.  Her hair pin was salvaged from this retro iron work peacock thing that my mom has hanging on her wall.  The thing had this blingy rhinestone bit stuck to the top of it's head, and she hated how out of place it looked.  It had obviously fallen off and been hot glue back on (poorly), so I spent a fair bit of time picking glue out of the settings before soaking it in vinegar and baking soda, then giving all of the metal parts a touch up with gold leaf, as well.


Woo, look at that hemline.  I think that's my single favorite part of this dress.
Eight sided skirt, with round about 8 yards of hem, all hand stitched rolled hem.

On stage, with the Joker.