Sunday, August 24, 2014

Project Summary: 1920s Batman Villains

Back in January of this year, I got to play my first ever 'group card'.  Amongst my clan of costuming buddies, we have this system where we all have these metaphorical cards.  Everybody gets one.  And one day, when you have this epic costume group idea that just HAS to happen, you get to play your group card and these friends will join you in making it happen.  It doesn't matter if it's not everybody's 'thing'.  It just has to be a good enough idea to warrant investing your time, money and creative energies into the project in order to make the one person's vision a reality.  I played my group card for the 1920s Batman Villains.

It was at a Dragon*Con a few years back that I started noticing people putting some interesting twists on their cosplays.  Costumers were taking recognizeable characters and re-doing them from an historical or other dimension.  The Super Girl bustle dress, Dark Knight suit of armor and Elizabethan Justice League were all inspiring reboots of popular characters and I wanted in on this.  I thought this was the perfect solution to celebrating some of my favorite characters and concepts when a straight up cosplay of the characters wouldn't do it for me.  I love super heros, but I don't really have the super hero body and would sooner shave my head than wear spandex in public.  Enter the historical re-interpretation.  I could take the recognizeable symbols and color schemes of my favorite characters and making them up in a way that I was comfortable with both making and wearing.

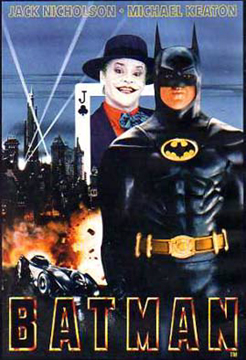
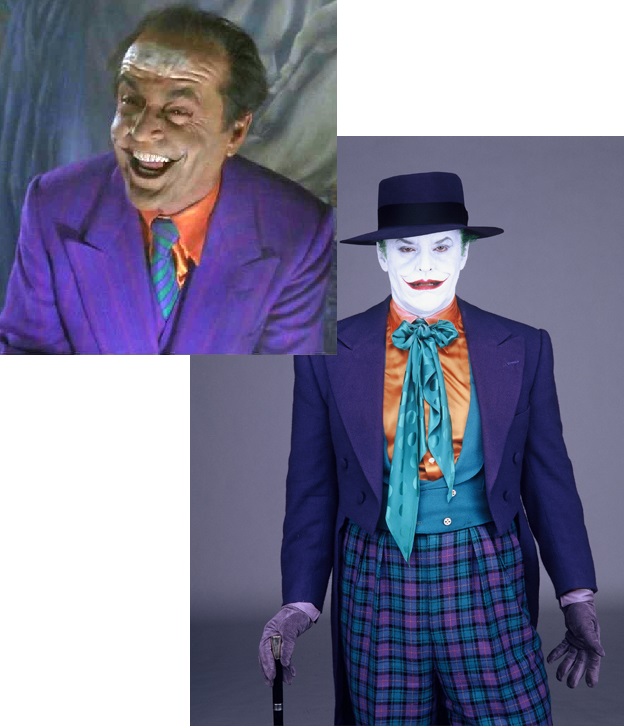
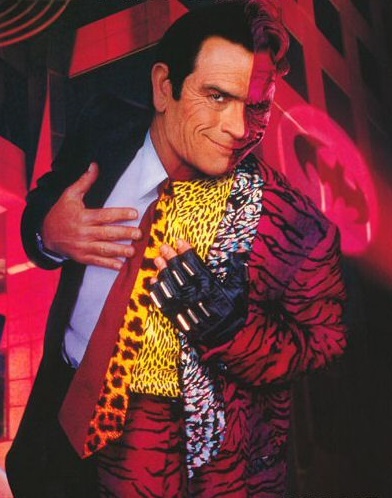
Now, I'll share a (not so) secret with you.  I am a teensy bit of a Batman fan.  And not just any Batman, mind you.  I broke my geeky teeth on Micheal Keaton and the series of movies that came out in 1989, 92, 95 and 97.

*sigh*
Just like you never forget your first Doctor, I will never forget my first Batman and the dirty gothic world that he was presented in.  And I LOVED his villains.  There was nothing understated about them; not like Bruce Wayne and his dark, slick bat suit and equally polished rich boy wardrobe.  Where Batman was all black and white, his villains were in COLOR.  They had over-the-top, bright colors with insane visual representations of their own inner mental workings and I was hooked.  

I don't remember exactly how it happened, but at some point I made the connection between the film noir look of the Gotham City of this Batman and the 1920s in general and it was all over for me.  I started to see the 20s style everywhere and my brain was consumed with the notion that this just had to be realized.  Cue the group card.  The basic instructions going into this were simple: take a the character and try to imagine how they would be represented in the 1920s.  We made ourselves a closed Facebook group to facilitate the brainstorming and away we went.  We picked elements of the villains' personalities and tried to relate them to a fashion of the time.  For example, Poison Ivy was all about using her sexuality as a weapon, so she gets a drapey, sexy party dress.  We didn't even try to match each other in style or materials, like we would with some of our other cosplay groups, but we all had that unifying theme of the 1920s fashions and that made it work for us.

Coming up with a presentation that both told a story and gave us all our moment of glory on stage wasn't too difficult in the end.  I picked a fun piece of jazz music from the era and the hive mind lead us to tell the story of Mr Freeze throwing a bit of a party to celebrate having caught Batman.  Characters were largely paired up based upon which movies they showed up together in.  Catwoman teased a socially hopeless Penguin.  The Joker was a loner, but he flirted a bit with Poison Ivy before she turned her attention back to their host.  And then the party gets crashed by Two Face and the Riddler.  Batman had escaped and all inclinations point to it being Two Face having facilitated that, simply to spite Freeze.  Short, sweet and to the point.  You can see a video of our presentation on this blog post.

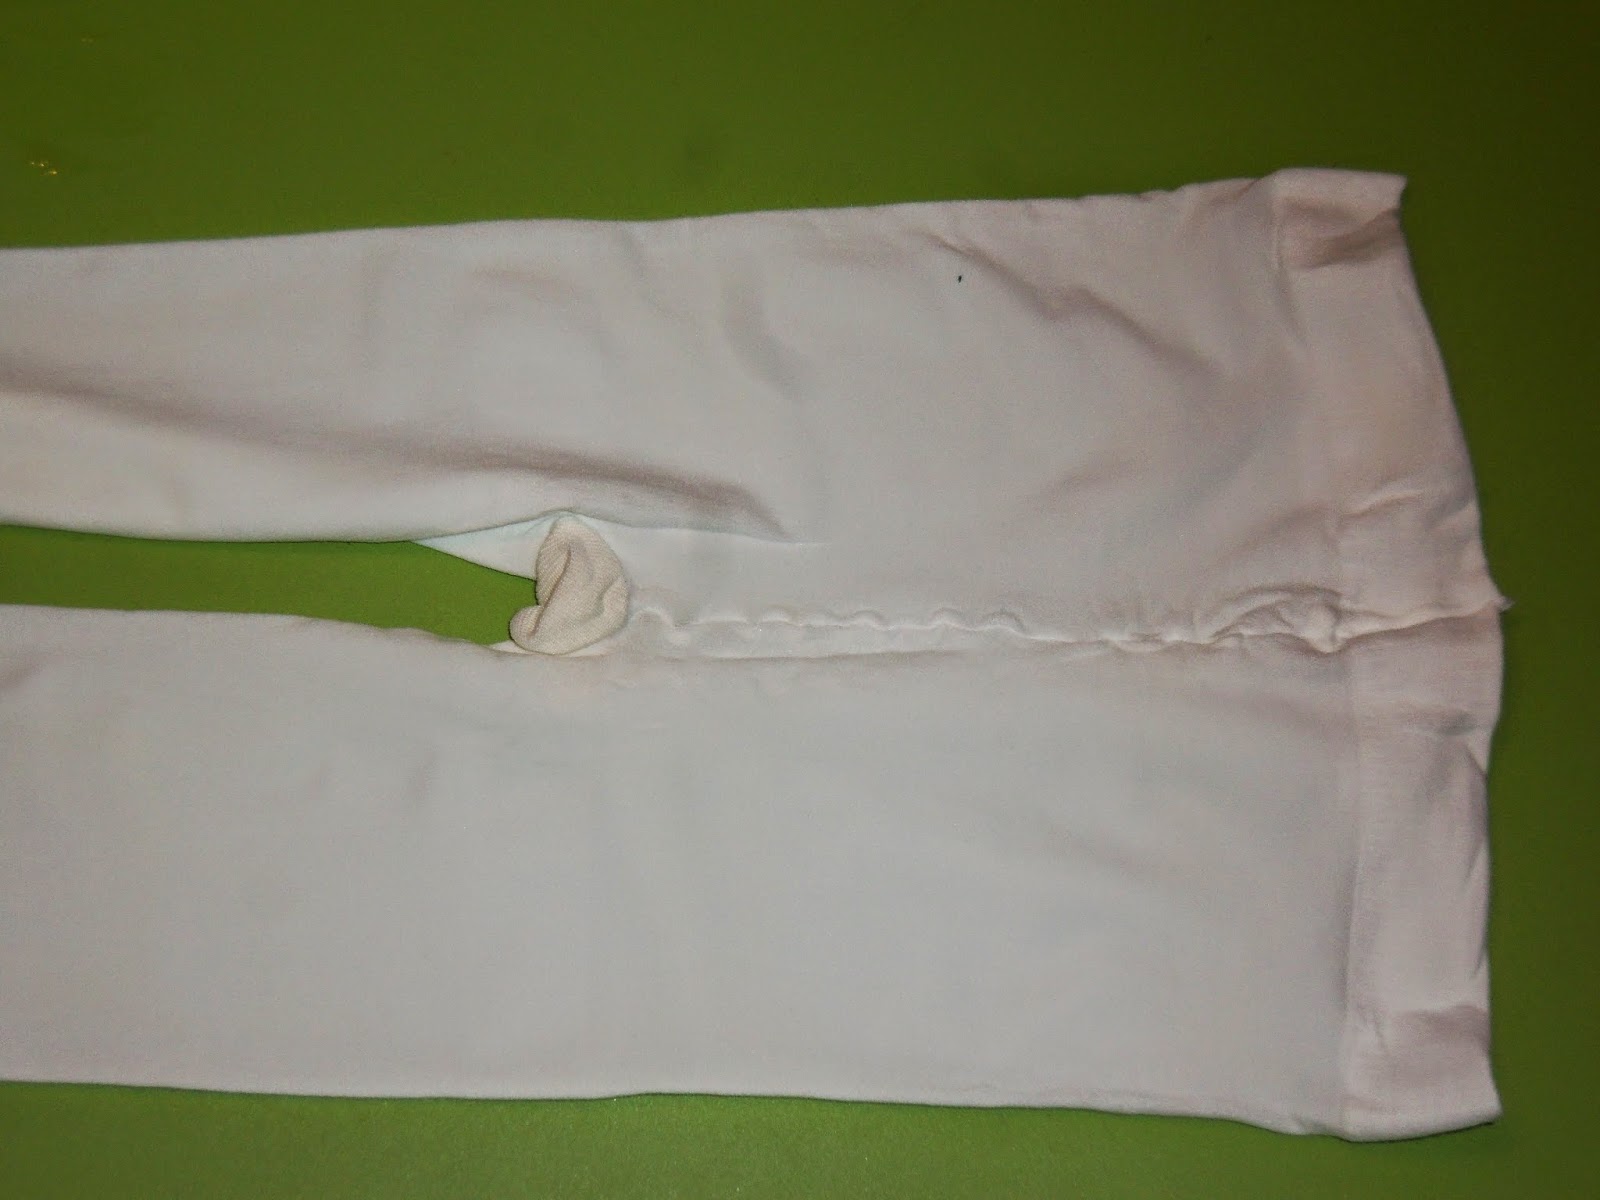
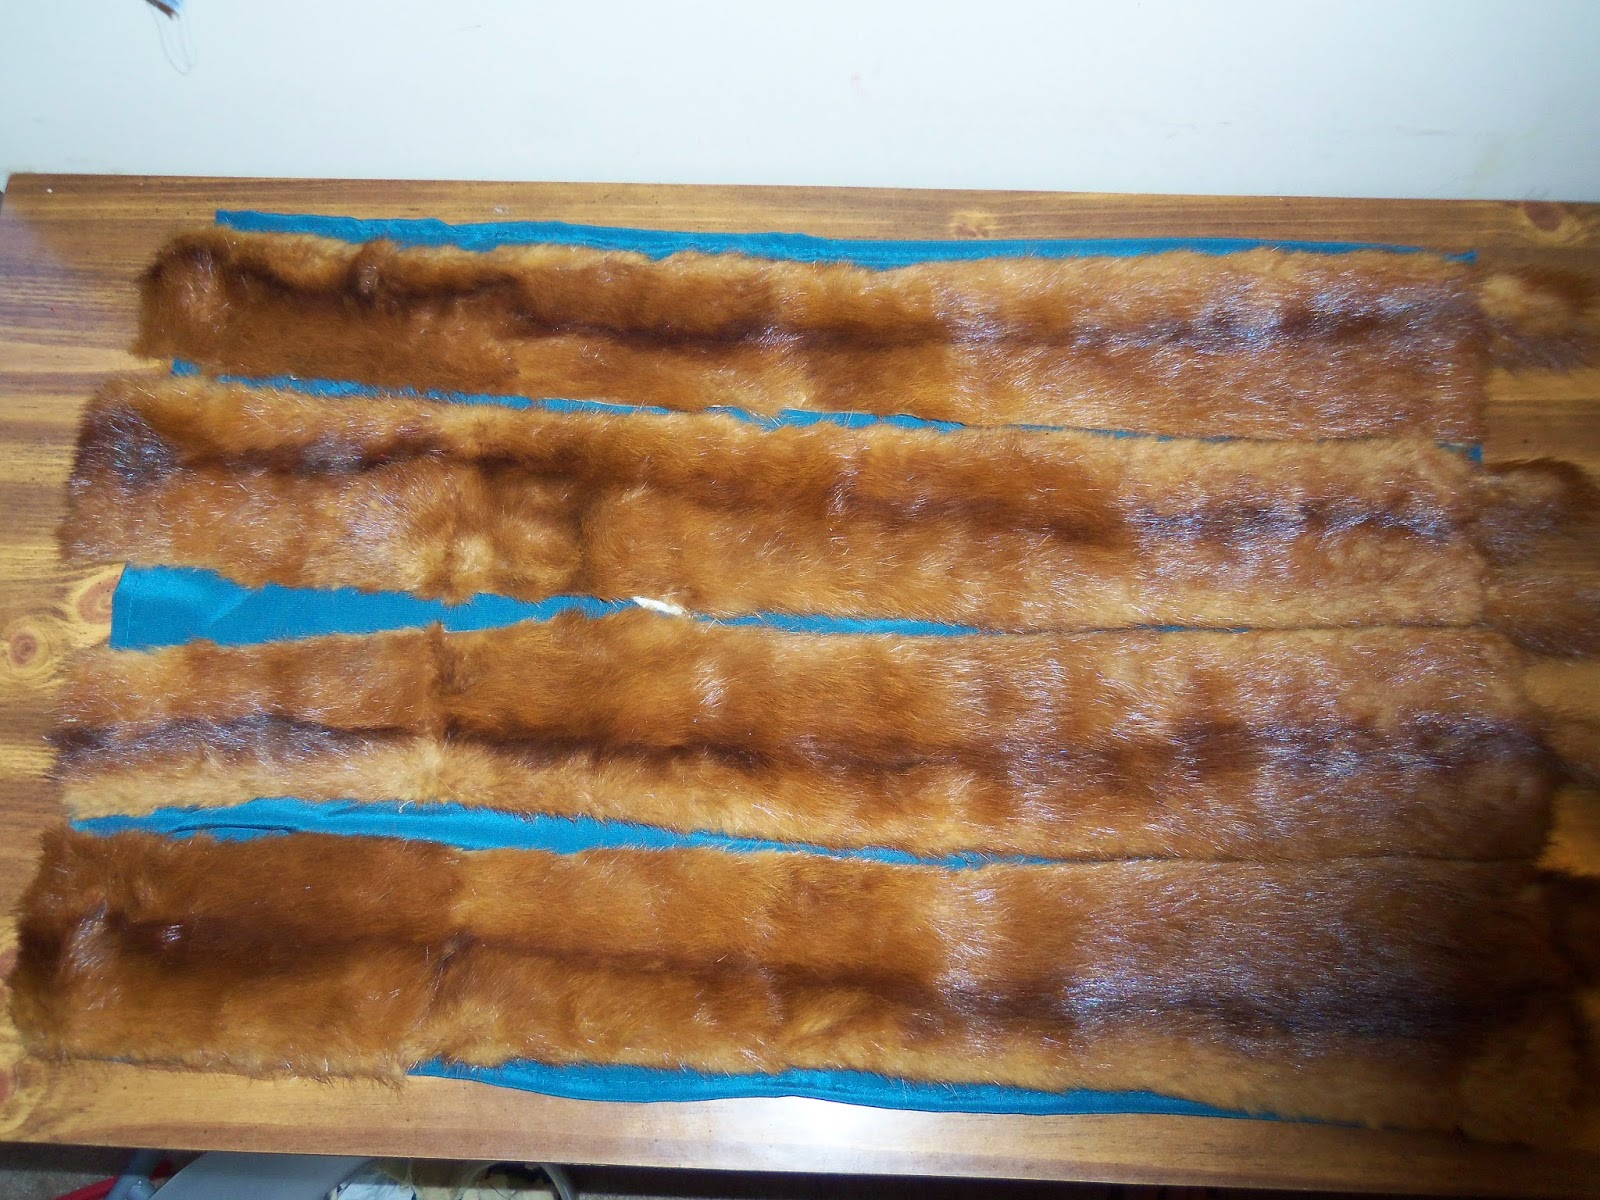
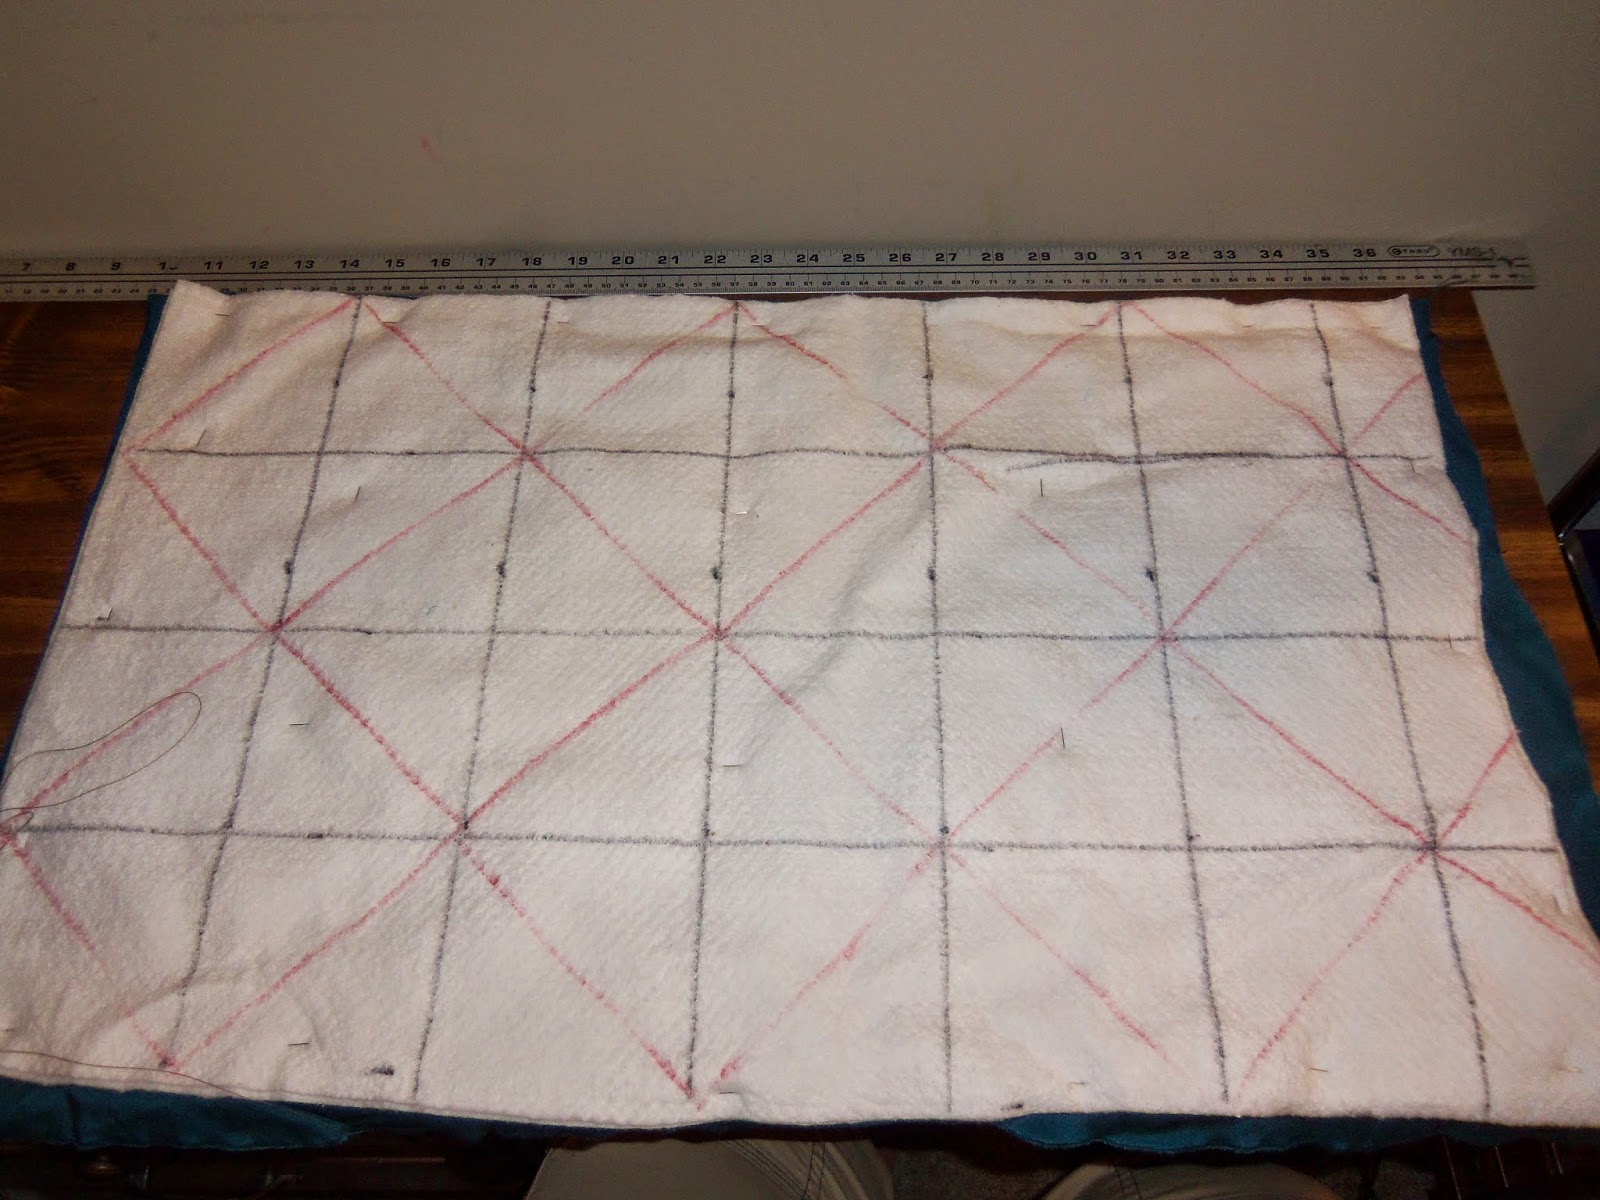
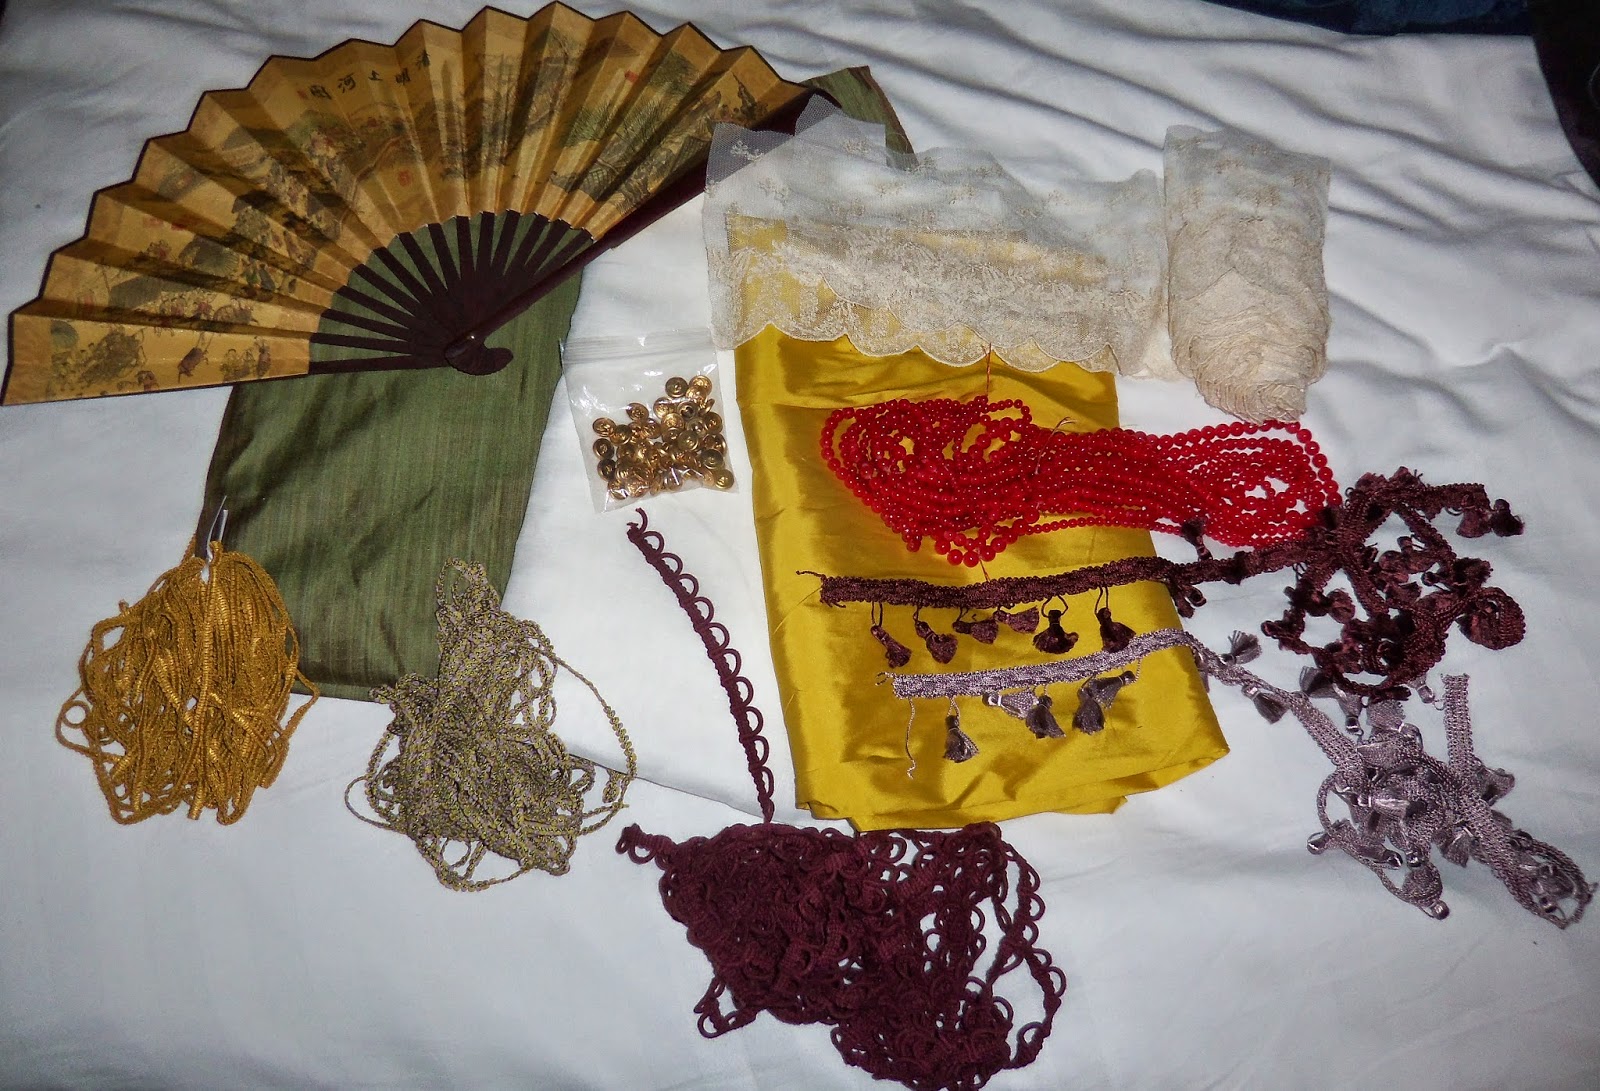
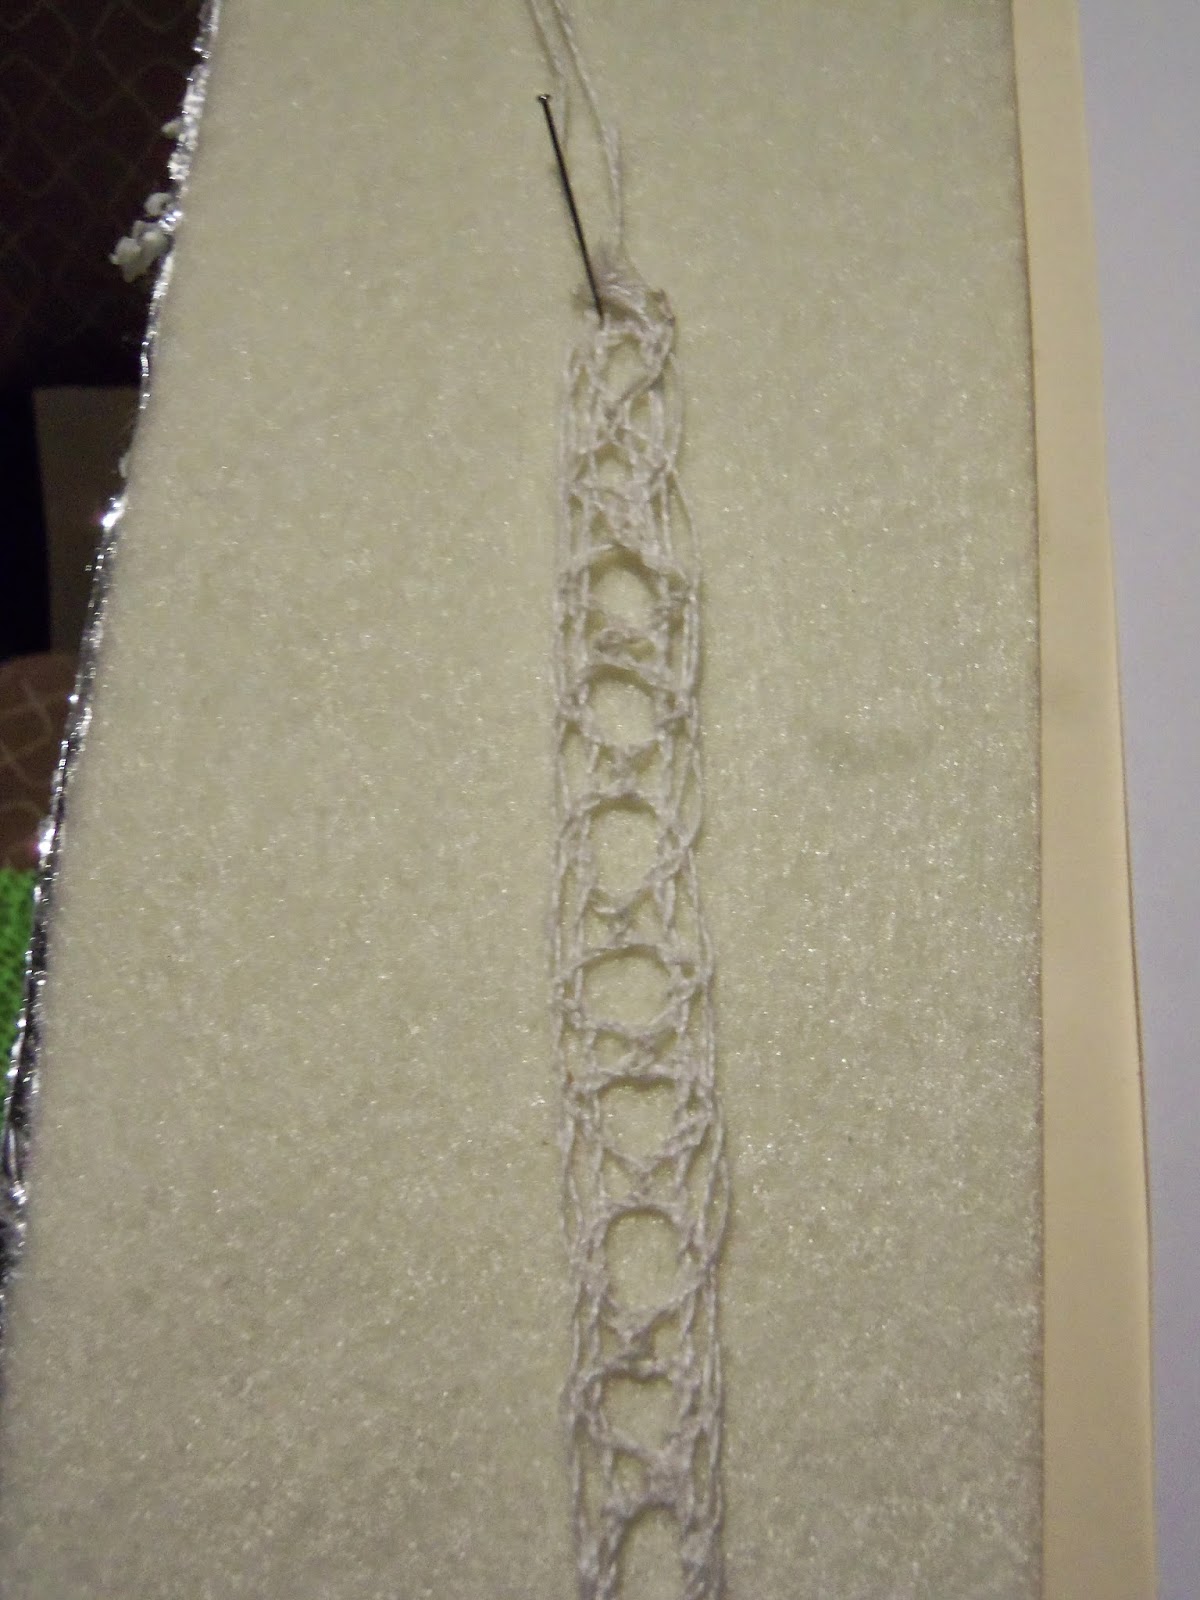
The last challenge was coming up with documentation for our group.  Documentation in the context of a masquerade entry serves the purpose of summarizing what you did for the workmanship judge.  This judge gets only a few minutes to look over everyone's costumes and you want to leave them with something that makes you stand out after the fact.  The problem for us was that we did so MUCH!  We did our research. and there were dozens of different techniques.  Patterns were drafted, hats were made, fabric was dyed and things were beaded.  There was so much for our group to tell, but one of the most important parts of documentation is keeping it succinct and to the point.  To keep it simple and unified, I assembled all of the documentation.  It included a couple of reference photos of not only the original character, but the 1920s look that the costumer was embodying.  There were a few sentences about what parts of the villain's personality we were trying to showcase and then a few more detailing the techniques which were used in making them.

Here's what we came up with:


a 1920s reimagining of the villains of:
Batman (1989)
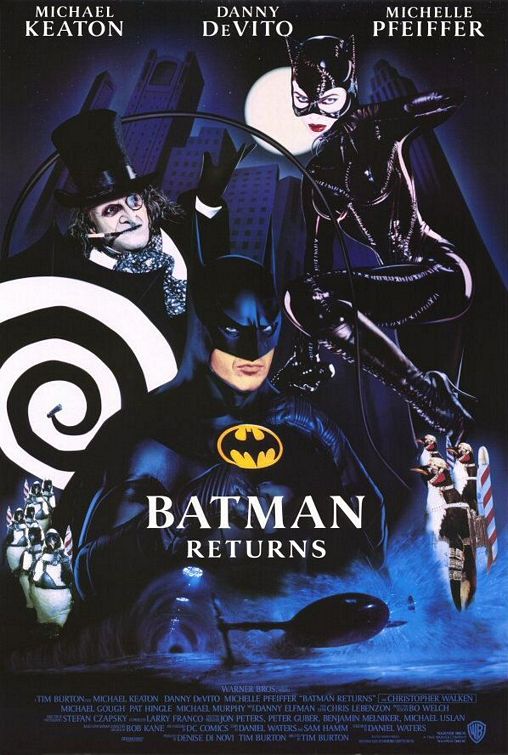
Batman Returns (1992)
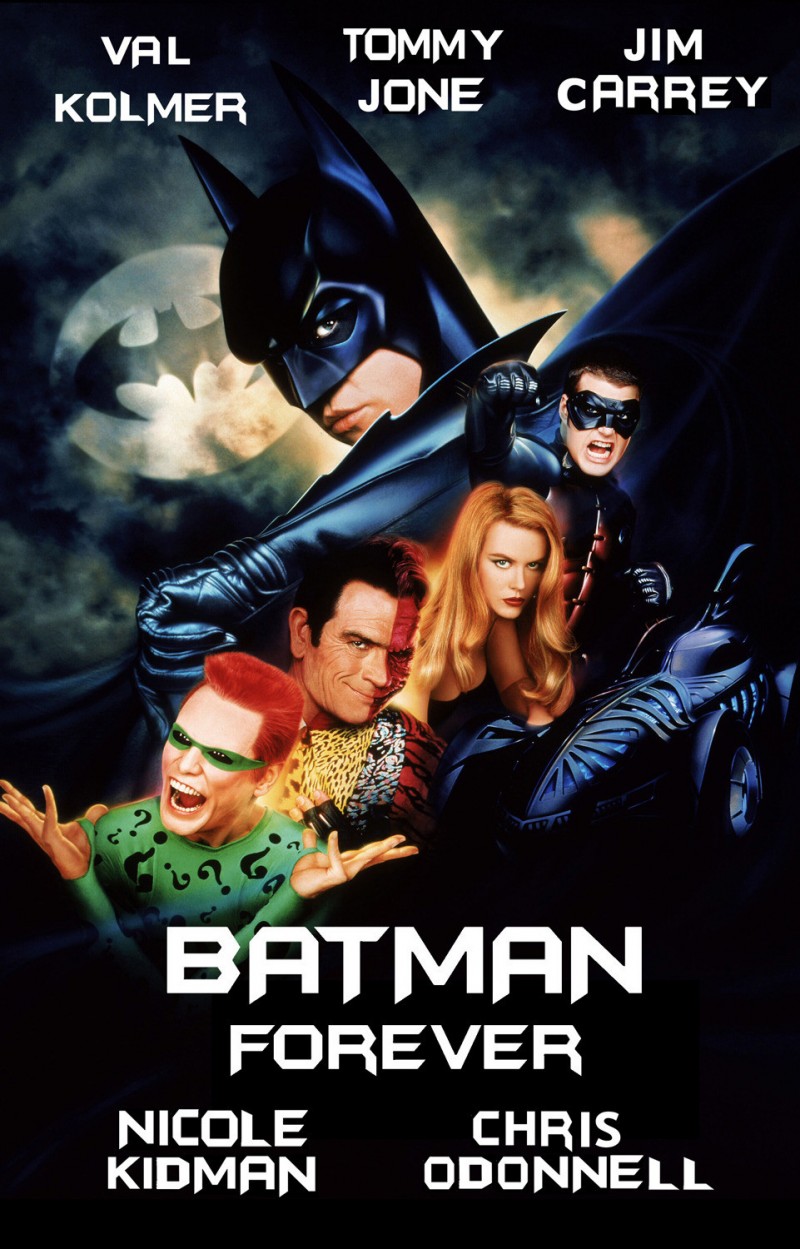
Batman Forever (1995)
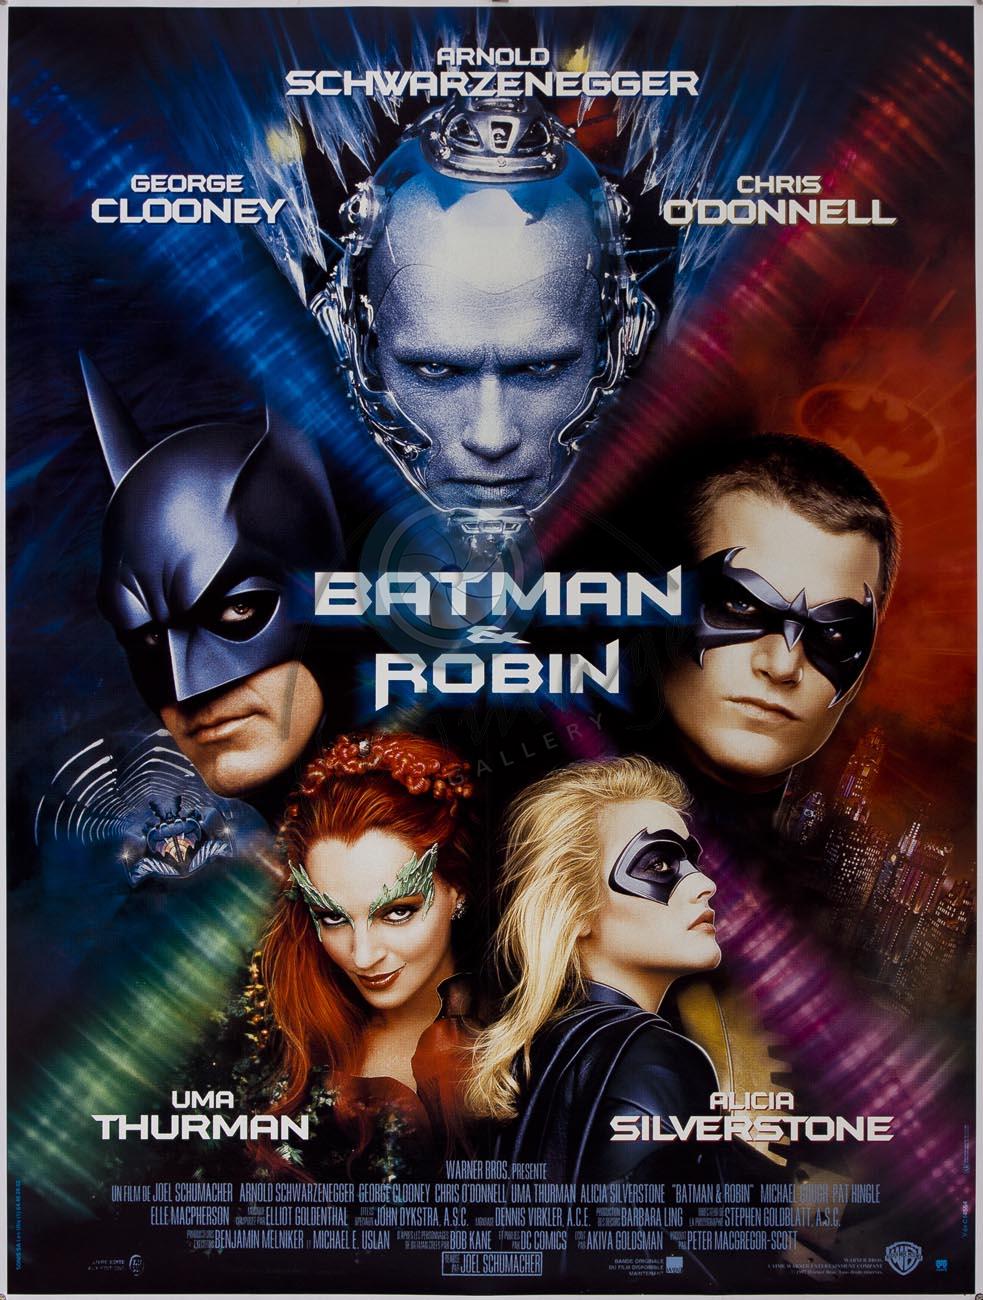
Batman & Robin (1997)


A Master Class entry for Arisia 2014

contact information: Jennifer [last name]  -  [EMAIL]  -  [CELL PHONE]

Your Cast of Villains:
Leo [last name] as The Joker
Bethany [last name] as Catwoman
Aurora [last name] as The Penguin
Megan [last name] as Two Face
Milo [last name]as The Riddler
Jennifer [last name] as Mr Freeze
Valorie [last name] as Poison Ivy

with special guest
Kristen [last name] as Harley Quinn
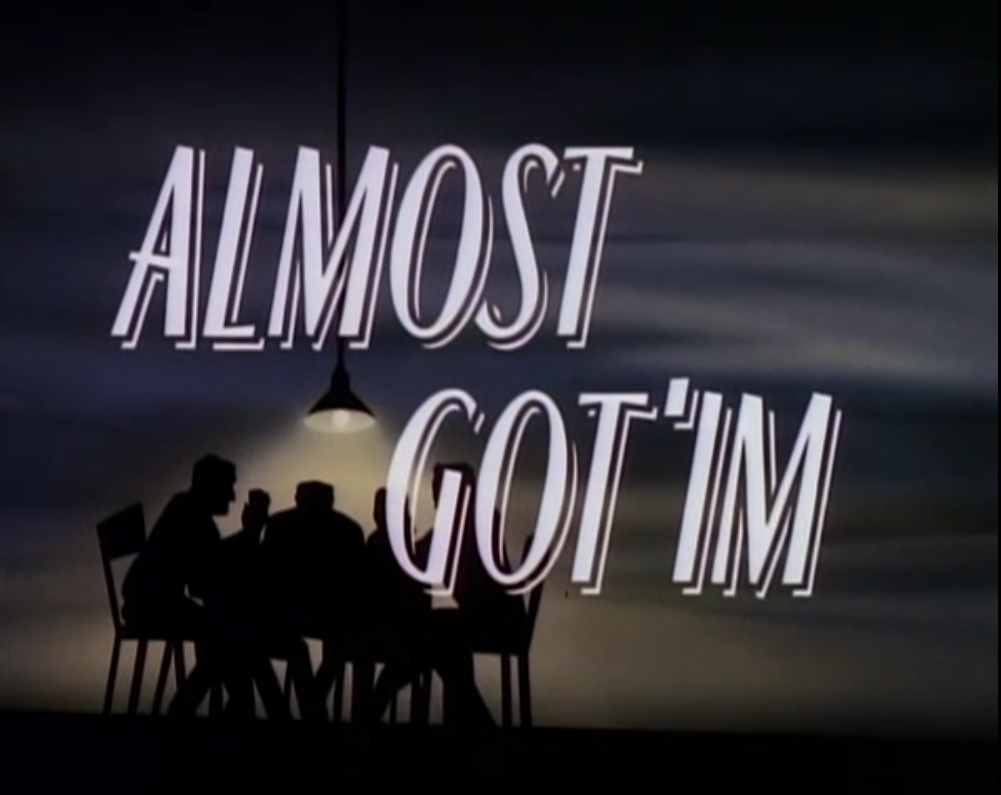


"Almost Got 'Im"
The title of, and inspiration for our entry comes from the forty-sixth episode of the Warner Bros. television program Batman: The Animated Series, which first aired on November 11, 1992.  This episode features five of Batman’s classic villains telling the stories of their "best" attempts at killing the Dark Knight.  Our presentation represents a hypothetical continuation of this story; the night that Mr Freeze “almost” got Batman.


The Joker


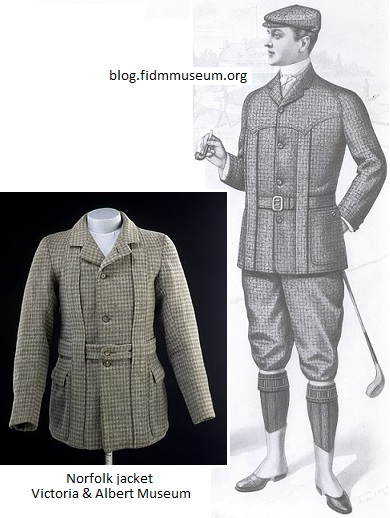
We pulled the Joker’s color scheme from the movie and applied it to an outfit built around a Norfolk jacket.  This iconic image of gentlemanly leisure was seeing a renewed popularity in the 1920s, especially amongst men living in the city - perhaps as a demonstration of their relaxed approach to fashion when compared to their properly suited predecessors.  I picture the Joker as being the kind of guy to thumb his nose at the expectations of a ‘proper’ gentleman.  The Joker’s costume is composed of a tailored wool blend Norfolk jacket that is fully lined with plaid cotton gauze, paired with matching trousers.  The cravat was patterned from scratch and constructed of hand dyed habotai silk, embellished with embroidery details.  The purchased shirt modified to attach playing card cufflinks and the appropriate silhouette is achieved by wearing a binder.


Catwoman

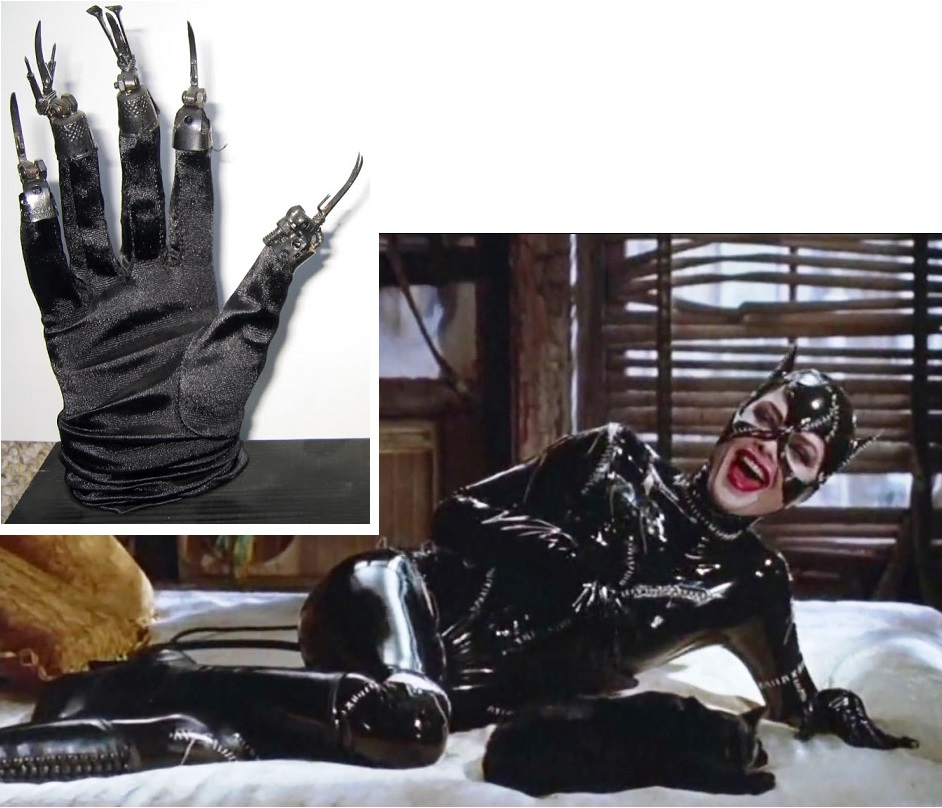
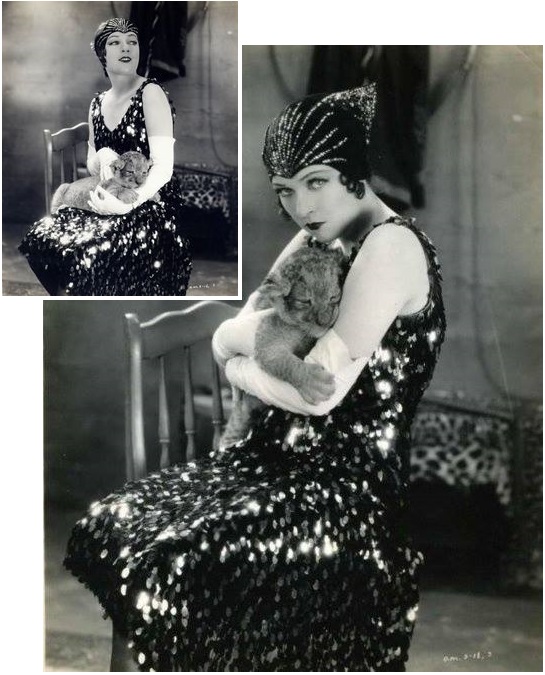
Selina Kyle, is an animal rights philanthropist by day who funds her charity work through high-stakes diamond heists by night under the alter ego of Catwoman. Bethany chose to recreate a dress worn by Jacquelyn Logan in the 1928 movie "Leopard Lady" as it seemed appropriately tongue-in-cheek.  Catwoman’s dress is made from black paillettes.  Her vintage gloves were embellished with claw-like nails.  The hat is a velour-covered frame made of wire and felt, embellished with rhinestones.  The whip and shoes were purchased and embellished with rhinestones.  The appropriate silhouette is achieved through vintage girdle.


The Penguin

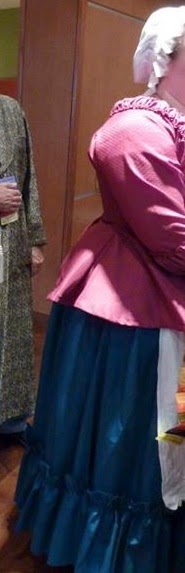
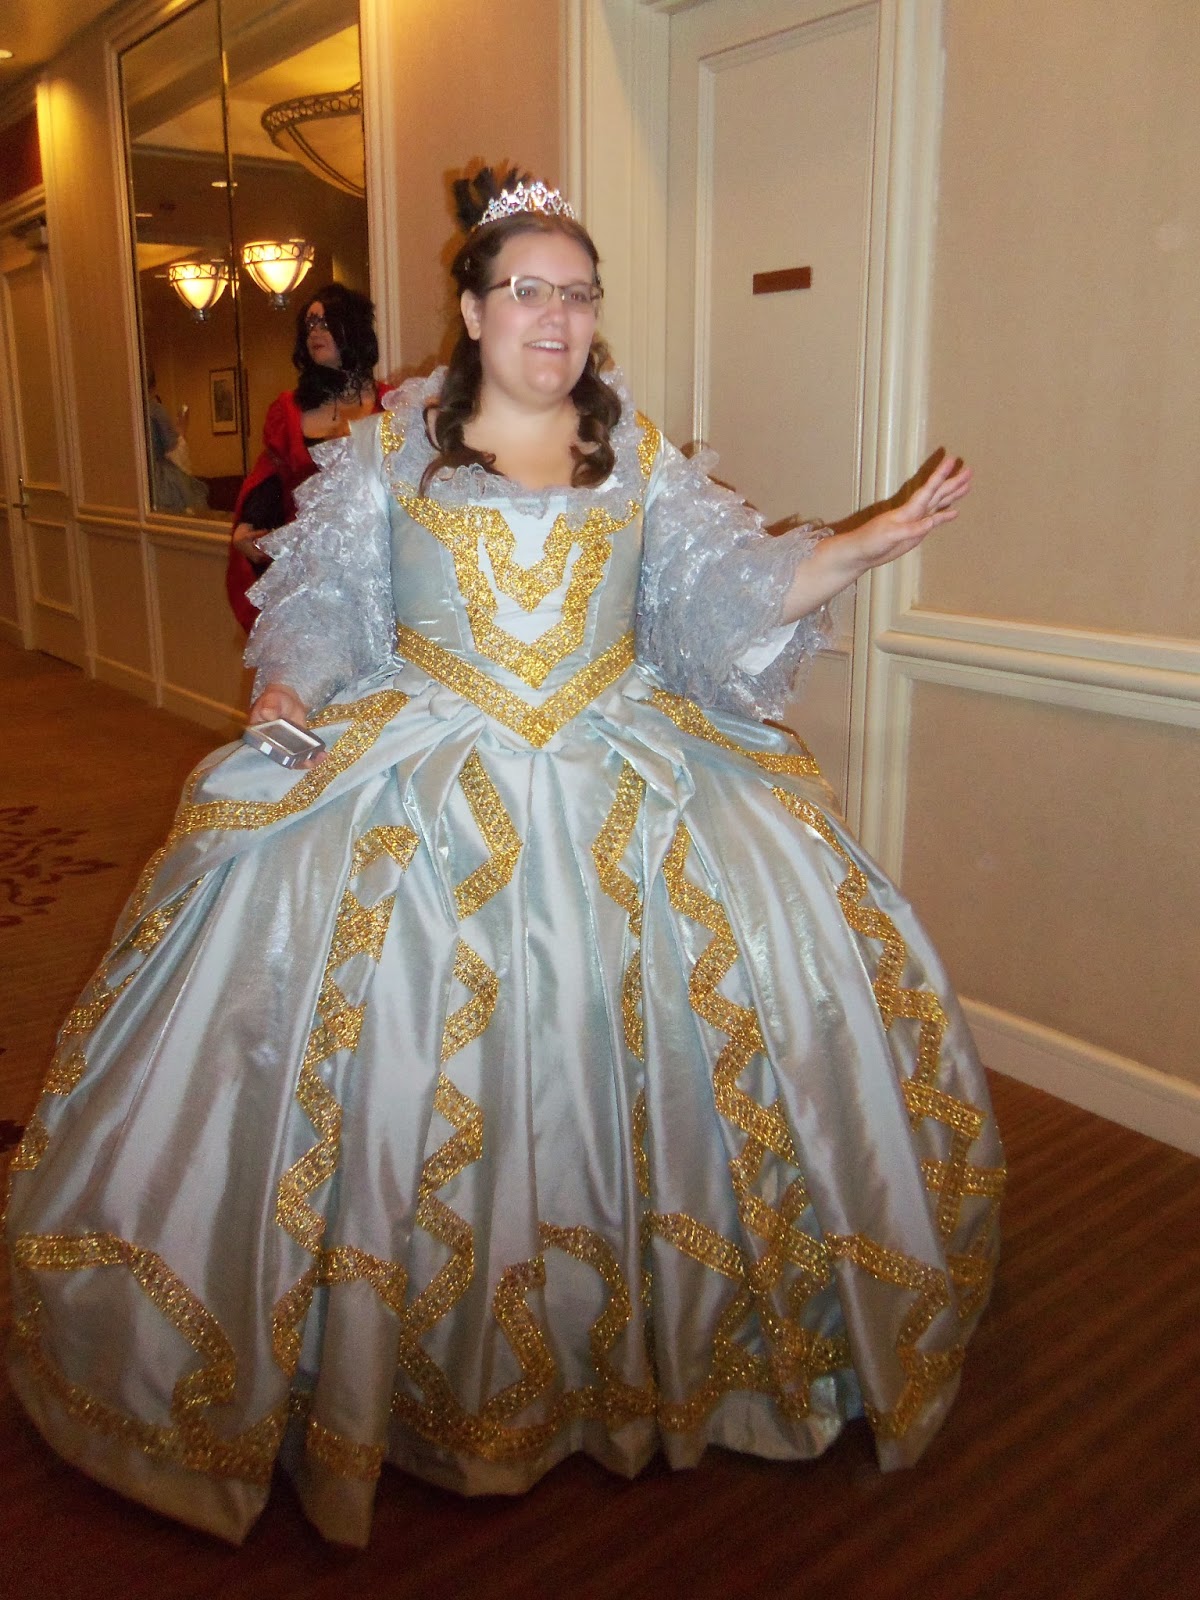
The Penguin is a little older and past his time. Aurora focused on creating garments from the late 1910's or early 1920's rather than ones on the cutting edge of fashion, and focused on authentic construction methods. She had to balance fit between wanting to make well-constructed garments fit perfectly and the fact that the character was probably wearing cast off garments that wouldn't fit him well at all. Colors were chosen to fit the black-and-white color palate established in the movie.

Body shaping was accomplished through the use of a binder, Spanx, compression shirt, compression boxers and a length of cloth used for stomach padding.  The dress shirt was made and tailoring techniques were used to make the pants, vest and jacket.  Leather working skills were use to make the suspenders.  The costume includes facial prosthetics and the construction of a unique wig.  The spats, cravat, monocle, boutonniere and flipper gloves were made for this costume.


www.morningdressguide.com
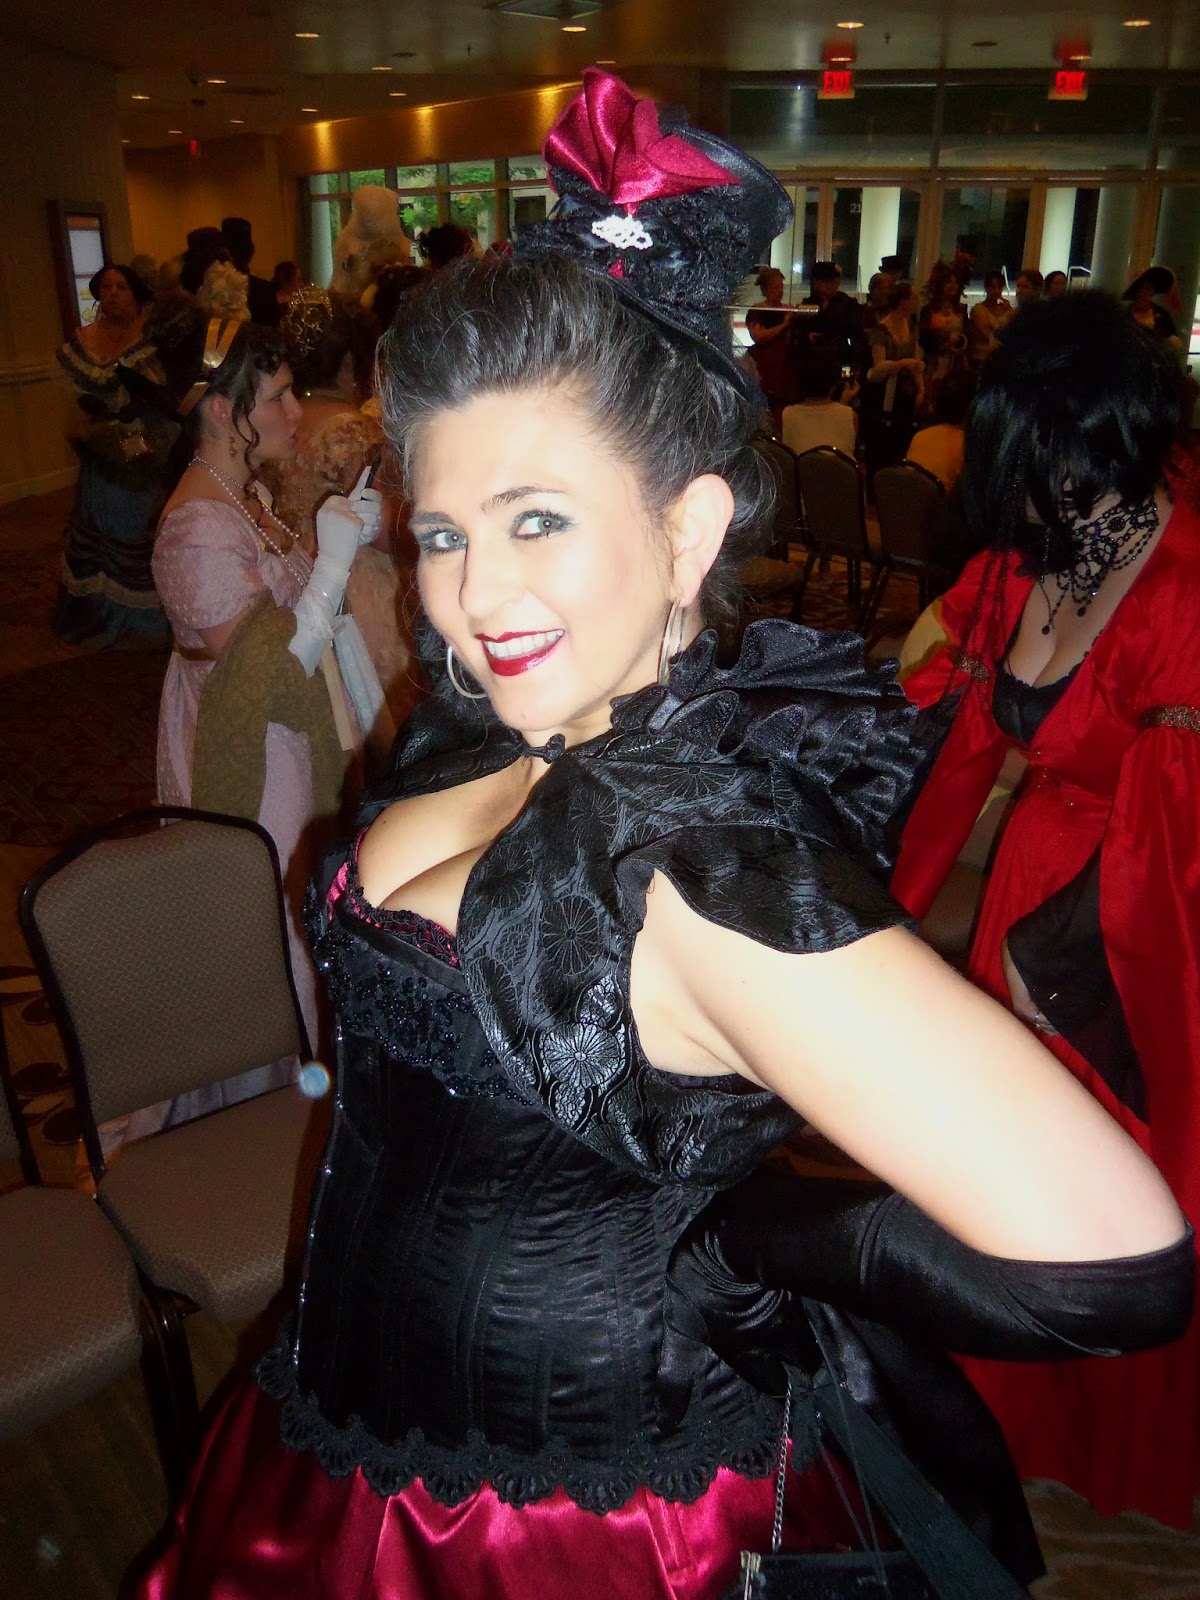
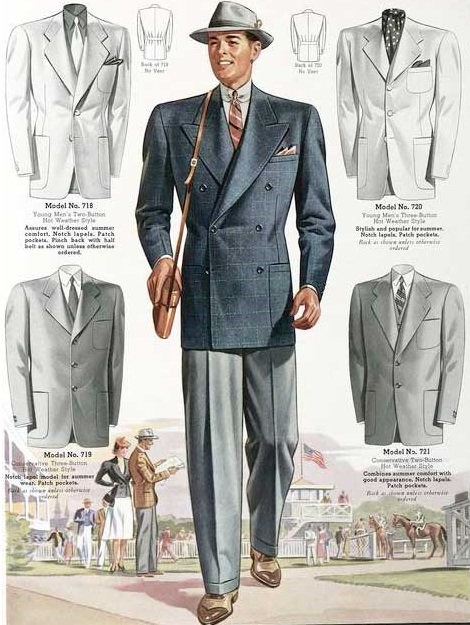
Two Face


For Two Face, we went with a classic gangster style.  Megan made his suit and trousers utilizing zebra stripe cotton fabric, the majority of which was overdyed fuschia.  The tie was patterned and constructed from scratch.  One half of his purchased dress shirt was dyed using fiber reactive dyes.  His spats were modified for fit and decorated with acrylic paint.  One sock was painted.  His hat was modified to add color and contrasting hat bands.  Two face is carrying a coin with a scratched face and wears a single fingerless glove.
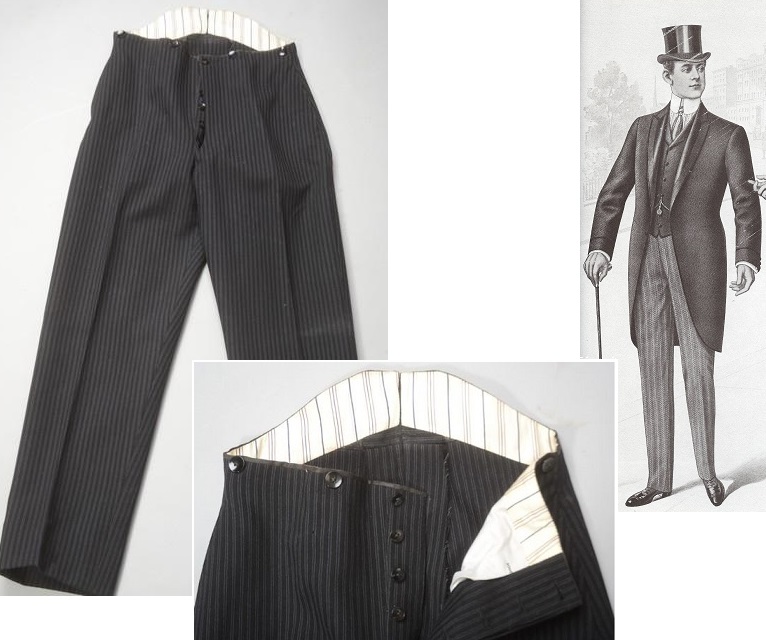
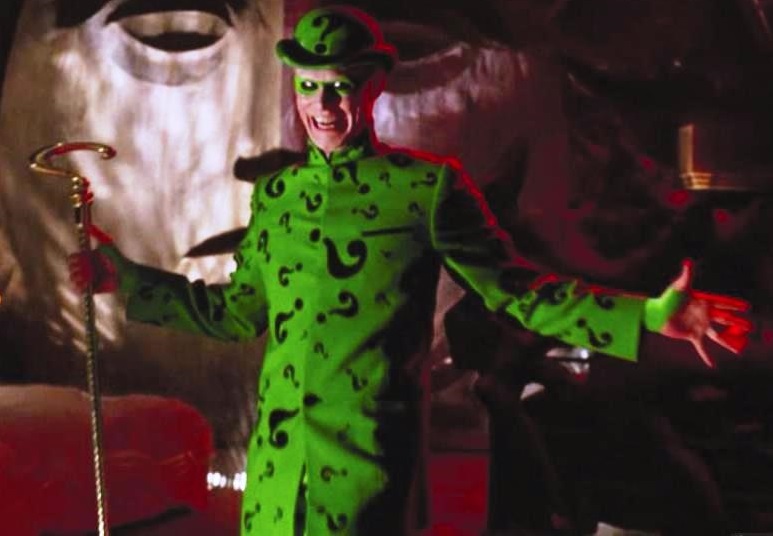
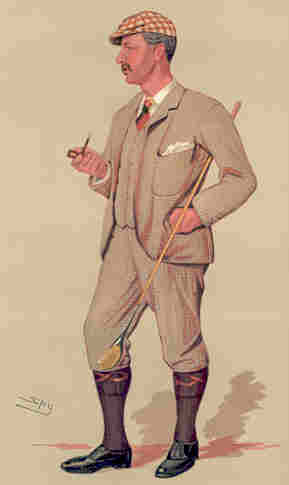
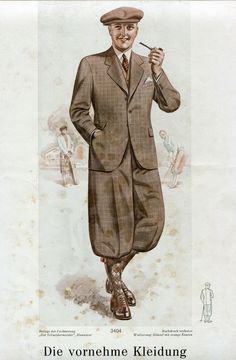


The Riddler


Milo took a casual approach to the interpreting the riddler.  His outfit is composed of a matching vest and plus fours made from fabric salvaged from a discarded theater suit and trousers.  His tie is hand painted and the bowler hat has question mark detailing added.  The shoes and socks are worn as purchased.


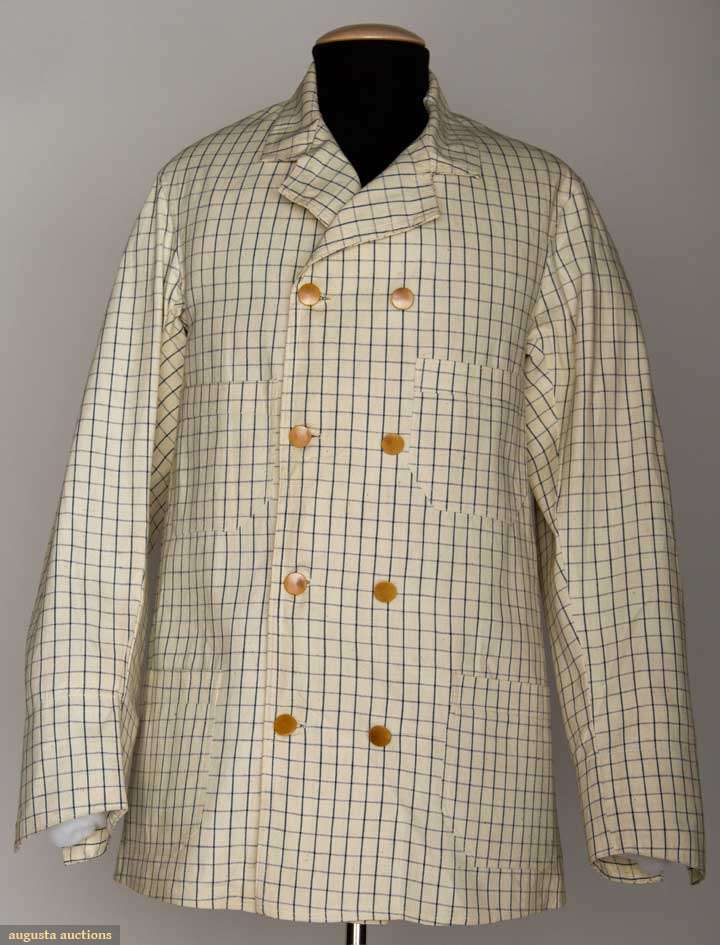
MAN'S SUMMER JACKET, White woven w/ blue tattersall pattern, double breasted
AMERICA, 1920s   www.augusta-auction.com
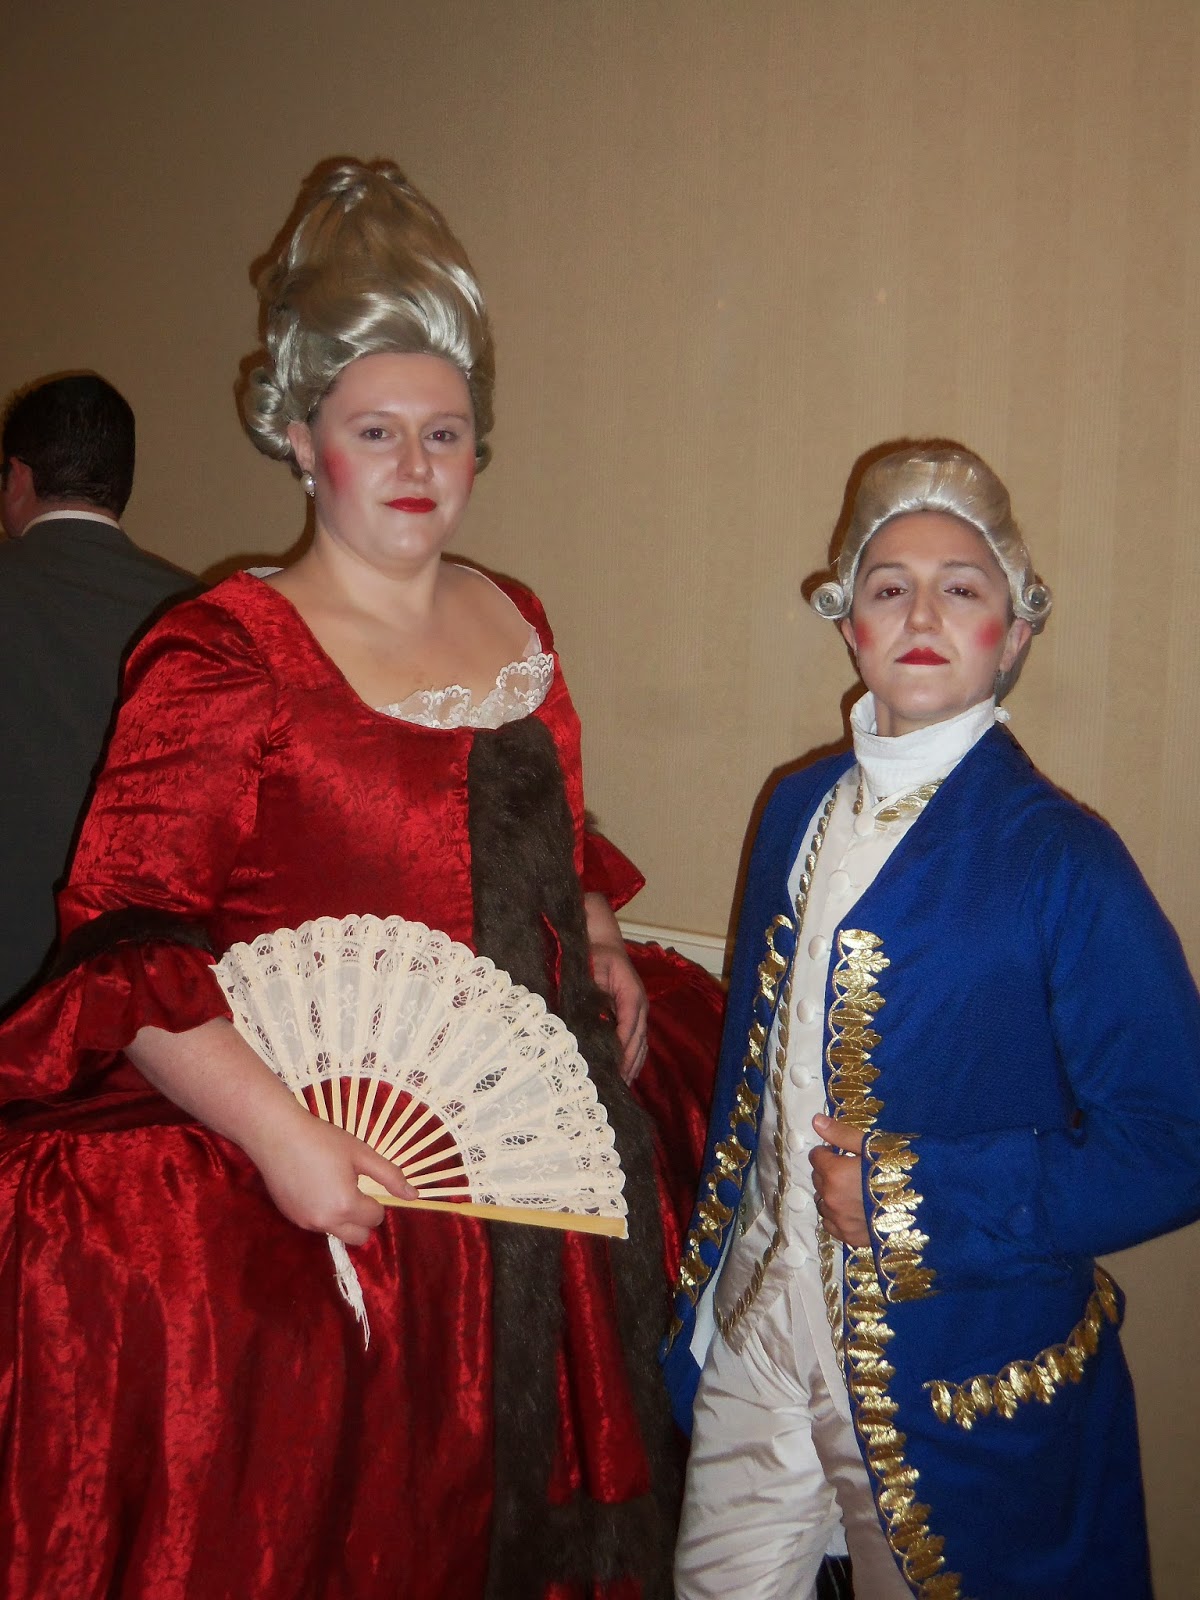
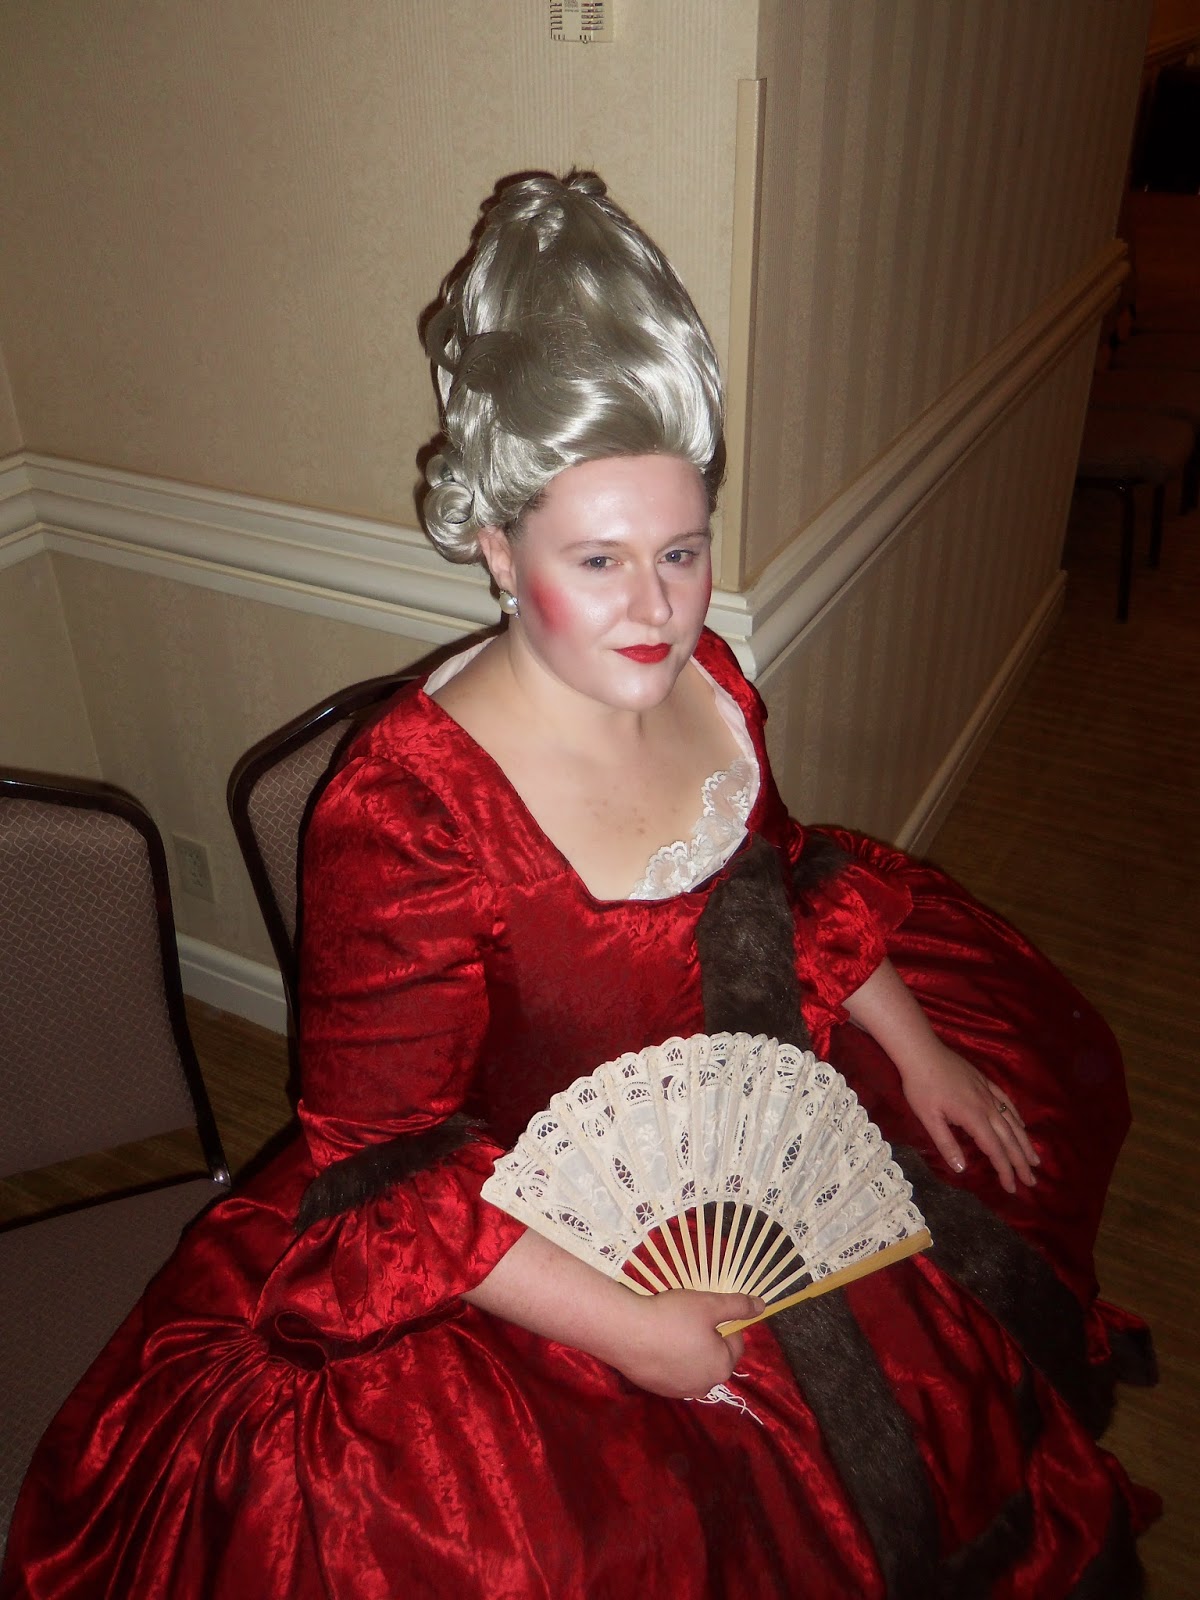
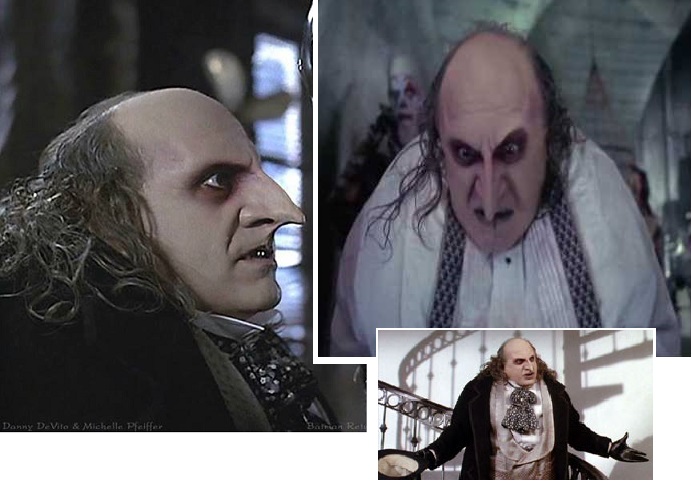
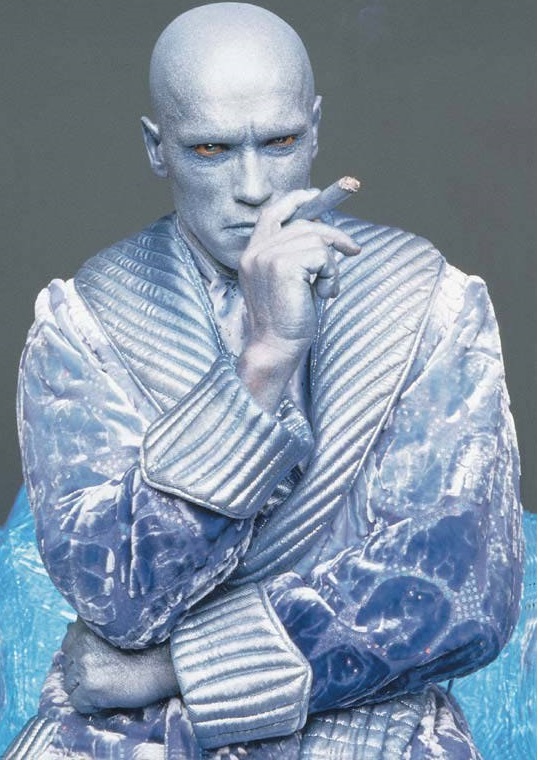
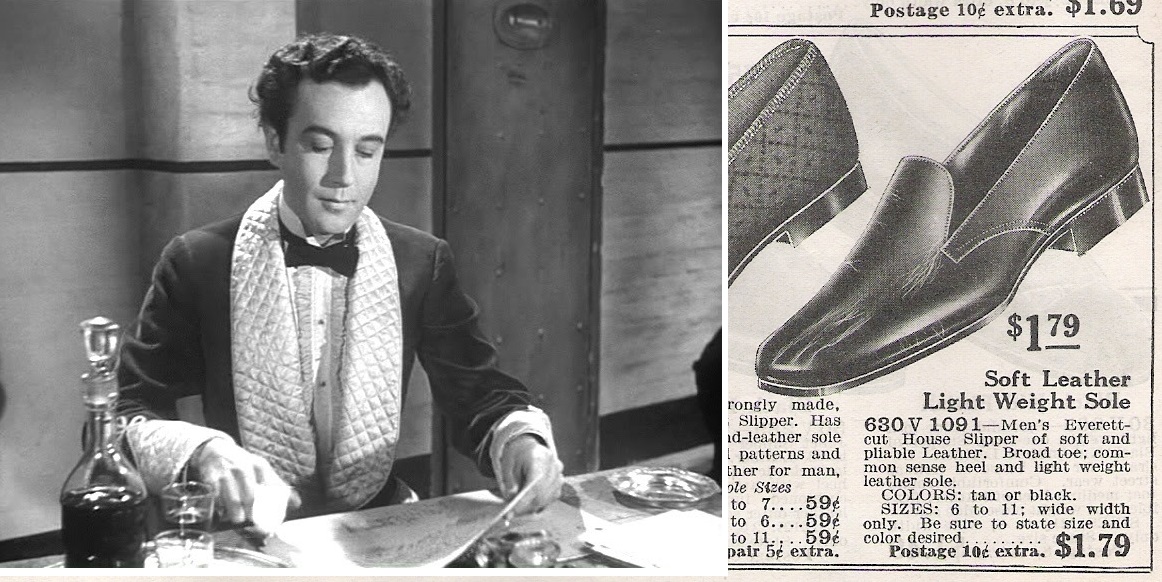
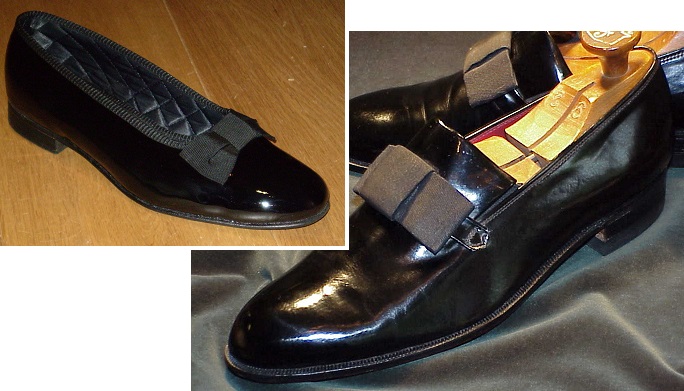
Mr Freeze


Mr. Freeze’s dressing gown was adapted to the period as a fully lined smoking jacket, which Jennifer made from silk velvet and devore satin that had been dyed two tone through the use of both acid and fiber reactive dyes.  The satin was quilted for cuffs and lapels, and a snowflake pattern stamped into the velvet.  His ascot is a dyed devore satin upon which a burnout dot pattern was created using Fiber Etch.  The tie pin was created using a jewelry pin back and rhinestone.  The cigar was modified from a purchased prop by being stripped and re-rolled in silver tissue paper.  His opera pumps were painted and embellished with ribbon binding and bows.  The Freeze’s dress shirt and trousers were minimally modified purchases.
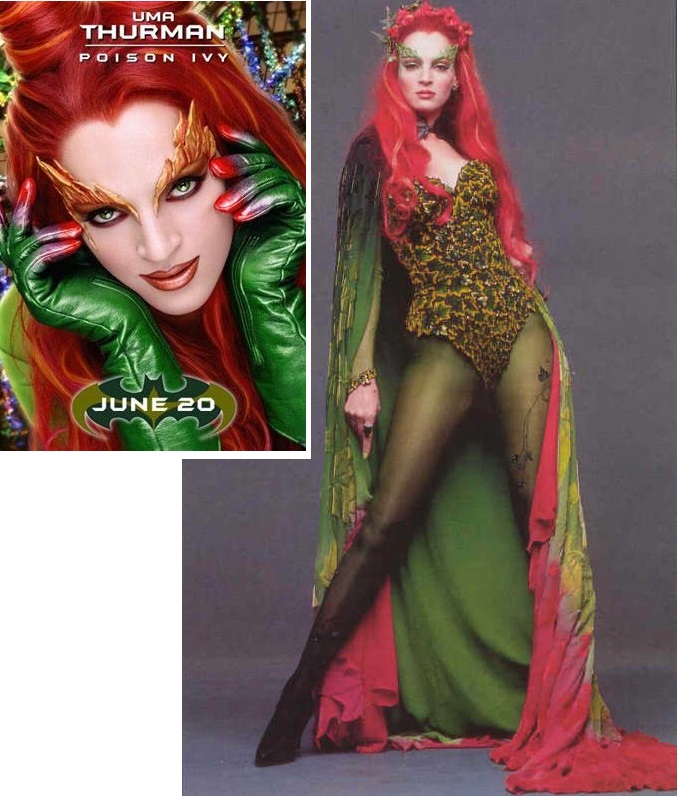
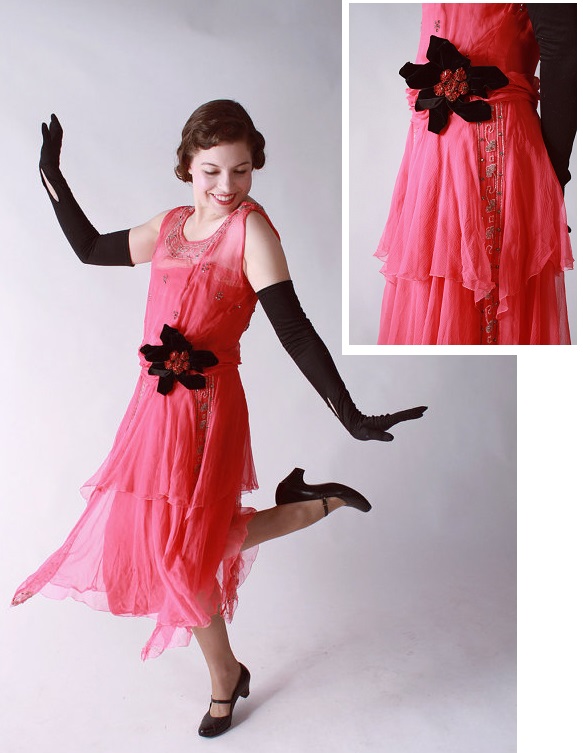


Poison Ivy


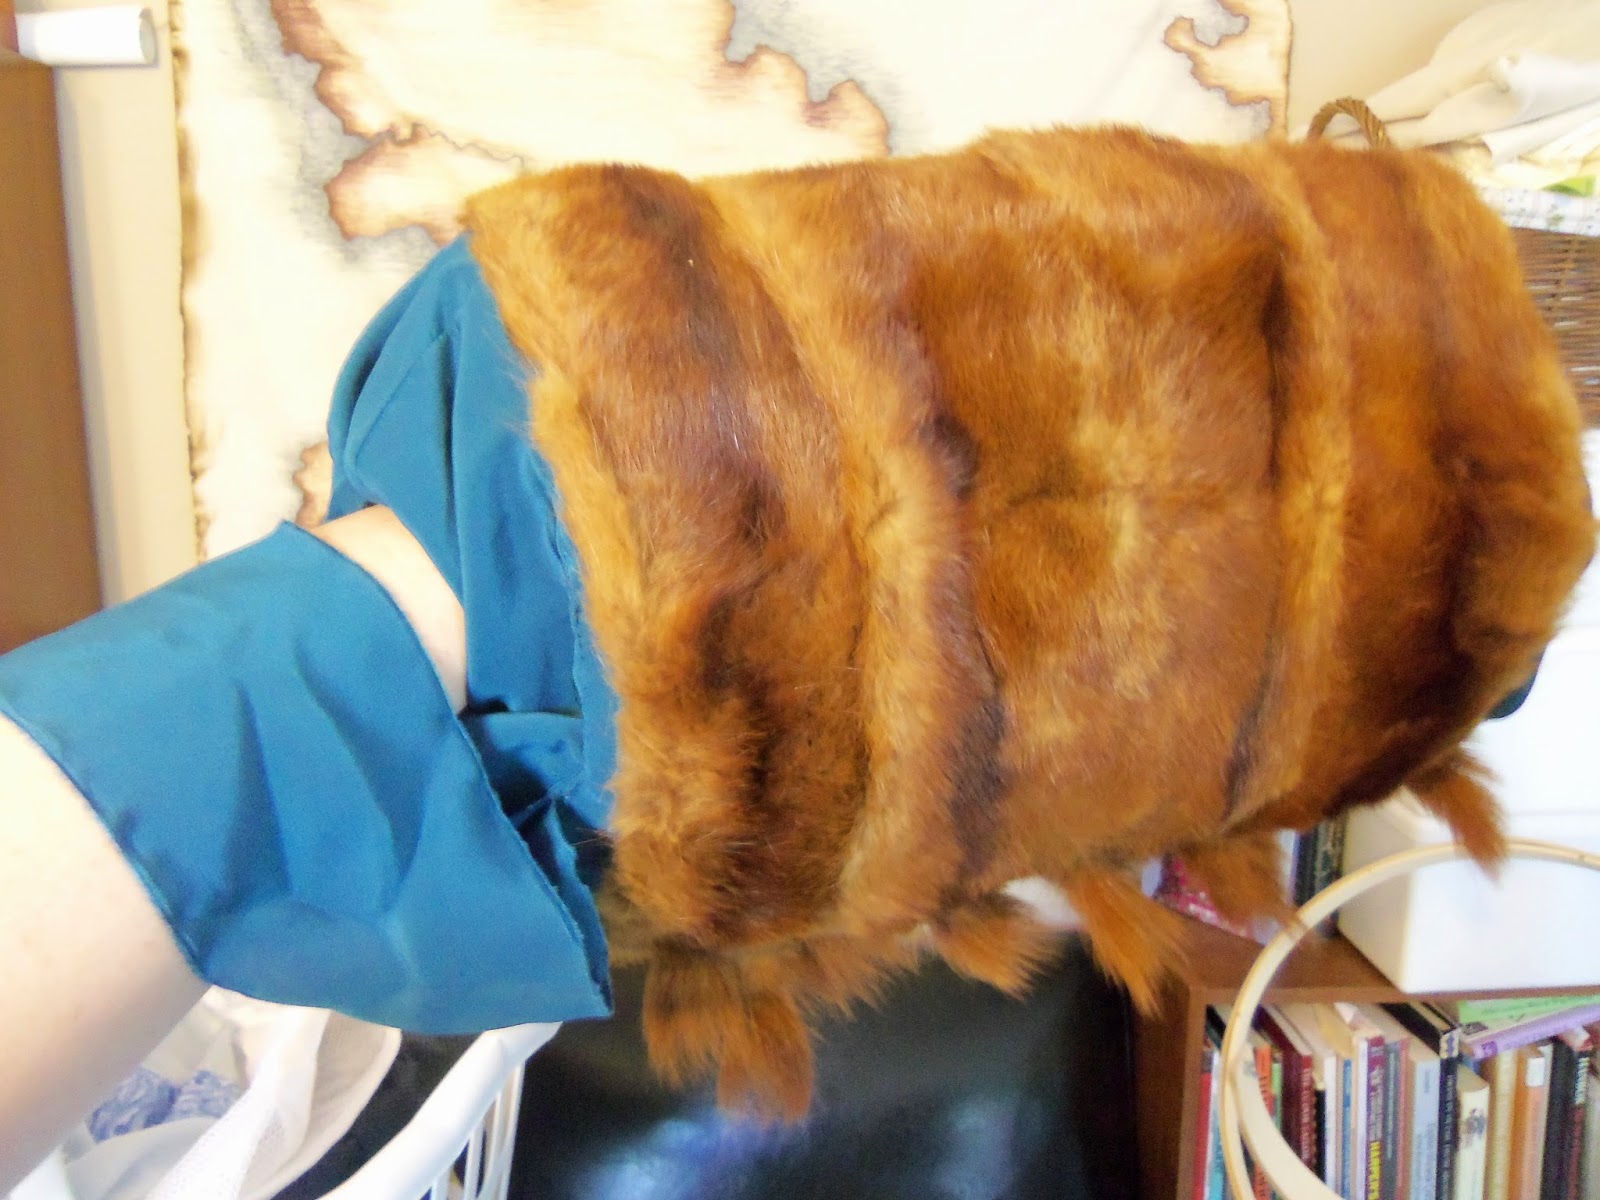
Poison Ivy wields her sexuality as a weapon.  We wanted to take advantage of Valorie’s tall, lean frame and chose to put her in a flapper style dancing dress with a handkerchief hem.  The dress was made of self dyed silk chiffon and the bodice lined with habotai in a matched color.  The dress is embellished with gold colored glass beads and paired with a matching chiffon scarf.  The gold beads were repeated in the embellishment of the gold dyed silk drawstring handbag.  Ivy’s gloves were dyed using silk painting techniques on purchased nylon gloves.  Her shoes were painted with gold leaf and, in her purse she carries her secret weapon, ‘poisoned’ lipstick and a gold painted compact mirror.


Vintage 1920s silk chiffon party dress for sale on Etsy.
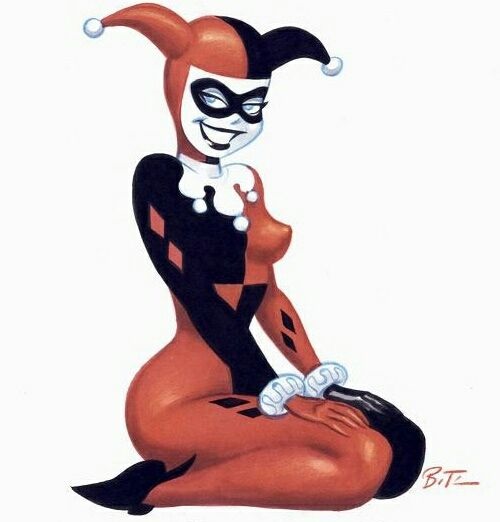
Harley Quinn


Harley Quinn is a strange combination of childish and womanly. Kristen wanted to reflect this through the blocky shapes in the trim, the wildness of the tulle and through the sophisticated beading she did on the belt and headdress. The choice of sleeve and coloring are based on the original design. The diamonds scattered throughout (in the belt, the fishnets, the headdress) are a homage to this as well.


*  *  *


And there you have it!  In the end, I chose not to include any of our progress pictures.  It was important to keep our documentation short enough that the judges would have the chance too flip all the way through it.  The more there is, the more they'll skim, and so we did our best to keep it as succinct as possible.   So much appreciation goes out to the members of the group who so graciously allowed me to share their work here with you.  Much of the personal information for people has been redacted, but I left the spaces in there to show you where it goes.  The only thing left to see is what crazy group idea I get pulled into next.

photo courtesy snarkyman

Thursday, August 21, 2014

Faking it: stockings for the 18th century costume

There was some conversation over on the Historical Sew Fortnightly group about symmetricals (padded stockings: if you're interested in them, Leimomi has a terminology post all about them).  I had joked that these were one of the only historical garments that I would have no use for, seeing as how my legs come with quite enough padding on their own.  Enough for me have a fun cheat to share with you.  I've just in the last year started making 18th century costumes.  Prior to that, the Victorian was fairly forgiving about what sort of stockings that I wore as my legs and ankles were always covered by high boots and long skirts.  But that Victorian sense of modesty didn't exist in the 1700s.  Skirts were higher and shoes were made for showing off.  Enter the need for stockings.

Now, sources for authentic stockings certainly exist, but they're not cheap and thus far seem to all be too small for my thunder thighs to fit in to.  To get around this, I bought a pair of opague white nylon tights for $2.50 a pair.

 Ok, so I bought 8 at a post-CoCo Target run, but only after I figured out it worked.

Lay the tights out and you'll see (or maybe you won't, it's kinda hard to photograph) that there's a narrow band of heavier knit at the top of the thigh going into the briefs portion that acts as a bit of a control top. 

I found that if I cut the leg of the stockings off inside this band, they tended not to unravel.

I put them on and stretched them all the way up to the thigh, then let
them unroll naturally until they fell just below the knee.

There And the best part was... they STAYED UP!  All by themselves.  I may eventually make myself a shiny pair of garters to wear with them, but thus far it was totally not needed.  All through a night of dancing at the Costume College gala and they didn't once slip down.  It probably helps that the tights were a size (or two) smaller than what I would have gotten were I planning to wear the full things.

 Geri caught me shaking my paniers to Sir Mix-a-lot, thus proving that I really did make those stockings work.

Next up, I'll have to figure out a way to fake some clocking on a few pairs.  I've seen both painting and embroidery used for such a purpose, but I have no idea where I'll find me a set of feet willing to sit still while the paint dries.

Wednesday, August 20, 2014

HSF 15: The Great Outdoors - the Mink Fur Muff

I certainly feel like this is one of the weirder things I've ever made.  About a year ago, my mother let me dig through her significant stash built up from decades of sewing and crafting.  One of the things that she passed on to me was mink stole that had certainly seen better days.  Mom made bears for a time, and one of her friends had passed the stole on to her and so it's just been sitting in people's stashes for ages now.  Fast forward to last December when I had a Steampunk holiday tea to dress for and as it was flipping cold out and I didn't have gloves to match the Victorian ensemble I'd planned to wear, I decided to make a muff.  This was one of those projects that sounded much simpler in my head: cut rectangles of lining, fluff and fur, sew together and Viola!   You're done.

Yeah, not so much.  First thing to do was to METICULOUSLY and very gently remove the fur from it's fabric lining.  The stole was two long strips of fur sewn side-by-side and I needed something shorter and wider than that, so the fur "strips" then had to be separated and cut in half to make the new shape.  


Next up was to sew the fur onto a backing material.  I chose to use the same silk as I was using for the lining so that when I sewed the fur layer to the lining, I could do it by the backing instead of putting more stitch holes in the fur.  This way, any backing that peaked through would be unnoticeable.  I went into this thinking that this step would have been simple... WRONG!  Despite seeming quite rectangular when in the stole, the resulting pieces were anything but.  I ended up having to pull the pieces in towards the cut ends, which ended up giving me a rectangle that was narrower at one end than the other.


Strips of fur had to be sewn together before being sewn to the backing material.
You can kind of see on the left there where even these strips were originally pieced.

Fur whip stitched to the backing fabric in a rust colored thread that would disappear in the fur.


Next I had to work on the insides.  I had seen where others had been quilting the interior of their muffs and I figured that seemed like a good idea.  More than anything, I like how the quilting it kept the lining material from shifting and bunching, which would have been unsightly.


Quilting on the sewing machine, because SURELY that would be easier than doing it by hand, right?

Aaaaand, this is about the place where the project got bagged up and put on hold until today.  I pulled it out and started trying to assemble the layers, not realizing until half-way through that my rectangle of fur was not a true rectangle.  I worked around this by assembling the lining and fur into tubes separately, then stuffing the lining inside the fur tube and hoping for the best.  The added bulk of the buckling lining means that the muff retains a bit of its rounded shape, even without a pair of hands in it.  The fur backing and lining were whip stitched together and a fabric wrist strap was inserted into one end.  The fur was old and quite delicate, and many of the mink tails broke along the way.  The stubby bits were left on one edge and the only remaining full tail was inserted into a pretty yellow bow and pined to the front of the muff.


Now it just needs to be not August and cold enough so that I can find and excuse to wear it!

What the item is: fur muff
The Challenge: The Great Outdoors
Fabric: mink recovered from a vintage stole, silk crepe, cotton batting
Pattern: none
Year: this could work for anything from the late 1700s up into the early 20th century.
Notions: poly ribbon and thread, scrap ribbon for cinching in the ends and a touch of tacky glue.
How historically accurate is it? meh, not too shabby, I suppose. Though I didn't really base it on any existing pieces or images.
Hours to complete: 10, perhaps. The fur had to be painstakingly removed from it's original backing and then pieced back together into a more rectangular shape. Lesson learned, I will NOT be working with real fur again any time soon.
First worn: it WAS intended for a holiday tea back in December, but set aside in the rush. It'll have to wait for it to not be August and sweltering before it gets to see the light of day.
Total cost: fur was gifted to me from my mom's stash and the silk was leftover from making a dress for a friend. So out of pocket? $3 worth of batting. But the valuation would have been closer to $60, given the shabby state of the fur.

Wednesday, August 13, 2014

Costume College, Sunday & Monday's trip to the LA Fashion District

Sunday started off with Breakfast belles and Beaus, which was the evolution of the Sunday Undies breakfast.  I wore my 18th century short gown with a new teal petticoat and the white work apron.  Unfortunately, this was another one of those outfits where I failed to snap any personal photos of the completed outfit.  Gina at Beauty From Ashes caught half of me in a photo of someone else, so that will just have to serve as a teaser until the official studio pictures come out.  I am loving what I can see of the shape here and can't wait to see what it looks like in good light from the front.  The teal petticoat was banged out at the eleventh hour when I realize that the whitework embroidery apron I'd been working on in all my spare moments was not going to show up very well on top of the ivory quilted petticoat.  The petticoat was a simple two panels at 56" wide (total circumference = 110" after seams) with 9" side slits for pocket access and a 12" ruffle pinked top and bottom.  I LOVE this teal/magenta/white color combination and I love the teal enough to want to take the rest of the fabric and make a top of some sort to go with it.


In amongst the two costumed meals of the day (omg, so full), I caught a couple of panels. see  There was Tasteful Tints and Textures with the ladies from Truly Victorian.  I had never really paid attention to how many and what kinds of colors/prints/fabrics were used in gowns from the Victorian era.  It makes me reevaluate every bustle gown I've ever made to see how 'proper' my fabric selection was.  And then I cringe a bit when I realize that both of the bustle projects I have lined up to do next break all of those rules.  However, as they are an historical reinterpretation of a super hero and legit interpretation of a satire print, I think it'll be okay.

The 19th Century Accessories talk turned out to be a slide show portrait cram session of over 400 years of history.  While the presenter was totally knowledgeable, it would have been nice to have had a focused hour on a shorter time frame.  However, I did pick up an inclination to do some 1790s Turkery nonsense and I picked up a handful of coral colored beads on Monday to get me started.

Back to the room for a quick change and then I headed down for the afternoon tea, themed after the Ladies Day at the Ascot (big hats, yay!).  I got to wear my chemise a la reine and beregere hat out for the very first time.  I loved how springy it felt.  And also, the hedgehog wig was very easy to style and wear.  Just a couple of pins to hold it and a few of the more rogue sections of hair in place and it was ready to go.  It was amusing to see a table full of corseted women try to reach the tray in the center of the table.  I had trouble keeping the straps of my stays tucked in the dress, though.  I may end up making a pair of strapless stays to get around the issue.  Or perhaps modify the pair I have to make the straps detachable.  

My last programming bit of the weekend was on how to teach at Costume College.  Just something to think about for next year.  Then it was back into my civies for dinner across the street and packing up the room so I'd be ready to head out for Monday's safari to the LA Fashion District.  I had signed up for the con-sponsored trip which provided a bus to take us into town and then waited there for us so that we could drop off purchases or just come hide in the shade for a bit of a break.  This was a nice touch as it was hella hot popping in and out of these tiny little shops packed floor-to-ceiling with all manner of fabrics and notions.

My fashion district hall.
All told I spent $203, which was only $3 over my budget.  Something I was fairly proud of for not keeping very close track.  Trying to make all of my purchases in cash certainly helped, though.  It may not look like a lot spread out on the hotel bedspread, but I bought a LOT of trim, which normally jacks the cost of an outfit up very quickly.  Also, fabrics I do fairly well with knowing how to order what I need online, but I find trims a lot harder.

What I came home with:
- Extra large paper fan (ended up being practical for the trip home, too).
- 8 yards of green silk with lavender, burgundy and olive threads running through it. No idea what I'll make with it, but I'm thinking late 18th century or perhaps Regency.
- Lavender and green ribbon trim to match the striped silk.
- Gold braid that was something like $1.50/yd, because simple gold braid will always find a use.
- 4 dozen gold buttons for the Captain Marvel natural form era gown ($3/dz!!!)
- 7 yards of English net lace for engageants and whatever else needs $5/yd lace.
- 4 yards of white linen for a new chemise.
- 1.5 yds of the most lurid yellow silk taffeta I have ever seen that I cannot wait to make a pair of 18th c mitts out of, plus line a hood and perhaps trim a Brunswick jacket.
- enough red coral-ish beads to deck out a Turkish-inspired 1790s outfit yet to be designed.
- burgundy looped trim for the Regency open robe project that's yet to have taken off.
- 1 yard each of burgundy and lavender tassels for decking out reticules and the like.

Wow.  When I write it all up, that's a LOT of stuff.  I think I'll make it a goal that one half of it needs to be used (at least once, not used up) by the time next year's Costume College rolls around.


Finally came across the PERFECT buttons for the Captain Marvel dress, which is next up on my to do list.

My one real impulse buy was this crazy striped silk and a 12 yards of a complementary ribbon trim.
I have no idea what I'm going to do with it, but I'm sure I'll figure out something.

Friday, August 8, 2014

Costume College, Saturday

Saturday started off bright at early at 9am for more programming.  I started with a talk on tailoring a man's Regency tailcoats, presented by the gal who designs patterns for Laughing Moon.  I picked up a few tid bits about construction and such, but it was mostly targeted towards people who are going to use their patterns as opposed to those figuring it out from the tailoring manuals of the time.  She did have some good notes about fabric weights and the types of support structure that were and were not required for the time period, though.  So that was helpful.

Next up was a class on beginning bobbin lace.  While kits were available (of which I bought one), there wasn't really the time for any instruction.  It was more of an introduction to what it was, with the tools for those who want to try it at home.

If I ever get around to using my kit, this is the sample of what it is that I'll be making.
 Next up was 18th century women's outerwear, which covered short and long cloaks and pelisses.  No real new information for me there, but I caught a lot of names for references and research collections online.  Also, now I want to make a pelisse.  No good reason for it, other than I haven't made one yet and they look interesting.  Oh, this 18th century rabbit hole that I have fallen into.

Also hit Five Faux-Historical Accessories which singled out some of the biggest no-nos of accessorizing historical costume, as well some both some cheap-n-easy-n-close-enough and not-so-cheap-but-super-accurate ways of fixing it.  Makes me want to go home and make a lot of purses and reticules and the like.

Saturday night was the big gala event, and what a production it was.  They do this semi-organized 'red carpet' event where they have chairs lining the halls going into the ballroom and attendees get to walk down it and have their picture taken/be gawked at.  It was kinda fun, if a little overwhelming.  But I suppose it's better than the alternative, which is everyone just crowding about the space and hoping to catch a picture of the costumes if they can. It also significantly ups the likelihood of finding photos of yourself online the next day, which I appreciated.  The Honey and I went the full nine yards with the hair and makeup, which I thought really pulled the whole thing together.  The look was relatively simple, really. After a touch of concealer where needed, we just loaded up with a metric ton of matte white eye shadow from Sephora, then touched the cheeks with a matte red. Red lip liner only, to keep it matte.   A scant touch of mascara for both of us and a light dusting of pale blue eye shadow for me and we were ready to go.  I know there's not really supposed to be any color on the eyelids, but my babies were getting lost in a sea of white powder and I had to do something.

Here we are texting the obligatory "look how silly we look" selfies to our friends back home.

Here we are all dressed up.  I like how the red/blue/ivory with gold and brown color palette worked out.

Actually, sitting in panniers turned out to be not that difficult after all.
So long as the seats next to me remained unoccupied.  ;)

Such a cad.  The outfit was like an open invitation to ham it up for the crowds.

Another full length shot.  I think I know why women in the time seemed to pose with their hands
where they did.  I needed to use the fan to hide where my pocket access slits tended to gape open.
Add that to the list of things that need to be tweaked when I get home, as well as adding fur revers
to my bodice, hooks to hold the front of the skirts up and moving the shoulder seam on Honey's coat.

I fell behind and this outfit totally would not have happened had it not been for Bethany's last minute help.
I did the pattern & mock up of the coat, her the cutting and assembly, and I the hem/trim/buttons.

Honey's wig, courtesy of Bethany.  It was perfect!

I'm just giddy over my wig.  I took a lot of progress pics and promise to get those up here at some point very soon.  I had to use the glue stick trick to get the tiny hairs in front of my ears to stay in place, but next time will have to powder them a bit more thoroughly.  I'll probably disassemble the wig and re-style it at some point before the next Costume Con, try to make the shape a bit less cone-like and a bit more symmetrical.  Maybe now I can read Kendra's book in depth and figure out a better way to manage that nonsense in the back.
Shot of my wig, courtesy of Geri, who had the forethought to take side
view photos of both the wig and the dress for me.

And some bonus shots of some of my favorite costumes of the night.  Most of them were from people I didn't know personally, so if you recognize yourself or a friend, please let me know.

So miffed that this photo didn't turn out better, but I had to include it anyway
because the makeup and prosthetics job on this was just phenomenal.

This matched pair were really sharp in their slate grey.  I kind of wanted to follow
him around and take pictures of the pleats in his coat, as they were pretty sharp.

This outfit was so fun, and she seemed to have such fun wearing it.  Bounding around
and running up and down the halls, fluffs of hair and swags of fabric bouncing in the breeze.

Not the best view from the side, but...

...check out that trim!  I will bow down to the master on this one.  That braid is well done.

The little embroidered emblems inside the swirls of trim were so intricate.

Another entry from the 18th c court ensembles group.  It was a coronation gown,
so she had one hell of a train following her around.

  
The petals of this skirt were just to die for.

Woo hoo, plaid!  Orange and blue plaid is one of those prints that I'd look at on the bolt and think, nah.
But it loos SO sharp in a bustle dress.  Well done, Tracy!

Possibly my all time favorite of the night.  The embroidery on this was so sharp.
And her veil was divine.  And the TIARA!   
Tanya looking RWAR!  All of her costumes were so fun.

Urgh, this pic just does not do justice to Melissa's awesome sleeves.

Victorian looking positively innocent in white at a table filled with red.  Loving the hair.