Showing posts with label documentation. Show all posts

Sunday, August 24, 2014

Project Summary: 1920s Batman Villains

Back in January of this year, I got to play my first ever 'group card'.  Amongst my clan of costuming buddies, we have this system where we all have these metaphorical cards.  Everybody gets one.  And one day, when you have this epic costume group idea that just HAS to happen, you get to play your group card and these friends will join you in making it happen.  It doesn't matter if it's not everybody's 'thing'.  It just has to be a good enough idea to warrant investing your time, money and creative energies into the project in order to make the one person's vision a reality.  I played my group card for the 1920s Batman Villains.

It was at a Dragon*Con a few years back that I started noticing people putting some interesting twists on their cosplays.  Costumers were taking recognizeable characters and re-doing them from an historical or other dimension.  The Super Girl bustle dress, Dark Knight suit of armor and Elizabethan Justice League were all inspiring reboots of popular characters and I wanted in on this.  I thought this was the perfect solution to celebrating some of my favorite characters and concepts when a straight up cosplay of the characters wouldn't do it for me.  I love super heros, but I don't really have the super hero body and would sooner shave my head than wear spandex in public.  Enter the historical re-interpretation.  I could take the recognizeable symbols and color schemes of my favorite characters and making them up in a way that I was comfortable with both making and wearing.

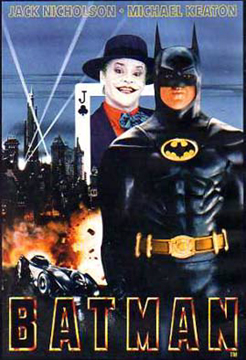
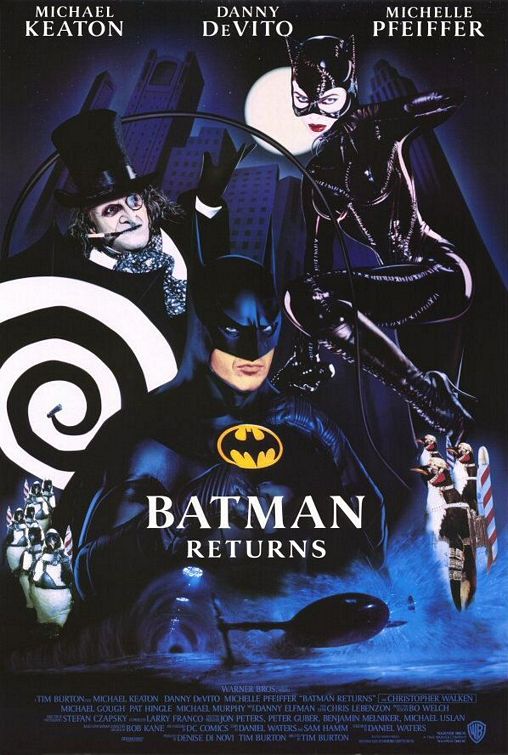
Now, I'll share a (not so) secret with you.  I am a teensy bit of a Batman fan.  And not just any Batman, mind you.  I broke my geeky teeth on Micheal Keaton and the series of movies that came out in 1989, 92, 95 and 97.

*sigh*
Just like you never forget your first Doctor, I will never forget my first Batman and the dirty gothic world that he was presented in.  And I LOVED his villains.  There was nothing understated about them; not like Bruce Wayne and his dark, slick bat suit and equally polished rich boy wardrobe.  Where Batman was all black and white, his villains were in COLOR.  They had over-the-top, bright colors with insane visual representations of their own inner mental workings and I was hooked.  

I don't remember exactly how it happened, but at some point I made the connection between the film noir look of the Gotham City of this Batman and the 1920s in general and it was all over for me.  I started to see the 20s style everywhere and my brain was consumed with the notion that this just had to be realized.  Cue the group card.  The basic instructions going into this were simple: take a the character and try to imagine how they would be represented in the 1920s.  We made ourselves a closed Facebook group to facilitate the brainstorming and away we went.  We picked elements of the villains' personalities and tried to relate them to a fashion of the time.  For example, Poison Ivy was all about using her sexuality as a weapon, so she gets a drapey, sexy party dress.  We didn't even try to match each other in style or materials, like we would with some of our other cosplay groups, but we all had that unifying theme of the 1920s fashions and that made it work for us.

Coming up with a presentation that both told a story and gave us all our moment of glory on stage wasn't too difficult in the end.  I picked a fun piece of jazz music from the era and the hive mind lead us to tell the story of Mr Freeze throwing a bit of a party to celebrate having caught Batman.  Characters were largely paired up based upon which movies they showed up together in.  Catwoman teased a socially hopeless Penguin.  The Joker was a loner, but he flirted a bit with Poison Ivy before she turned her attention back to their host.  And then the party gets crashed by Two Face and the Riddler.  Batman had escaped and all inclinations point to it being Two Face having facilitated that, simply to spite Freeze.  Short, sweet and to the point.  You can see a video of our presentation on this blog post.

The last challenge was coming up with documentation for our group.  Documentation in the context of a masquerade entry serves the purpose of summarizing what you did for the workmanship judge.  This judge gets only a few minutes to look over everyone's costumes and you want to leave them with something that makes you stand out after the fact.  The problem for us was that we did so MUCH!  We did our research. and there were dozens of different techniques.  Patterns were drafted, hats were made, fabric was dyed and things were beaded.  There was so much for our group to tell, but one of the most important parts of documentation is keeping it succinct and to the point.  To keep it simple and unified, I assembled all of the documentation.  It included a couple of reference photos of not only the original character, but the 1920s look that the costumer was embodying.  There were a few sentences about what parts of the villain's personality we were trying to showcase and then a few more detailing the techniques which were used in making them.

Here's what we came up with:


a 1920s reimagining of the villains of:
Batman (1989)
Batman Returns (1992)
Batman Forever (1995)
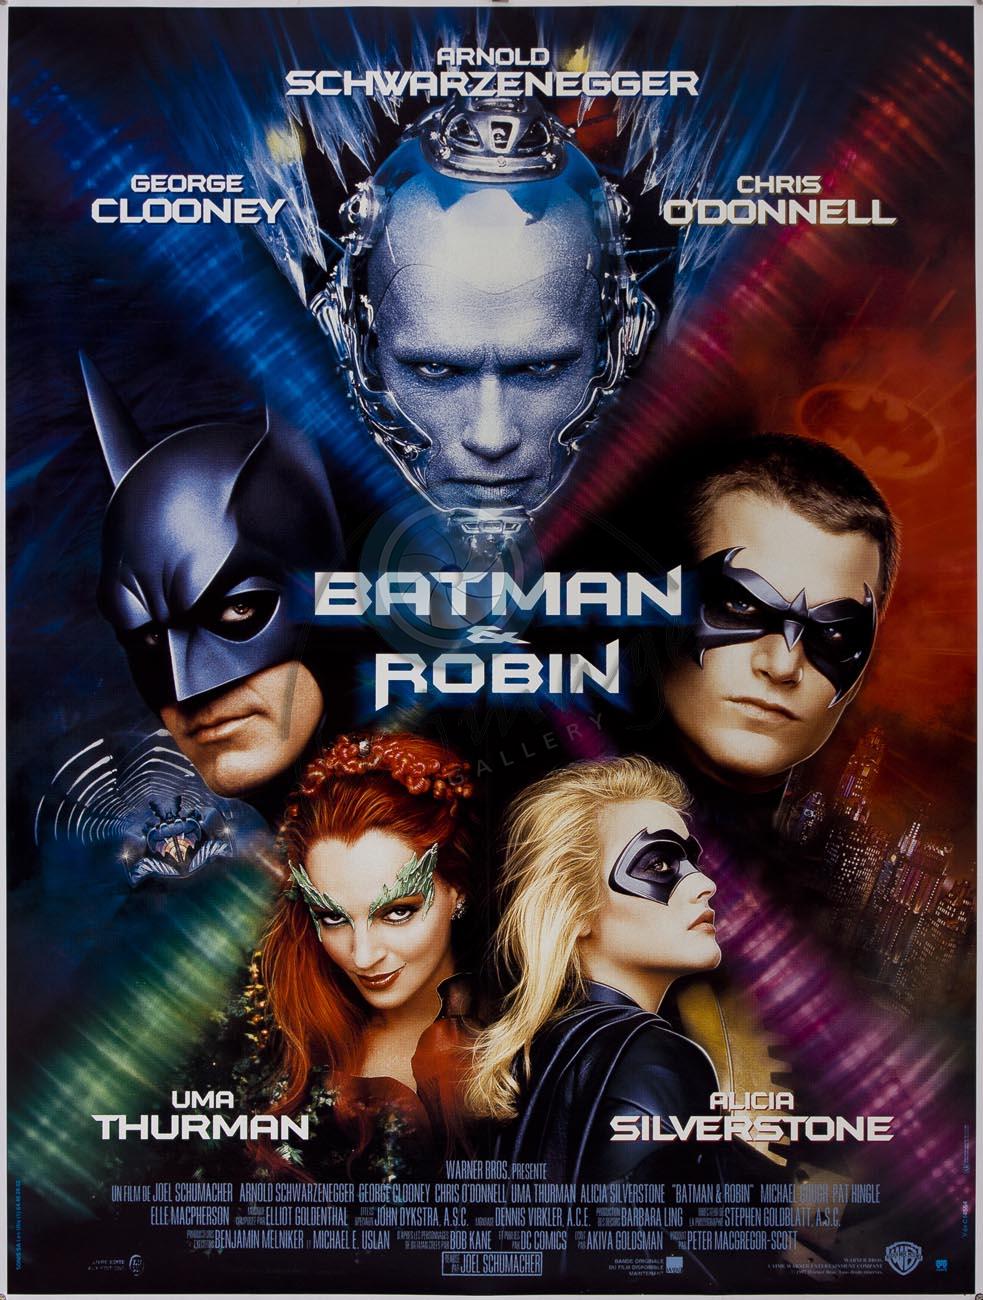
Batman & Robin (1997)


A Master Class entry for Arisia 2014

contact information: Jennifer [last name]  -  [EMAIL]  -  [CELL PHONE]

Your Cast of Villains:
Leo [last name] as The Joker
Bethany [last name] as Catwoman
Aurora [last name] as The Penguin
Megan [last name] as Two Face
Milo [last name]as The Riddler
Jennifer [last name] as Mr Freeze
Valorie [last name] as Poison Ivy

with special guest
Kristen [last name] as Harley Quinn


"Almost Got 'Im"
The title of, and inspiration for our entry comes from the forty-sixth episode of the Warner Bros. television program Batman: The Animated Series, which first aired on November 11, 1992.  This episode features five of Batman’s classic villains telling the stories of their "best" attempts at killing the Dark Knight.  Our presentation represents a hypothetical continuation of this story; the night that Mr Freeze “almost” got Batman.
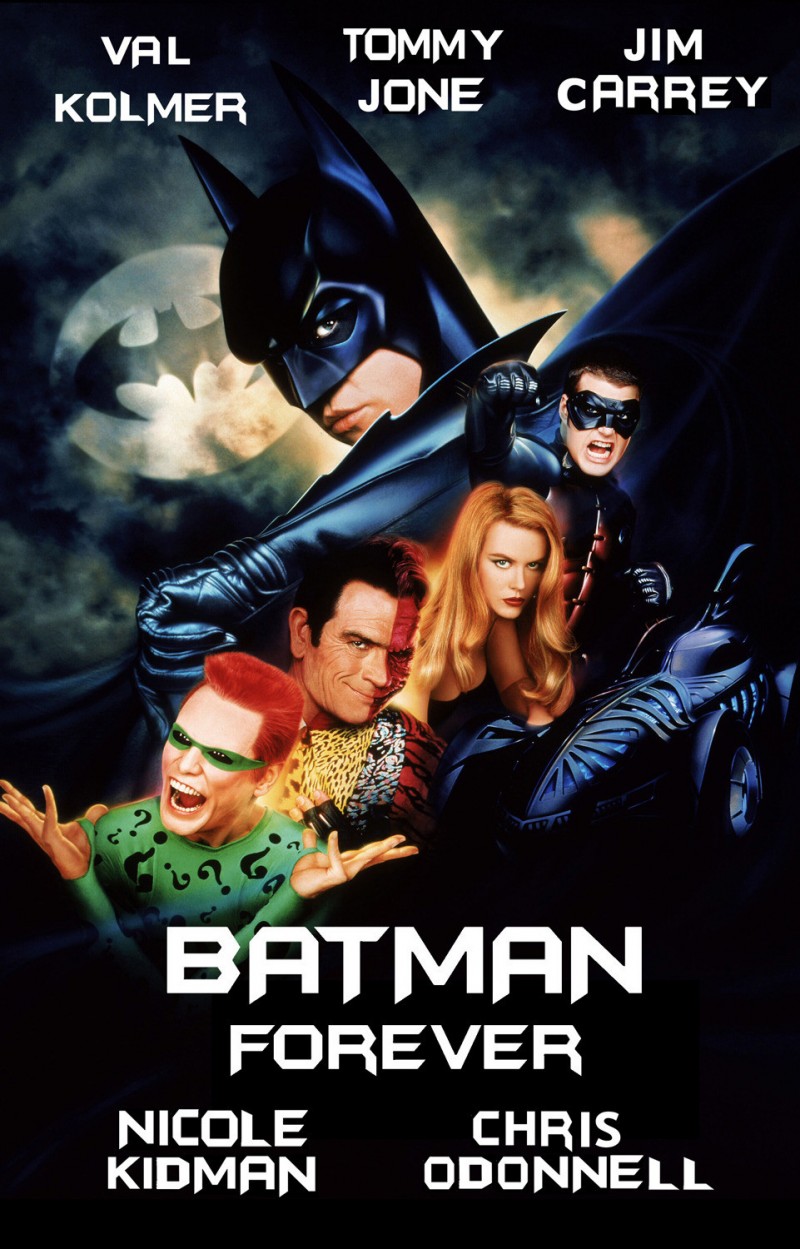


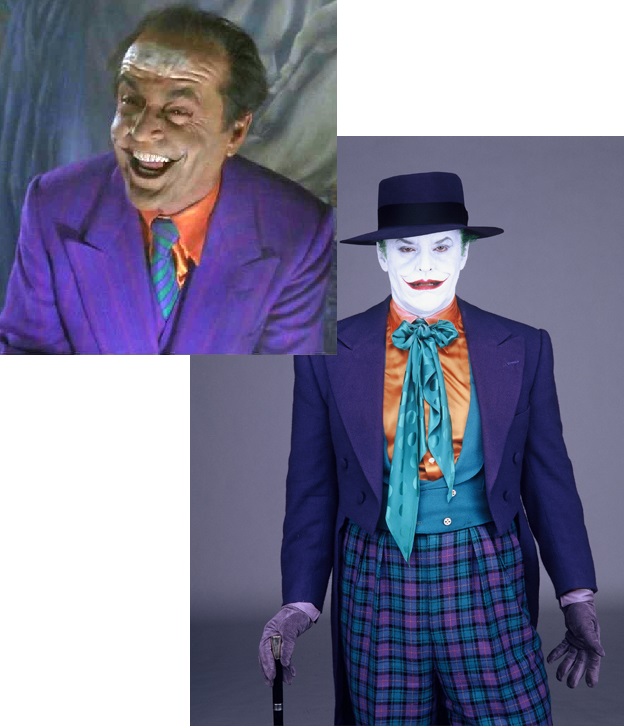
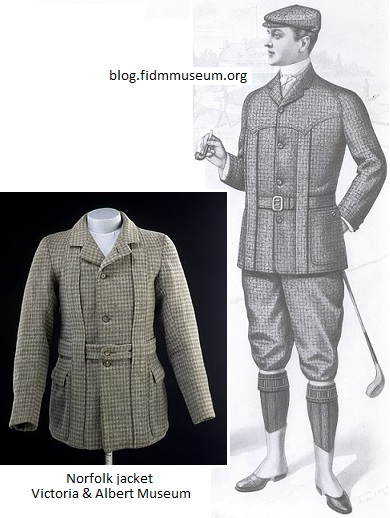
The Joker


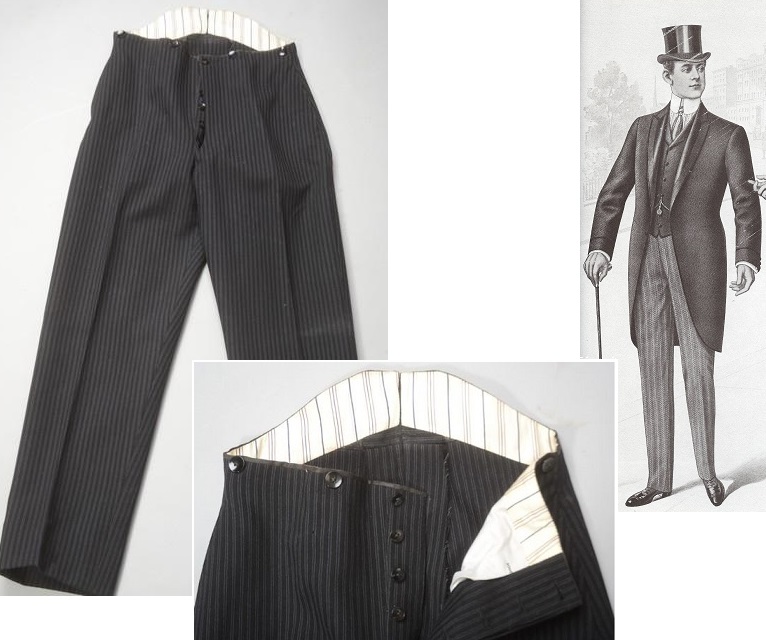
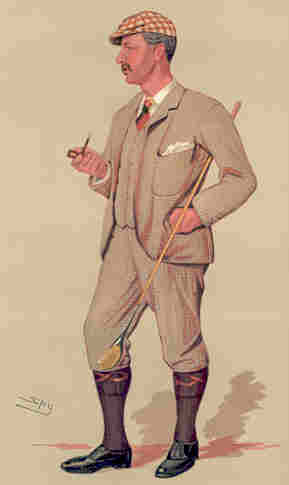
We pulled the Joker’s color scheme from the movie and applied it to an outfit built around a Norfolk jacket.  This iconic image of gentlemanly leisure was seeing a renewed popularity in the 1920s, especially amongst men living in the city - perhaps as a demonstration of their relaxed approach to fashion when compared to their properly suited predecessors.  I picture the Joker as being the kind of guy to thumb his nose at the expectations of a ‘proper’ gentleman.  The Joker’s costume is composed of a tailored wool blend Norfolk jacket that is fully lined with plaid cotton gauze, paired with matching trousers.  The cravat was patterned from scratch and constructed of hand dyed habotai silk, embellished with embroidery details.  The purchased shirt modified to attach playing card cufflinks and the appropriate silhouette is achieved by wearing a binder.

Catwoman

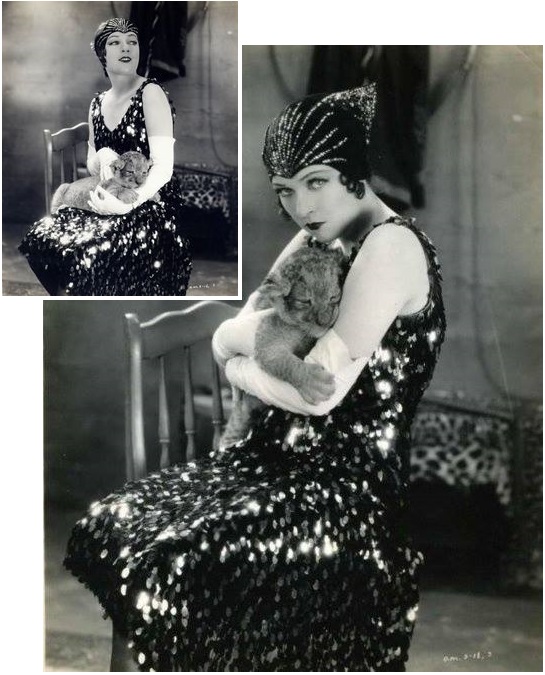
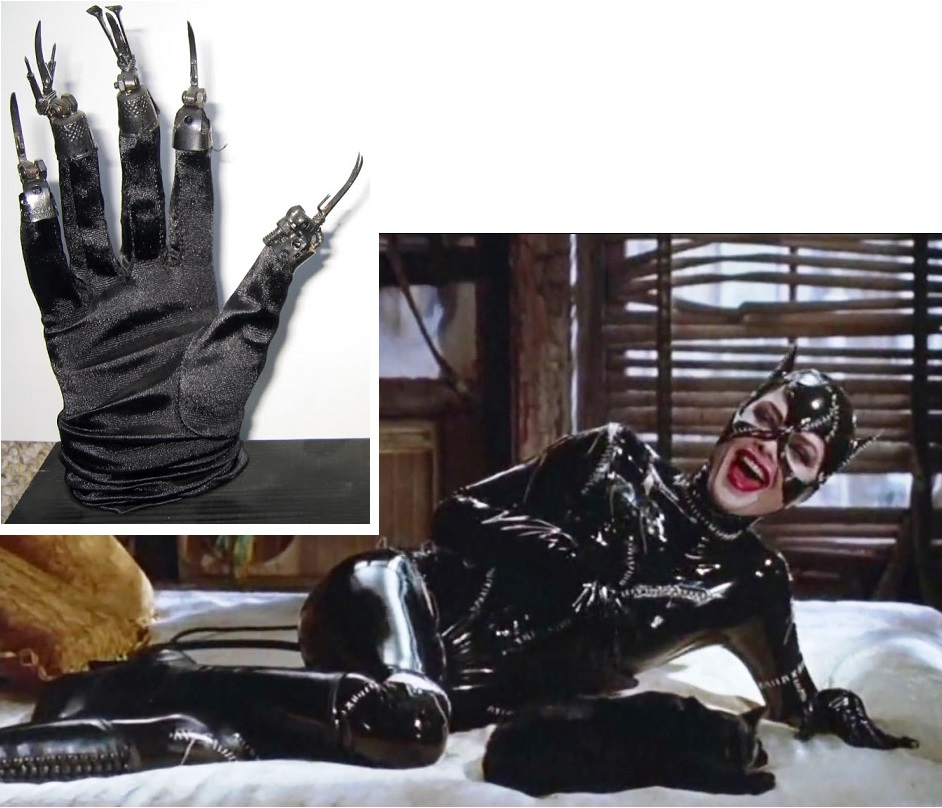
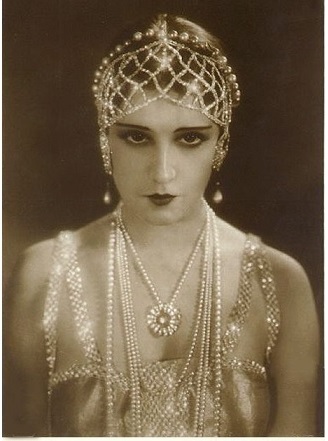
Selina Kyle, is an animal rights philanthropist by day who funds her charity work through high-stakes diamond heists by night under the alter ego of Catwoman. Bethany chose to recreate a dress worn by Jacquelyn Logan in the 1928 movie "Leopard Lady" as it seemed appropriately tongue-in-cheek.  Catwoman’s dress is made from black paillettes.  Her vintage gloves were embellished with claw-like nails.  The hat is a velour-covered frame made of wire and felt, embellished with rhinestones.  The whip and shoes were purchased and embellished with rhinestones.  The appropriate silhouette is achieved through vintage girdle.


The Penguin

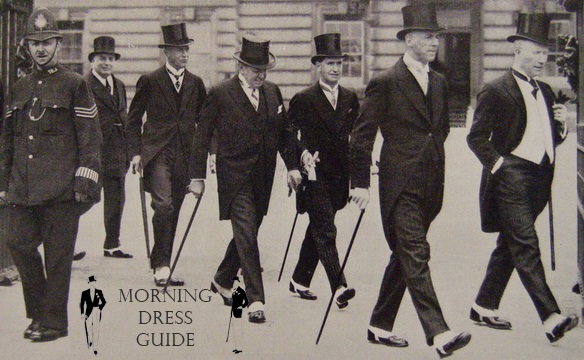
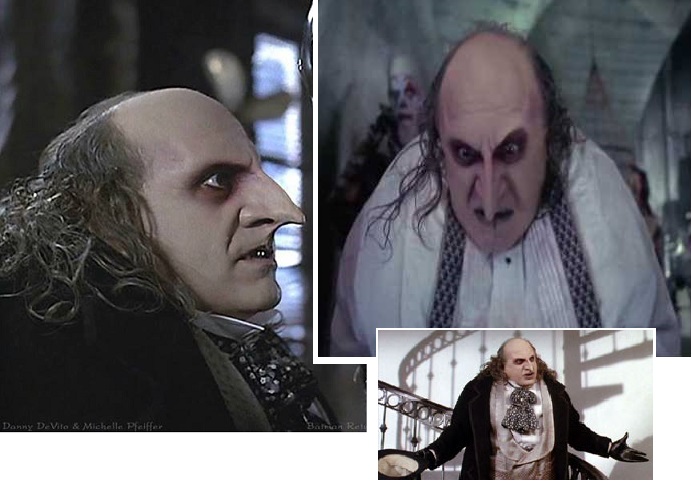
The Penguin is a little older and past his time. Aurora focused on creating garments from the late 1910's or early 1920's rather than ones on the cutting edge of fashion, and focused on authentic construction methods. She had to balance fit between wanting to make well-constructed garments fit perfectly and the fact that the character was probably wearing cast off garments that wouldn't fit him well at all. Colors were chosen to fit the black-and-white color palate established in the movie.

Body shaping was accomplished through the use of a binder, Spanx, compression shirt, compression boxers and a length of cloth used for stomach padding.  The dress shirt was made and tailoring techniques were used to make the pants, vest and jacket.  Leather working skills were use to make the suspenders.  The costume includes facial prosthetics and the construction of a unique wig.  The spats, cravat, monocle, boutonniere and flipper gloves were made for this costume.


www.morningdressguide.com

Two Face


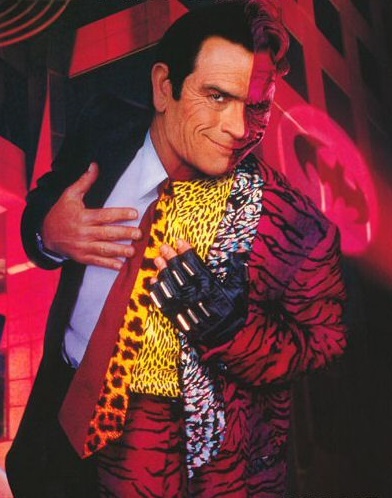
For Two Face, we went with a classic gangster style.  Megan made his suit and trousers utilizing zebra stripe cotton fabric, the majority of which was overdyed fuschia.  The tie was patterned and constructed from scratch.  One half of his purchased dress shirt was dyed using fiber reactive dyes.  His spats were modified for fit and decorated with acrylic paint.  One sock was painted.  His hat was modified to add color and contrasting hat bands.  Two face is carrying a coin with a scratched face and wears a single fingerless glove.


The Riddler


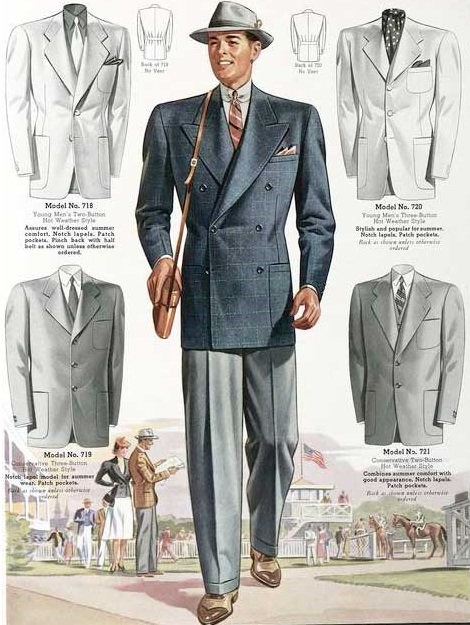
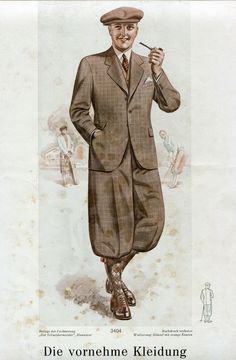
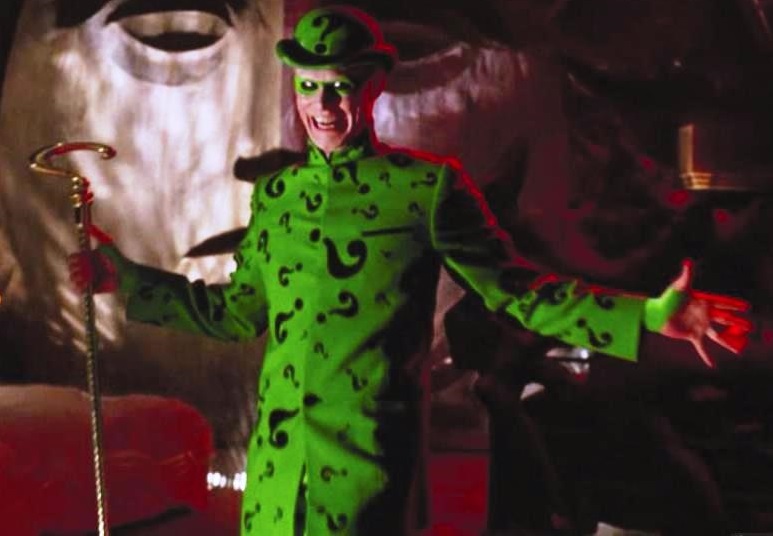
Milo took a casual approach to the interpreting the riddler.  His outfit is composed of a matching vest and plus fours made from fabric salvaged from a discarded theater suit and trousers.  His tie is hand painted and the bowler hat has question mark detailing added.  The shoes and socks are worn as purchased.


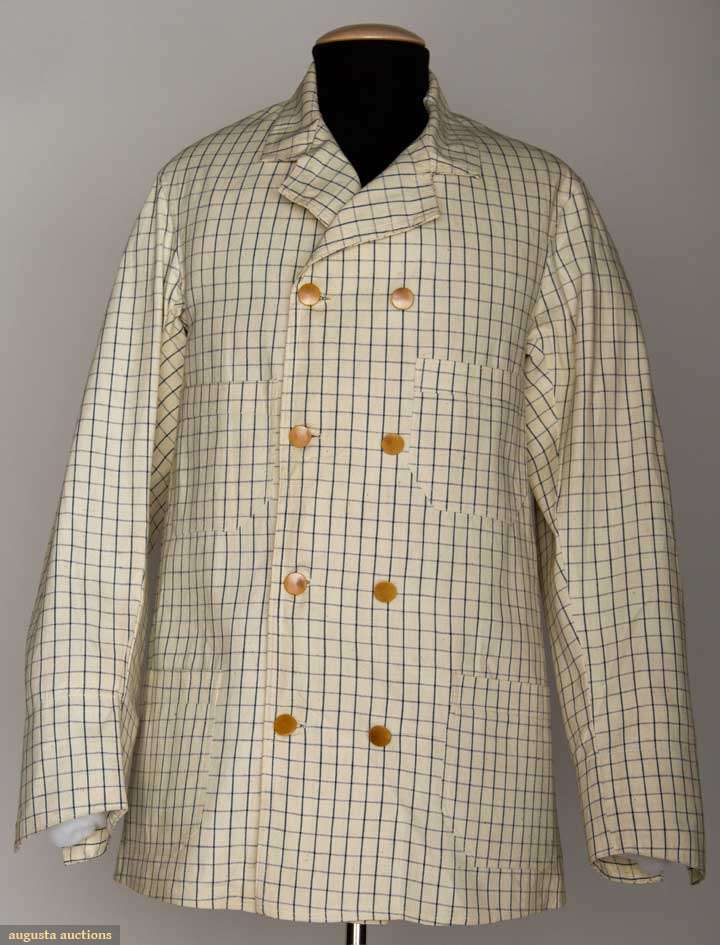
MAN'S SUMMER JACKET, White woven w/ blue tattersall pattern, double breasted
AMERICA, 1920s   www.augusta-auction.com

Mr Freeze


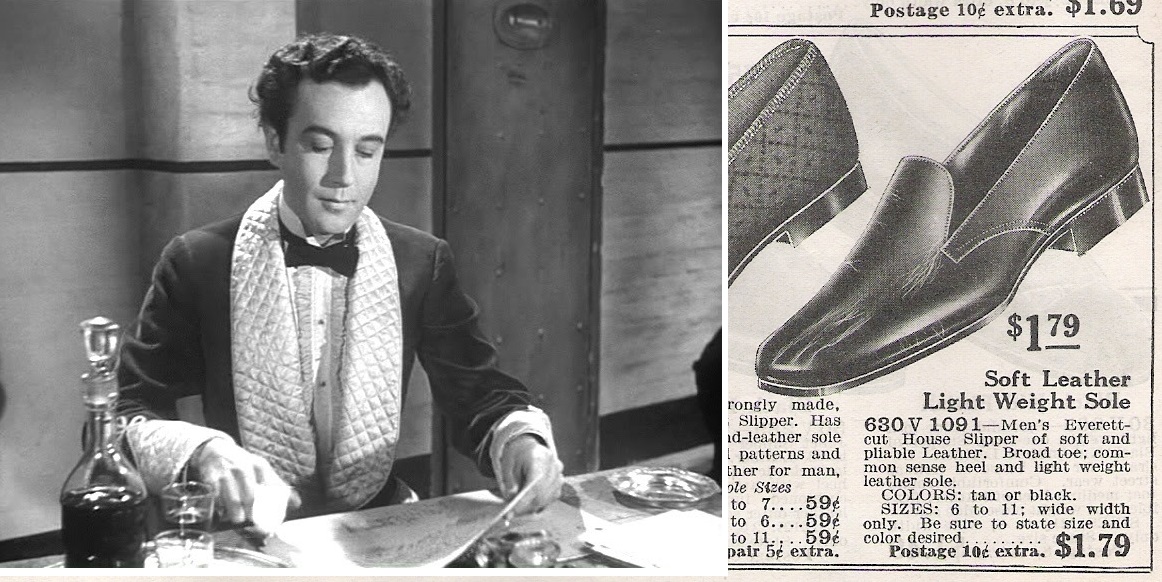
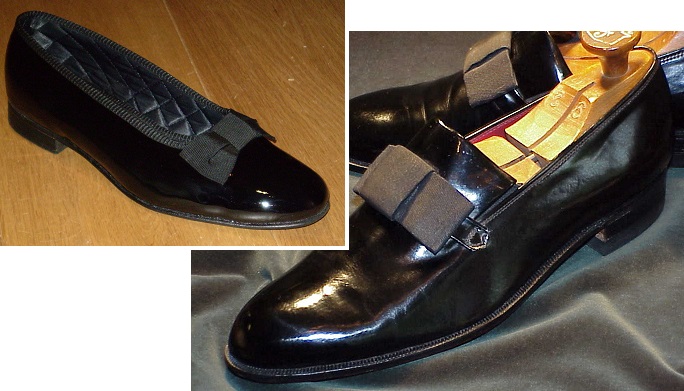
Mr. Freeze’s dressing gown was adapted to the period as a fully lined smoking jacket, which Jennifer made from silk velvet and devore satin that had been dyed two tone through the use of both acid and fiber reactive dyes.  The satin was quilted for cuffs and lapels, and a snowflake pattern stamped into the velvet.  His ascot is a dyed devore satin upon which a burnout dot pattern was created using Fiber Etch.  The tie pin was created using a jewelry pin back and rhinestone.  The cigar was modified from a purchased prop by being stripped and re-rolled in silver tissue paper.  His opera pumps were painted and embellished with ribbon binding and bows.  The Freeze’s dress shirt and trousers were minimally modified purchases.
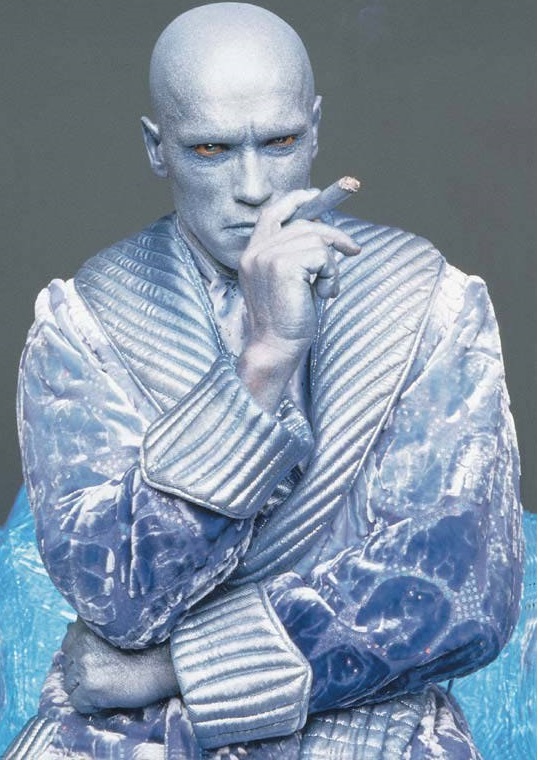


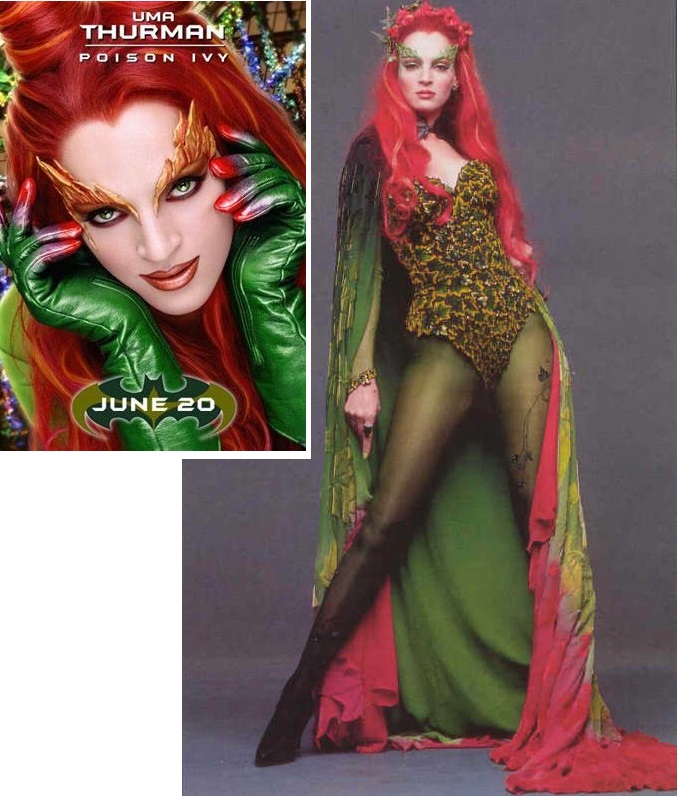
Poison Ivy


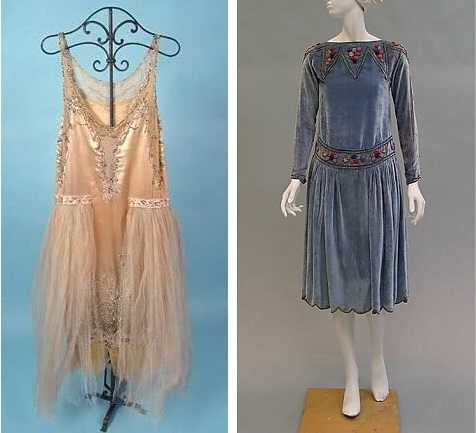
Poison Ivy wields her sexuality as a weapon.  We wanted to take advantage of Valorie’s tall, lean frame and chose to put her in a flapper style dancing dress with a handkerchief hem.  The dress was made of self dyed silk chiffon and the bodice lined with habotai in a matched color.  The dress is embellished with gold colored glass beads and paired with a matching chiffon scarf.  The gold beads were repeated in the embellishment of the gold dyed silk drawstring handbag.  Ivy’s gloves were dyed using silk painting techniques on purchased nylon gloves.  Her shoes were painted with gold leaf and, in her purse she carries her secret weapon, ‘poisoned’ lipstick and a gold painted compact mirror.
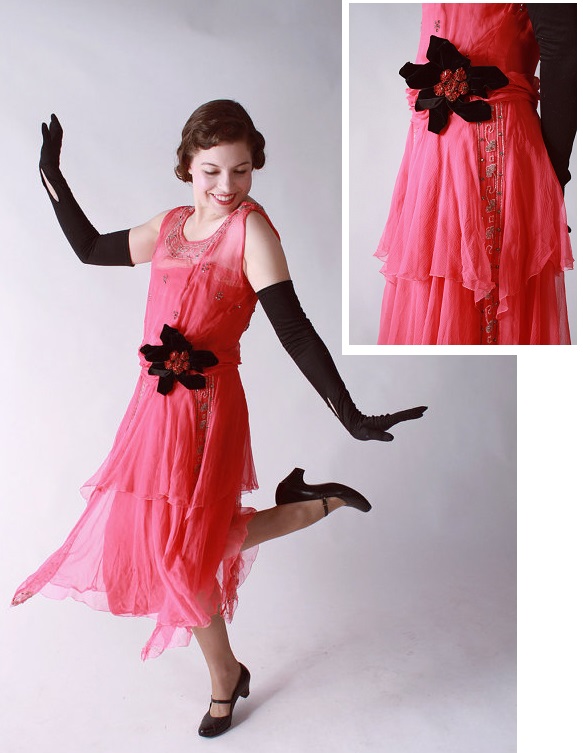
Vintage 1920s silk chiffon party dress for sale on Etsy.

Harley Quinn


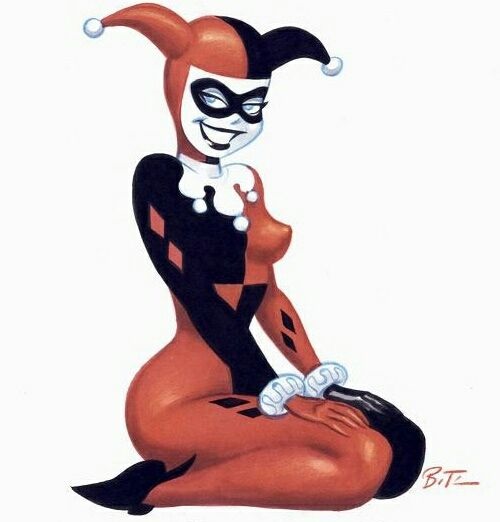
Harley Quinn is a strange combination of childish and womanly. Kristen wanted to reflect this through the blocky shapes in the trim, the wildness of the tulle and through the sophisticated beading she did on the belt and headdress. The choice of sleeve and coloring are based on the original design. The diamonds scattered throughout (in the belt, the fishnets, the headdress) are a homage to this as well.

*  *  *


And there you have it!  In the end, I chose not to include any of our progress pictures.  It was important to keep our documentation short enough that the judges would have the chance too flip all the way through it.  The more there is, the more they'll skim, and so we did our best to keep it as succinct as possible.   So much appreciation goes out to the members of the group who so graciously allowed me to share their work here with you.  Much of the personal information for people has been redacted, but I left the spaces in there to show you where it goes.  The only thing left to see is what crazy group idea I get pulled into next.

photo courtesy snarkyman

Monday, February 17, 2014

Project Summary: Bilbo's Dressing Gown from The Hobbit: An Unexpected Journey (2012)

I have a Honey, and my Honey has a particular affinity with Hobbits. So, when the first of the Hobbit movies came out, of COURSE he needed to have himself a new costume. We collectively latched onto the idea of the dressing gown. Him because it was quircky and awesome, me becaue I could turn my head to the side and go "How the f*** did they make that?" One of the things that I love about this hobby is figuring things out bit. I've not seen a lot of people attempt this particular project, so I really wanted to put what I learned out into the world. Hopefully, it'll help someone else.
In one of the early sequences of The Hobbit: An Unexpected Journey, we Bilbo settling down in his tidy dining room to eat his dinner in peace. As Tolkien fans know, Bilbo’s dinner (and his life) are interrupted by a company of dwarves. During this key sequence of the movie, Bilbo is seen wearing a quaint and cozy patchwork dressing gown.


The dressing gown appears to have been made out of a patchwork of velvets in a variety of solids colors and prints. The patchwork appears to have a random pattern. It has a solid burgundy velvet collar, cuffs and belt with piping on terminal edges that is light (but not white or ivory) in color and appears to have a very small pattern on it. Looking at the screen caps from the back, it appears that the back of the dressing gown could possibly be from three pieces with princess-style seams, which would give the garment a bit more of a fitted look. However, I could just as easily reason in my head that those were folds in the fabric. Seeing as how working with the quilting was going to be a challenge enough in it's own right, I went with the easier interpretation and went ahead and made the back a flat piece with a straight line seam down the center. Any fitting was then done at the side seams.

The pattern I used as a launching point was Butterick 3648 Making History: Dickens St. Nicholas/Ghost of Christmas Past. I chose this for simplicity's sake: I already had it on hand and it was 'close enough". I figured a bathrobe couldn't be that hard to cobble together. So I adjusted the sleeves to be a bit more tube-like and the robes shorter and less full.


I made a muslin mock up out of an unremarkable cotton print from my stash. It was important to keep in mind that heavy fabrics will stand out more and this was taken into account in the fitting. Hem allowances for collar, cuff and bottom hem were taken into account. Grain lines were marked onto the mock up pieces, which was critically important for matching the patchwork layer.

The muslin mock up was disassembled and laid out as a guide for assembling the patchwork layer so that I wouldn't have to quilt any more of the velvet than absolutely necessary. It appears that the dressing gown is made of quilted velvet, sewn together in squares and rectangles to form a completely randomized pattern. The next step was to sort out what, if any, sort of pattern was used in the organization of the quilting. A couple of black and white prints of the costume helped me focus. I used the base of Bilbo's ear as a size reference and then outlined all of the places where I could identify the shape, then extrapolated from there.


This is what I could come up with as far as a recognizable pattern.  A few of the 8-square blocks had a repeated pattern and I could identify four distinct arrangements.  For each block, I penciled in what color/pattern arrangements were present.


While it was impossible to find the exact fabric patterns that were used in the movie, we compiled a set of fabrics to give the same impression of texture and color in the original. Some fabrics were used in the form in which they were purchased; other pieces of fabric were dyed into one or more colors to create more variety in the final piece.

When choosing fabrics, I wanted to stick to natural fibers. This gave the benefit of breathability, and also the opportunity to adjust the colors of some basic light colored solids to increase variety. Choices were further weeded down by systematically ignoring all stretch or panne velvets that were available. I was left with the choice between cotton and silk, and went with cotton because of the appropriate prints I could find and relative affordability. While a few of the patches in the final garment are presented in the exact color in which they came, many more were dyed to that color by Michelle and I. I purchased large quantities of solid colored velvet in light blue and ivory, then cut them into 1/8 yard pieces and dyed them in small batches using Dharma Fiber Reactive dyes to yield a stunning array of blues, greens, golds, reds and browns.

All of the velvets and lining material for this costume were purchased online from Denver Discount fabrics. They did not have the appropriate color of burgundy for the trims, so that was also dyed by hand using the Buttercream velvet and Dharma Fiber Reactive dye in Burgundy. The 100% cotton chambray lining was originally purchased in peach, but the fabric was a poor match for the velvets and was also thrown into the burgundy dye bath. The cotton print for the piping was pulled from my stash and was originally a pale lavender. To help it blend in with the earthier tones of the velvet patchwork, the print was dyed with a mix of maroon and brown Rit dye, giving it a much more muted color.

My honey was conscripted to help with the cutting and labeling of squares, in addition to doing much of the ironing which had to happen to every seam. Trying to keep the nap going in the same direction for all pieces was a pain in the rump. What we ended up doing was to use chalk arrows drawn on the back of each piece.

SO many little squares and rectangles.

A plain cotton muslin was dyed a dusty rose and used as lining.  Once each of the body and sleeve pieces were fully quilted, I used the lining pieces to cut out the pattern piece from the quilting.  The lapel is made from two 3" wide strips of velvet that were tappered to 2" at their terminal ends, then attached to a cotton backing with piping along the seam.  The cuffs have velvet on the inside and out, with piping along the terminal seam.  The belt is simply two long strips of velvet sewn right sides together, then turned right side out.  The hem was turned up and sewn by hand to avoid obvious stitch lines on the velvet.


Photo by official CC30 photographer, Richard Man.


Photo by official CC30 photographer, Richard Man.

Photo by official CC30 photographer, Richard Man.

The hairy feet, Honey did all by himself.  I had nothing to do with that, beyond the generous tip left for the housekeeping staff for cleaning up the dusting of curly dark hairs off of our bathroom floor.  We entered the Sci-Fi/Fantasy Masquerade at Costume Con 31 (May, 2013) where it received a Workmanship Award for Best Journeyman. Such a well dressed hobbit.


As a fun side project, I made up a small quilt to use up the leftover materials.  The quilt is made exactly like the robe, with lining and piping scraps pieced together for the backing, and rows of piping along both edges of the burgundy velvet border.  It's too small to be a lap blanket, but it should look lovely hanging on the guest room wall.


Sunday, December 8, 2013

Hanbok: Traditional Korean Women’s Dress

Below is a repost of the documentation I submitted with my entry in the Costume Con 31 Historical Masquerade.  The information presented is correct to the best of my knowledge, but should you believe something to be otherwise, please let me know. 

*  *  *

Hanbok: Traditional Korean Women’s Dress 


© Eric Lafforgue Photography, http://www.ericlafforgue.com/


Costume Con 31
Historical Masquerade
Ethnic Dress Category 

*  *  *

Introduction 

When my wife’s college friend moved back to the United States after seven years in South Korea, she brought us gifts. To me, she brought fabric. Among the treasures was an interesting piece of synthetic organza in two colors, with embroidered designs placed (so I thought) haphazardly around the piece. I quickly took to the internet to determine just what one would make out of dress fabric in Korea and that’s how I discovered hanbok. Hanbok is the combination of a jeogori (short bolero-style jacket) and chima (high-waisted wrap-around skirt). I soon came to believe that the fabric piece was intended to be made into a jeogori, and this entire costume is built upon it.

My goal 

To design and create a complete outfit built around a modern hanbok using the material gifted to me by a friend on her return from South Korea.


*  *  *

History of the Hanbok

The basics of the Korean style of dress were established as early as the Three Kingdoms’ period (c. first century BC to the seventh century AD), and they have remained conceptually similar through the present day. Painted murals from the Goguryeo kingdom, which date from the third to the sixth centuries AD, clearly show the early forms of Korean dress.

Traditional Korean Costume, page 8


Any major changes that Korean clothing was to undergo between then and the modern era took place over the next thousand years, so that by the beginning of the Joseon period (1392-1897), the characteristics of traditional hanbok were essentially in place. Despite foreign influences on Korean society from the Chinese, Japanese and the Russians, the traditional features of Korean dress survived. While Korean traditional dress may have incorporated stylistic elements from these foreign sources, the Koreans also retained their own indigenous style, characterized by the beautiful shapes, colours and fabrics found in hanbok’s traditional garments. 

 Traditional Korean Costume, page 13

With regards to the women’s hanbok, as the Joseon period progressed, the jeogori became shorter, while the skirts grew ever more voluminous. But what the jeogori lost in length, it made up for in decorative devices, such as bright colors, long breast ties and norigae. Hairstyles also grew more pronounced, and there was widespread use of extravagant hairpieces and ornamentation. While styles have modernized with the times, women’s hanbok is conceptually quite similar to what was worn at the close of the Joseon period. Cut and materials may change, but the essential elements of Korean dress persevere.

Today, it is most common to see Korean women wearing hanbok on national holidays, New Year’s Day, and other festive occasions. The traditional costume is also worn to celebrate a child’s first birthday, when attending funerals, and at weddings.

*  *  *

Inspiration

The variety of hanbok in existence is frankly astounding. Luckily I had already selected the fabric for the jeogori and the rest of the outfit could be built around a jeogori with a light-colored body and darker cuffs and neckband, embellished with silver and pink flowers and butterflies. From there, I picked a chima that was darker in color, to fit more comfortably with my own personality. Included below is a small selection of some of the images which I found most influential in choosing the style of my hanbok.

Wedding Inspirasi 

http://tesserae.blogspot.com/2010_07_01

Kayla's Korean Adventure

*  *  *

The Construction Process

The Jeogori

The jeogori is only a small part of the whole of hanbok, yet it is a very busy piece. Lavish fabrics in bright colors and decorative stripes, embroidery or other ornamentation make the jeogori quite eye-catching. The jeogori closes with a pair of ties or sashes called otgureum, which are often brightly colored and adorned with designs of their own. The otgureum is tied into a single bow knot and the tails allowed to flutter as the women walks. Additionally, the neckband of the jeogori contains a narrow strip of detachable white paper or fabric which can easily be removed and replaced so that the jeogori itself requires less frequent laundering.  
The fabric for the jeogori is where this entire project began. Brought back from South Korea as a hostess gift, the fabric came in two colored parts, each with oddly shaped and arranged embroidered designs and bearing the same background pattern woven into the fabric. The fabric was 22.5” wide and the length split into two sections: 104” of aqua and 24” of the teal.


An initial mockup was made which was a true representation of Folkware #141 using scrap fabric. This step was crucial for me to learn how this garment of non-western construction would piece together. Particularly troublesome was understanding how the lining of the angled cuffs would fold back under and lay smoothly. Difficulties with this step led me to choose a more delicate lining material for the cuffs to facilitate ease of finishing. Adjustments were also made from this step to lengthen the arms, widen the neck opening and lengthen the body of the jacket to cover the waist ties of my chima.


A second mockup was cut, taking the above modifications into account. Having already established the assembly and finishing, my focus for this step was to adjust pattern pieces to best utilize the irregular placement of embroidered patterns on the irreplaceable piece of fashion fabric brought back from South Korea. Additional vertical seams were put into the right and left front pieces and the body of the sleeve was shortened in order to fit the narrow width of the fabric. The cuffs were lengthened to compensate for this change. The neck band piece was asymmetrically split into two pieces to allow for making the neckband out of darker contrasting color to match the cuffs.


Hanbok circa 1950s displaying seams in the left and right front panel of the jeogori.
Photo from Etsy seller julzz4u  

Neckband and dongjeong top-stitching detail, from hanbok-boutique.com

Second mock up, showing divided front left piece.


In making the mock ups, I discovered that I was unhappy with the way the pattern handled the dongjeong, the strip of white around the neck band. The pattern called for a strip of twill tape or ribbon to be sewn into the neck-facing seam of the neckband and serve a decorative purpose only. As the dongjeong was originally made of paper and designed to be a replaceable mode of keeping the collar of the jeogori clean, I wanted to do something similar. As paper would have been uncomfortable against the skin, I instead used a 1.5 inch wide piece of white silk ribbon folded over the neckband seam and top-stitched into place.

The second mock up was disassembled and used as pattern pieces

The window was used as a backlight to check the placement
of embroidered details on the jeogori pattern pieces prior to cutting.

Although the pattern called for a bag lining of the body and unlined sleeves, I was concerned that the seams would show through the somewhat transparent fabric. I instead flat-lined all jeogori pieces with either white habotai silk (for the lighter aqua pieces) or a dark teal silk from the stash for the darker fabrics of the neckband and cuffs. The lining fabric for the front pieces was cut against the selvedge and seams bisecting the front pieces were ironed flat and left unfinished to reduce bulk. Seams under the sleeves, at the arm and at the shoulders were hand-finished with a flat-felled seam and care was taken that the stitches not show through on the outside of the garment.

Dark colored basting stitches were used to flat line the fashion
and lining fabric together to facilitate their removal later. 

Snap closures and piping on garment displayed by Rosie Thorn in her panel Traditional Korean Clothing 101, presented at Nak-Kon Anime Convention in March of 2013.  

I chose to add piping to the jeogori so that a contrasting color could be brought in to emphasize the borders between light and dark fabrics. A bright pink was chosen to echo some of the subtle coloring in the embroidered floral embellishments. I wanted to use the remnants of the habotai silk to keep the piping from being bulky. The silk and the cotton cord were dyed in the same dye bath using fuschia Rit dye, which is designed to work on both plant and animal protein fibers equally.


I also chose to add a snap closure to the front of the jeogori to bear any weight put on the front closure. This way, the shape of the otgureum, or bow, would not be affected by pull from wear. As the fabric from the cuffs and neck band of the jeogori was in short supply, I choose to instead make the otgureum out of ribbon in a complementary color. As the piecing of the body of the jeogori left one orphaned bit of embroidery, this was utilized as decoration at the end of the top ribbon.

My jeogori

Detail of otgureum with applique made from leftover jeogori fabric scraps.


Close up of my jeogori showing piping, otgureum and dongjeong.


The Chima

Chima refers to a wrap-skirt consisting of a number of panels sewn together and gathered at the waist with ties to tie the chima firmly, minimizing the prominence of the breasts. The chima did not undergo as many changes throughout history as the jeogori, however, in the late nineteenth century, the hem of the skirt was raised off of the ground and the waist pleats became wider among ‘modern’ women, those who were open minded about Western culture and clothing styles. This modernized version of the chima, with suspender-like shoulder straps attached to the waistband, enabled women to move more freely and wear the waistband of their chima looser.


Traditional Korean Costume, page 251


newsen.com


Chima from hanbok-boutique.com which had shoulder straps of a contrasting color.


Folkware #141 was only lightly referenced in the making of the chima. Modifications to the pattern: chima size adjusted to utilize three widths of the red poly satin in order to take advantage of the selvedges and avoid the need to finish seams, which limited bulk and kept a smooth line. The pleating guide disregarded in favor of a gathered waist.

I added an organza overlay as I felt that the chima was too plain on it’s own. For the overlay, the width of the fabric was used as length so that there are no seams, only chiffon hemmed edges. The ties were changed to organza strips instead of pieced ties matching the body of the skirt because organza would hold the knot better than the poly satin. The lime green shoulder straps were made with a piece of grosgrain ribbon from the stash.


My chima, full frontal 


My chima, back view

Sokchima

The sokchima is the petticoat worn under hanbok. While many styles are available, I chose to recreate one which combines a breast-binding sleeveless top with a bodifying skirt.


hanbok-boutique.com


I wanted my sokchima to serve multiple functions and so I chose to recreate a style of petticoat with an top portion which could provide some support across the breasts. I drafted my own pattern for a double-layered top out of white rayon which would be soft to the skin, breathe well and not show through the light colors of the jeogori. The neck and arm holes were bound with silk ribbon. I paired this with a dark purple skirt portion, largely to use up the large quantity of dark purple synthetic lining fabric that I had leftover from making dresses for my wedding. Although the examples of petticoats that I could find were all white, I felt that it was not necessary to purchase additional fabric in white when the chima I was making was quite dark and opaque. The center back of the top portion closes with bra strap hook-and-eye closures. The skirt is made in two layers, with net ruffles attached to the base layer. Each layer of ruffle was cut approximately double the circumference of the petticoat and then pleated to fit. A wide band of white lace trims the hem of the sokchima so that it might be visible as I walk.

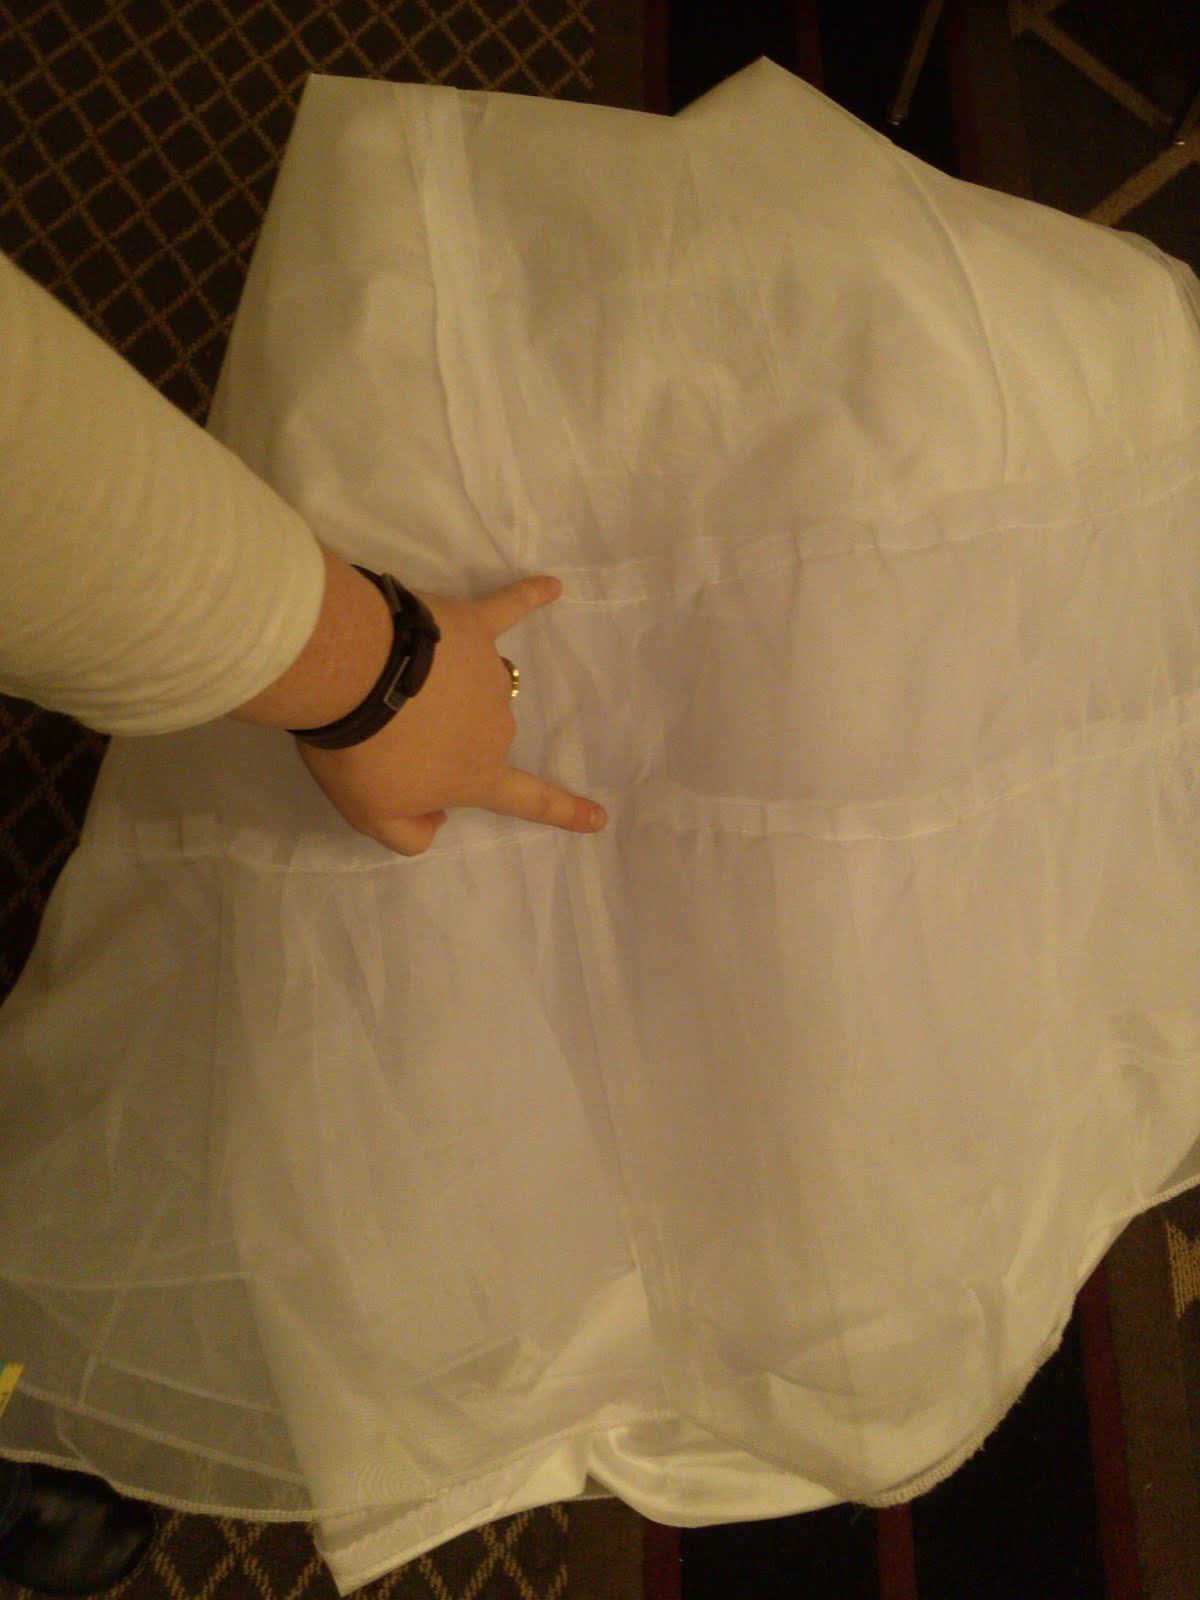
The following diagram displays the math utilized to determine the appropriate size of skirt for the base layer of the petticoat. The top layer is cut to be the same diameter as the finished chima. The petticoat is intended to fall close to the same length as the chima, so that the lace detail may peak out.


Measuring the distance between ruffles (approximately six inches) on garment presented

by Rosie Thorn in her panel Traditional Korean Clothing 101, presented at Nak-Kon
Anime Convention in March of 2013.


My sokchima 

Back of my sokchima
*  *  *


Accessories

Hairstyle and Ornamentation

Both men and women wear hair ornaments for practical and decorative purposes. Before marriage, both men and women wore daenggi, a ribbon tied at the bottom of their long braids. After marriage, it was customary to wear the hair up: women in chignon buns and men in a topknot. Both sexes used a hair stick to hold these hairstyles in place. The ornament for women was the binyeo, an asymmetrical stick of varying length with decorative stones or carving on one end. The chignon were also often decorated with vertically inserted ornamental hairpins called dwikkoji. The wearing of multiple dwikkoji was common and popular designs included flowers such as the lotus or plum blossom, butterflies or the phoenix.


http://askakorean.blogspot.com/2010/03/traditional-korean-hairdo-for-women.html

Jjokjin meori is probably the most classic Korean hairstyle for women, and it is popular to this day. Jjokjin meori is formed by first parting the front part of the hair and then tying braided hair into a bun in the back of the neck.

The binyeo is utilized to help the chignon hold it’s shape. The materials and design of binyeo show significant variation. Binyeo could be made with gold, silver, jade, wood, bamboo, or animal bones, and popular designs include symbols for phoenix, dragon, wild ducks and lotus flowers. The size of the binyeo can also vary -- some of the decorative binyeos for ceremonial wear were as long as two feet!


I simulated the look of jjokjin meori by making a chignon bun out of a braid of false hair, which is attached to a comb with auburn colored satin-finished embroidery floss. The idea for such an appliance was taken from online shops which sold hanbok and accessories, such as the example below from sonjjang-hanbok.com.


The binyeo I present is composed of a darkly stained and smoothed wooden stick adorned with an aventurine ring to resemble jade and tumbled garnet stones (my birthstone). The dwikkoji were created by relieving a pair of costume jewelry rings of their decorative bits and attaching those bits to hairpins which have a flat disk at the head. The dwikkoji and binyeo were utilized in the assembly of the chignon bun to help keep the layers of braids in order. In addition to the comb, non-decorative bobby pins will be used to secure the entire system over a small ponytail at the back of the head. A scrap of dark teal silk, also utilized for lining in parts of the jeogori, was wrapped around parts of the braid, both to hide construction elements and to add a bit more color.


My completed chignon with binyeo and dwikkoji.


*  *  *


Norigae

Norigae is a decorative ornament which is hung from either the breast tie of a jeogori or to the waist ties of the chima. While the precursors of norigae have been found in tombs dating back to the Silla dynasty (57BC - 935), the widespread popularity of norigae can be attributed to its appeal to the aesthetic and emotional senses of women of the Joseon dynasty. Norigae were worn by women of all social classes and exhibited much variation in size and materials. At it’s most basic, a norgigae consists of an elaborately knotted silk cord which often contains some sort of ornament, and ending in a tassel of silk yarn. Ornaments could be purely decorative and include carved jade, precious stones, silver, gold, pearls and amber. Ornaments could also be functional, examples of which include a small knife, a perfume case or containers for a woman’s sewing needles.

The traditional Korean art of decorative knots which is used to make norigae is called maedeup. In maedeup, a single silk cord is folded in half and each end is woven and tied to form a perfectly symmetrical series of knots. Many of the patterns created represent familiar items such as those found in nature (butterflies, dragonflies, chrysanthemums) or household items (buttons, rings), in addition to complex geometric designs. Depending on the occasion, a single norigae or norigae sets could be worn. According to the number of norigaes that make up the set, it is called a one-part (danjak), a two-part (ijak) or a three-part (samjak) norigae. Although five- and even seven-part norigaes are evidenced through artifact or photograph, samjak was generally the limit for most occassions.


Three-part ornamental maedup by Eun Young Kim, knotted silk with
silver and jade adornments.  Korea, 1991 - Victorian & Albert Museum


Hanbok ornament made of artificial jade and silk.  36cm
www.hanbok-boutique.com  


The norigae that I present is a danjak (one-part) norigae which features “good luck” and “button” knots made from 2.0 mm Korean knotting cord in purple and aqua. The main ornament and beads are aventurine, which was chosen to simulate the look of jade. The tassels were made of 0.42 mm silk beading thread in purple, coral and a hand-dyed teal and the tassel heads are bound with 30wt. gold silk thread. The entire norigae measures 43 cm in length, a bit on the long side for the average Korean women, but I was more concerned with replicating relative proportions than exact measurements and gave my norigae some additional length to compensate for my height.


Using a scrap of cardboard to make the tassels.


My completed danjak norigae.

*  *  *


Gomusin

Gomusin are wide, all rubber shoes with short sides and little to no heel. Molded in a single piece, the shoes are waterproof, quite useful during Korea’s long rainy season. Construction of rubber shoes began during the Japanese occupation period of the 1920s and 30s. Popular due to their affordability and ease to clean, rubber shoes remain an inexpensive alternative in footwear to this day.


Ladies “Woon-hye” shoes.  All rubber, middle 20th century.

From the online ethnographic collection, Shoes or No Shoes footwear museum, Belgium.
http://www.shoesornoshoes.com/index.php?page=collection&cat=ethno


http://gyopo.wordpress.com/2010/07/30/intangible/

The choice to wear gomusin was largely a practical one. Finding a pair of gotsin (leather shoes) in my size would have required placing a pricey special order. I was lamenting this fact to a friend, who thought she might have a pair in storage that I could use as reference when modifying a pair of Western shoes to approximate the right look. I was thrilled when I realized that the all-rubber gomusin that she sent me had enough stretch that they fit. Since the shoes were slightly abused and discolored in places, I chose to neaten up the exterior with light blue acrylic nail varnish in the same shade of pale blue. This evened the color and gave the gomusin a pearly finish, dressing them up a bit. Contrast was added at the toes with bright red varnish and the pointed toe emphasized with white silk thread.


My gomusin with the materials used to decorate them.


*  *  *

Beoseon (Korean traditional socks)

Beoseon is the type of sock that is worn with traditional hanbok. Historically made from silk and later cotton, the beoseon were thick and added warmth, protection and comfort to the wearing of the short-sided shoes that were favored amongst the Koreans Both men and women wore plain white beoseon, while quilted and embroidered versions were popular for children. Beseon are made of made of two identical halves with a single seam running from front to back and a characteristic upturned, pointed toe.


The beoseon that I wear were purchased from Sonjjang-Hanbok and are pictured above. 


*  *  *


the Completed Project


The completed project!
Photo credits to Don Searle of Fantascenes Phtography.


This was my first time competing as a Master, so I was pretty stoked with how well I did in competition. I got awards in all three categories: Best in Class for Documentation, Judges' Choice in Workmanship for Mastery of Multiple Techniques and a Presentation Award for Most Serene.

Looking back on this project six months later, those shoes are probably a lost cause.  The nail enamel started cracking with wear and, although they ARE rubber, they can only stretch so much and I fear they're just too small for extended wear.  I loved that chignon bun and will keep it around for other projects, but I cut my hair super short and now can't wear it.  I'll have to come up with a plan B for the head and toes soon, though, as I'm looking forward to wearing the costume around at Arisia next month.

*  *  *

References

Eun-sun, Choe.  “The Elegant Intricacy of Knotted String.”  Antiques Alive.  Antiques Alive Inc, 2004.  Web.  23 April 2013.  http://www.antiquesalive.com/masters/decorative/master05_view1.html


Kyung Ja, Lee.  Norigae: Splendor of the Korean Costume.  Seoul: Ewha Womans University Press, 2005.  Print.


Kyung Ja, Lee, Hong Na Young and Chang Sook Hwan.  Traditional Korean Costume.  Kent: Global Oriental Ltd, 2003.  Print.


Lenzen, J.D.  Decorative Fushion Knotting.  San Francisco: Green Candy Press, 2011.  Print.


Magda.  “Good Luck Knot Tutorial”  and “Button Knot Tutorial”.  How in China. Web.  12 September 2012.   www.chineseknot.howinchina.com


Thorn, R.  (2013, March).  Traditional Korean Clothing 101.  Talk presented at Nak-Kon Anime Convention, Overland Park, KS.

Yang, Sunny.  Hanbok: The Art of Korean Clothing.  Seoul: Hollym Corporation, 1997.  Print.


* * *


Special appreciation goes out to Danielle, who not only brought back the fabric samples that spawned the interest which led to this costume, but also allowed me to turn her Korean teacher’s uniform inside-out to look at the seams, enthusiastically helped me with my Korean pronunciation, coached me through a proper Korean bow, and invited me to borrow her fan for my presentation. This is entirely her fault.