Thursday, July 31, 2014

Costume College, here I come!

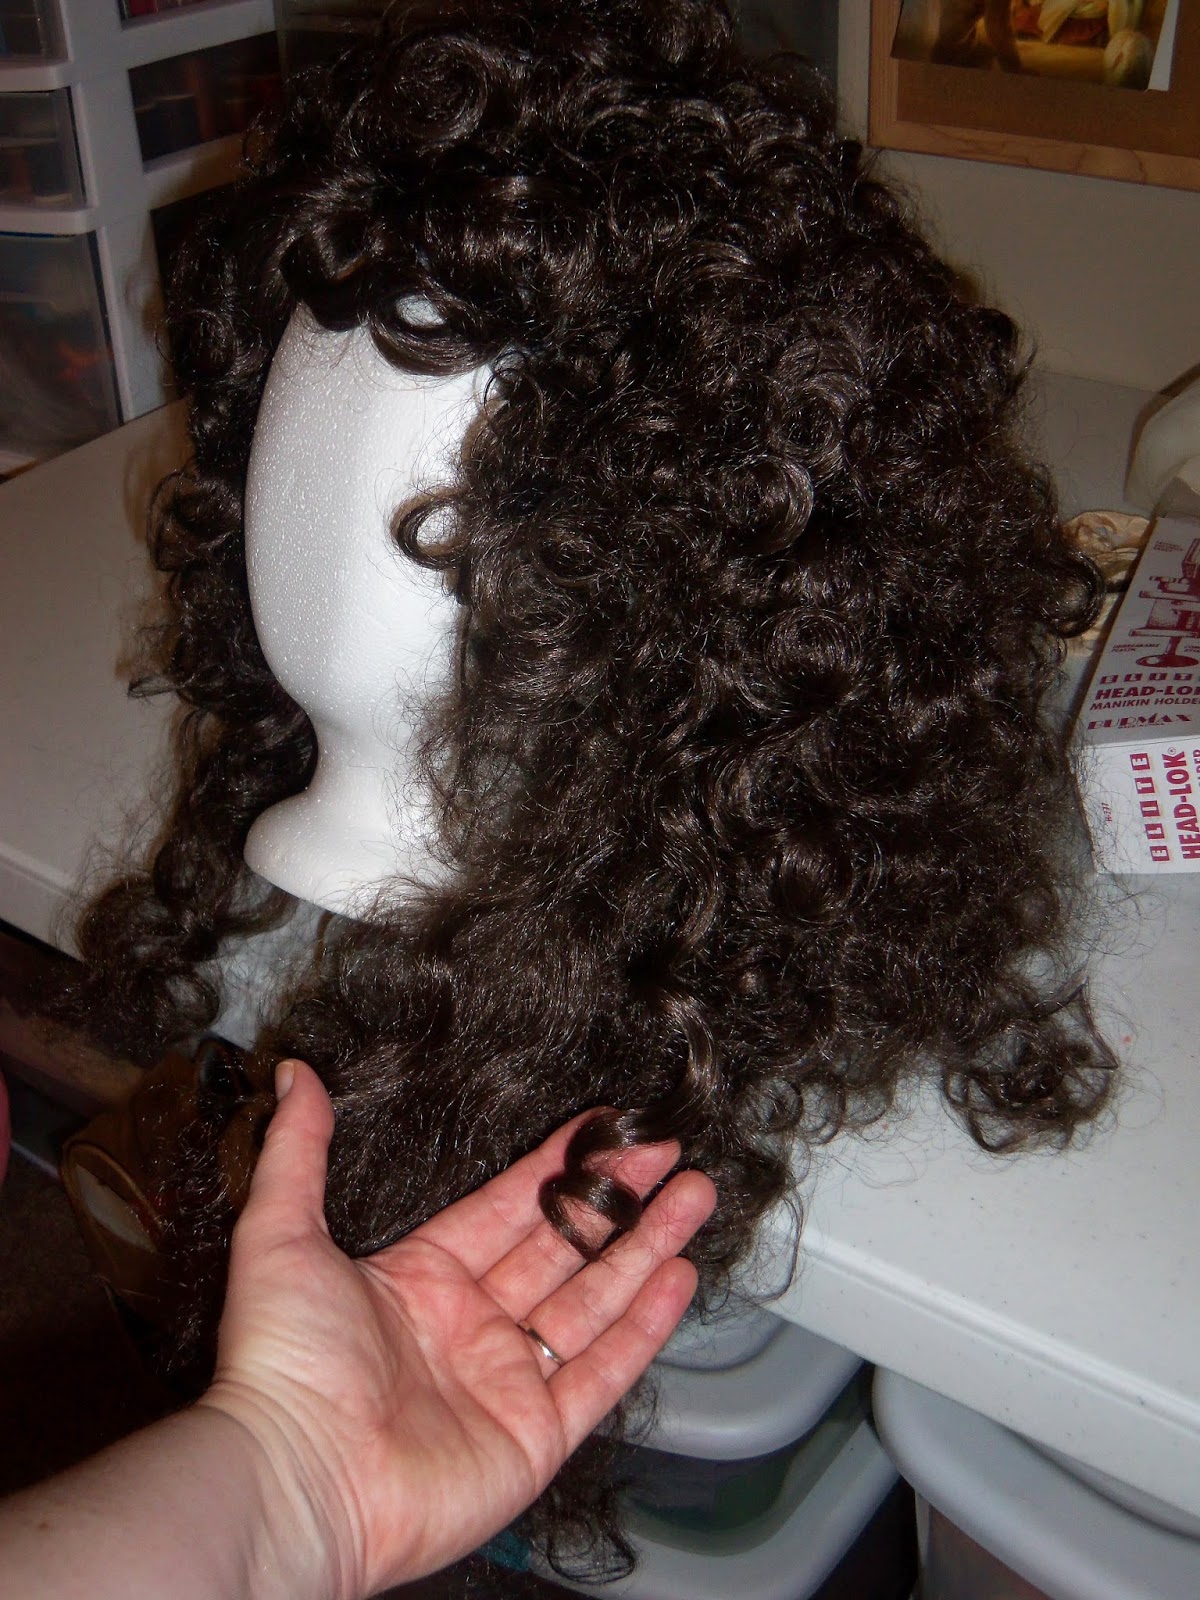
Well, we've made it safely to Los Angeles, with all costumes here in their entirety and very little finishing left to be done.  Curls and ribbons still need to be attached to his & hers 18th century court-appropriate wigs , as well as a generous second helping of hairspray and gentle fingers to get them Gala-ready.

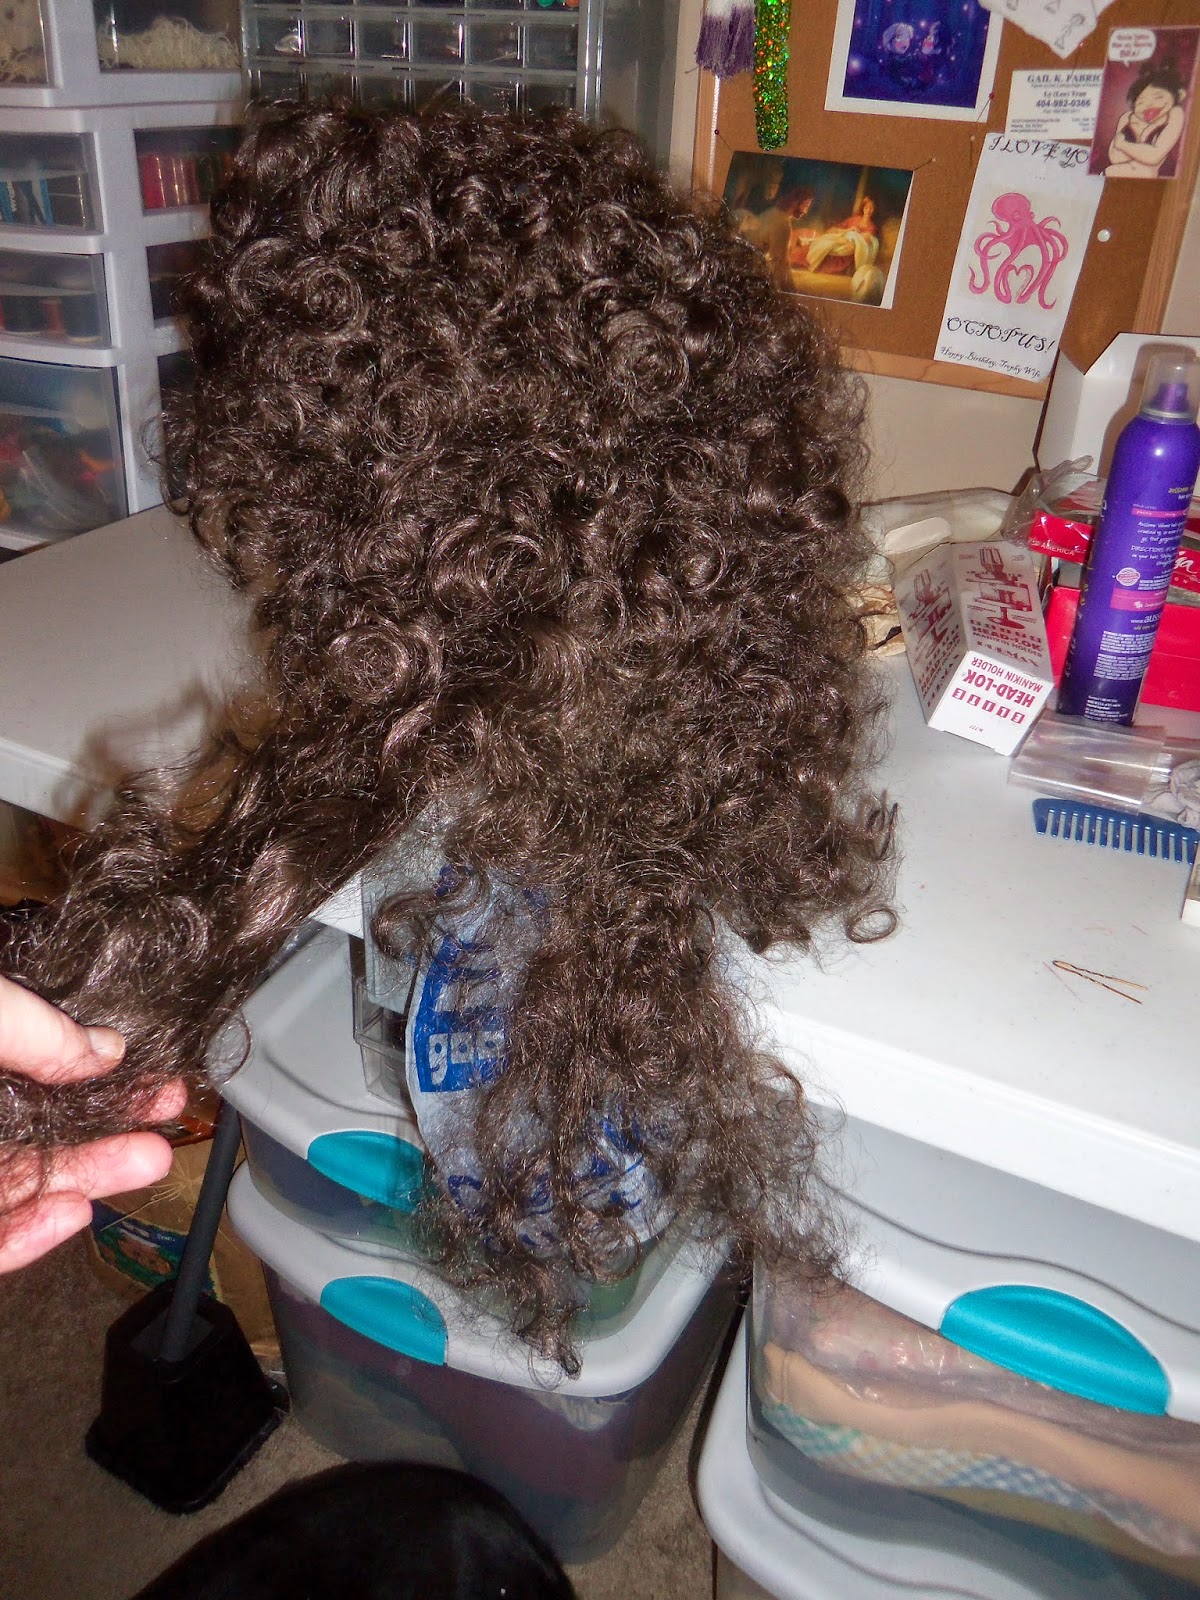
A pair of almost ready wigs.  While the base wigs are fully styled, any of the attachable pieces of curls and such were rolled up and packed in a separate box.  This avoided a significant amount of squish during travel.

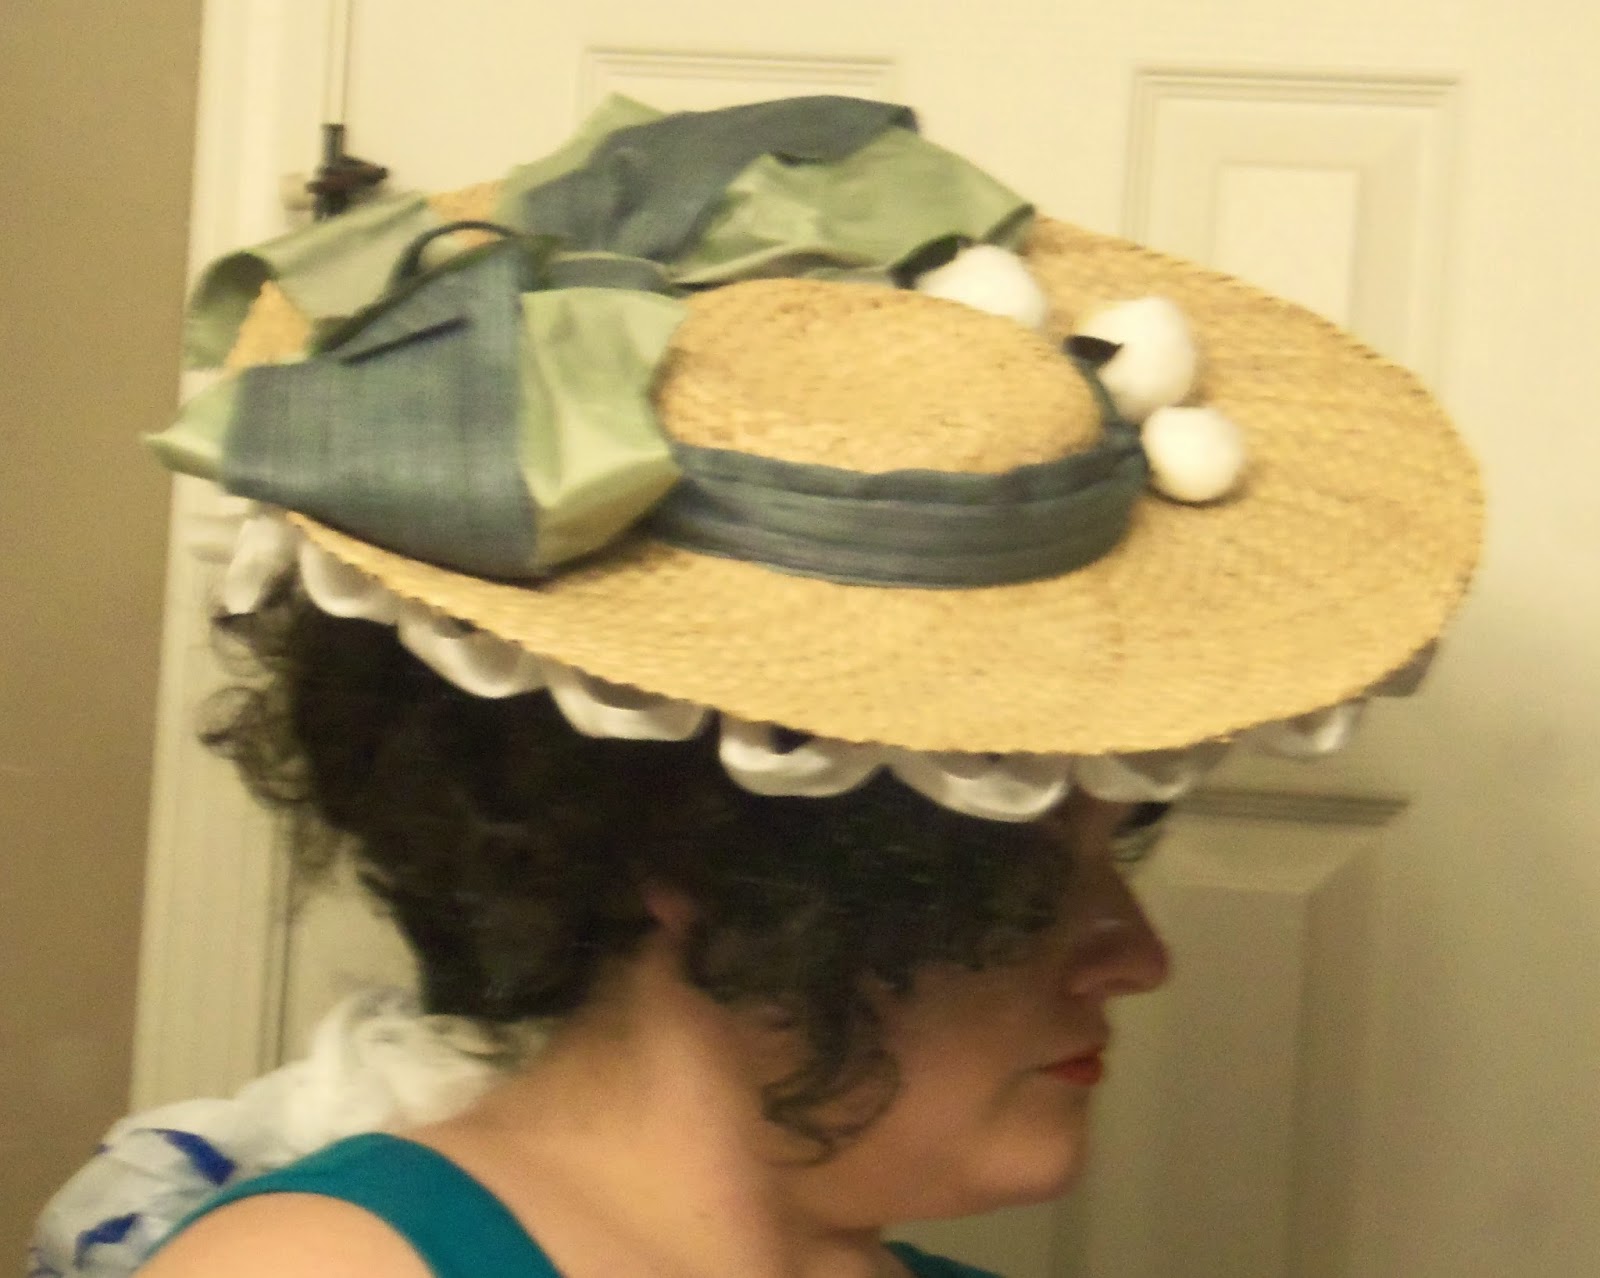
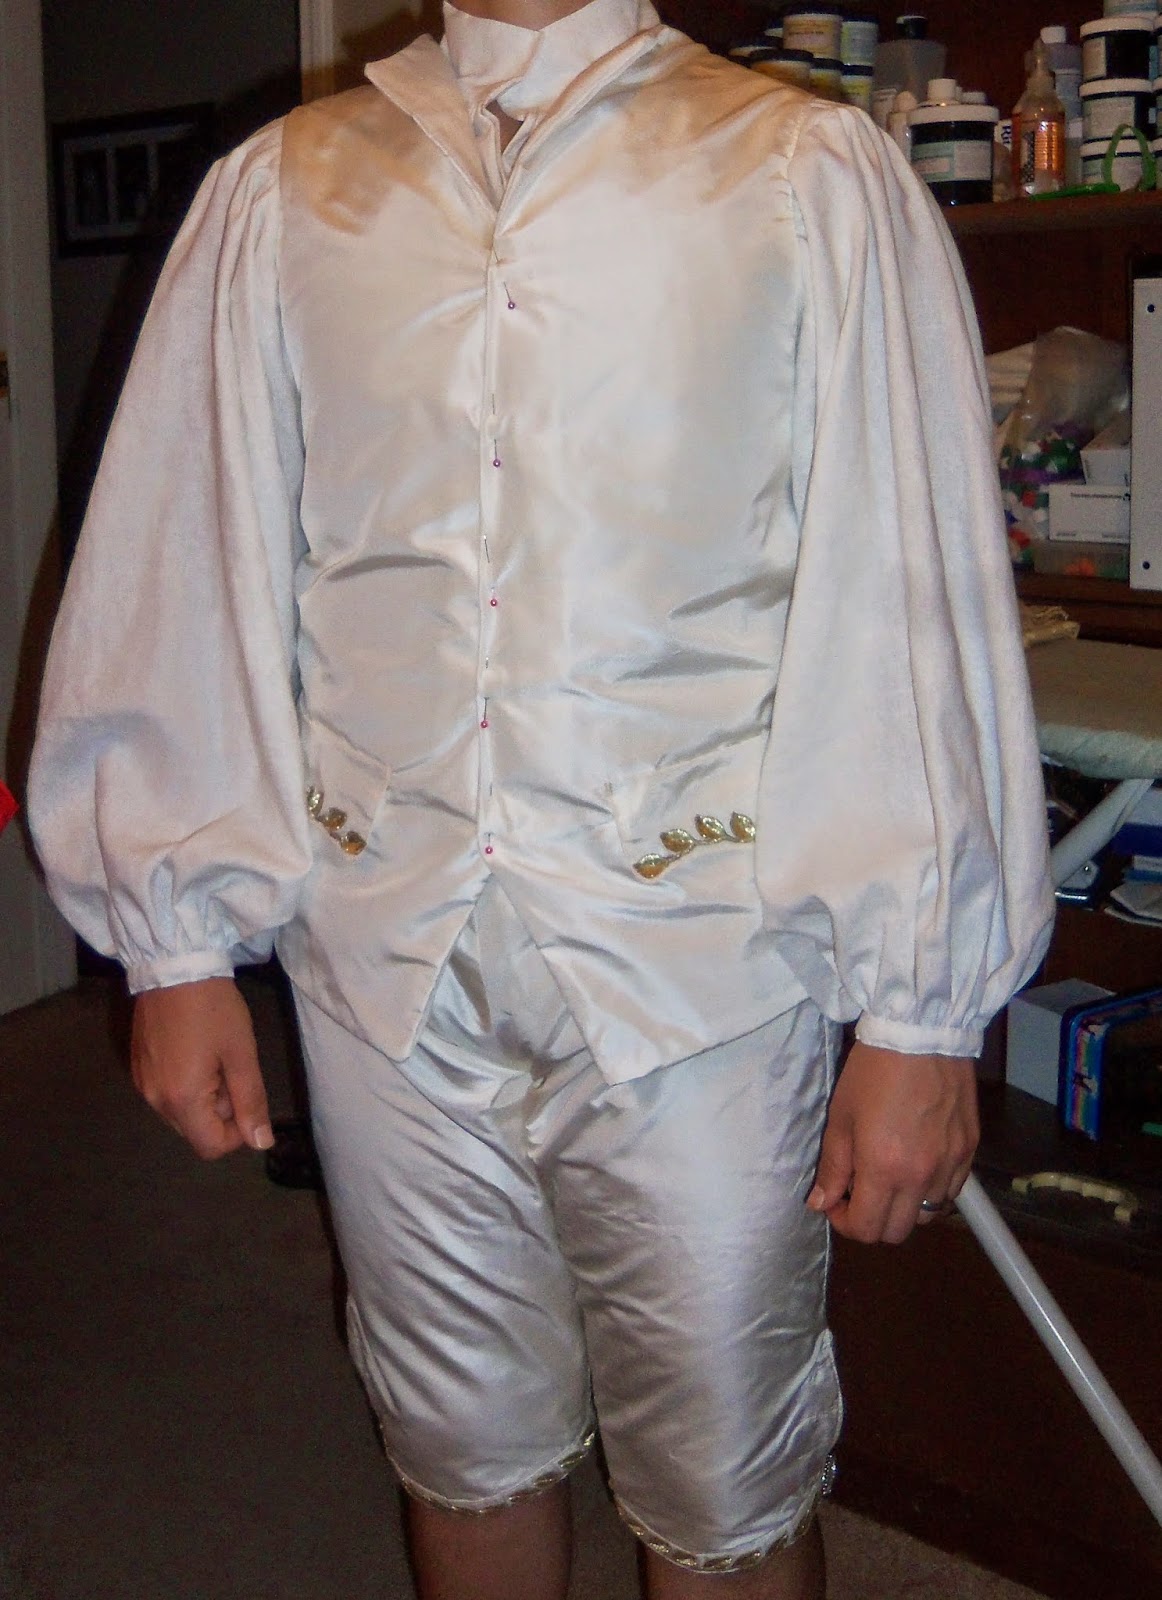
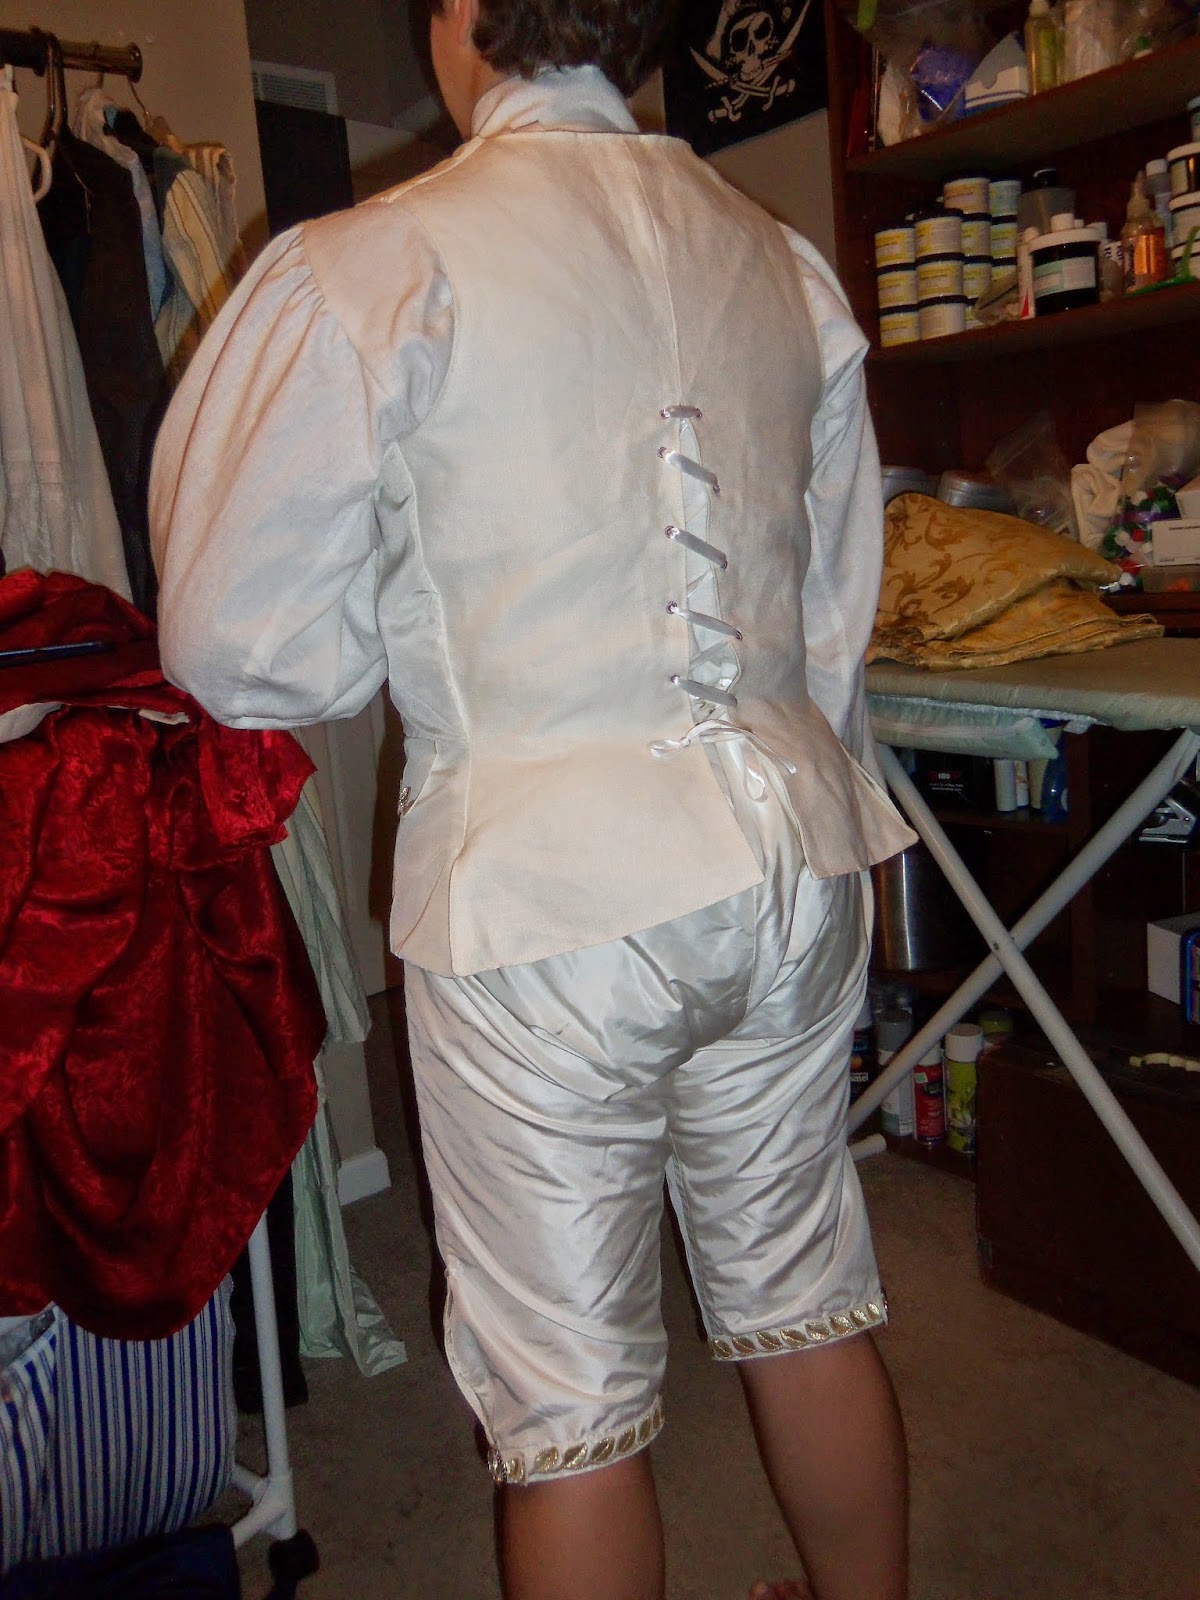
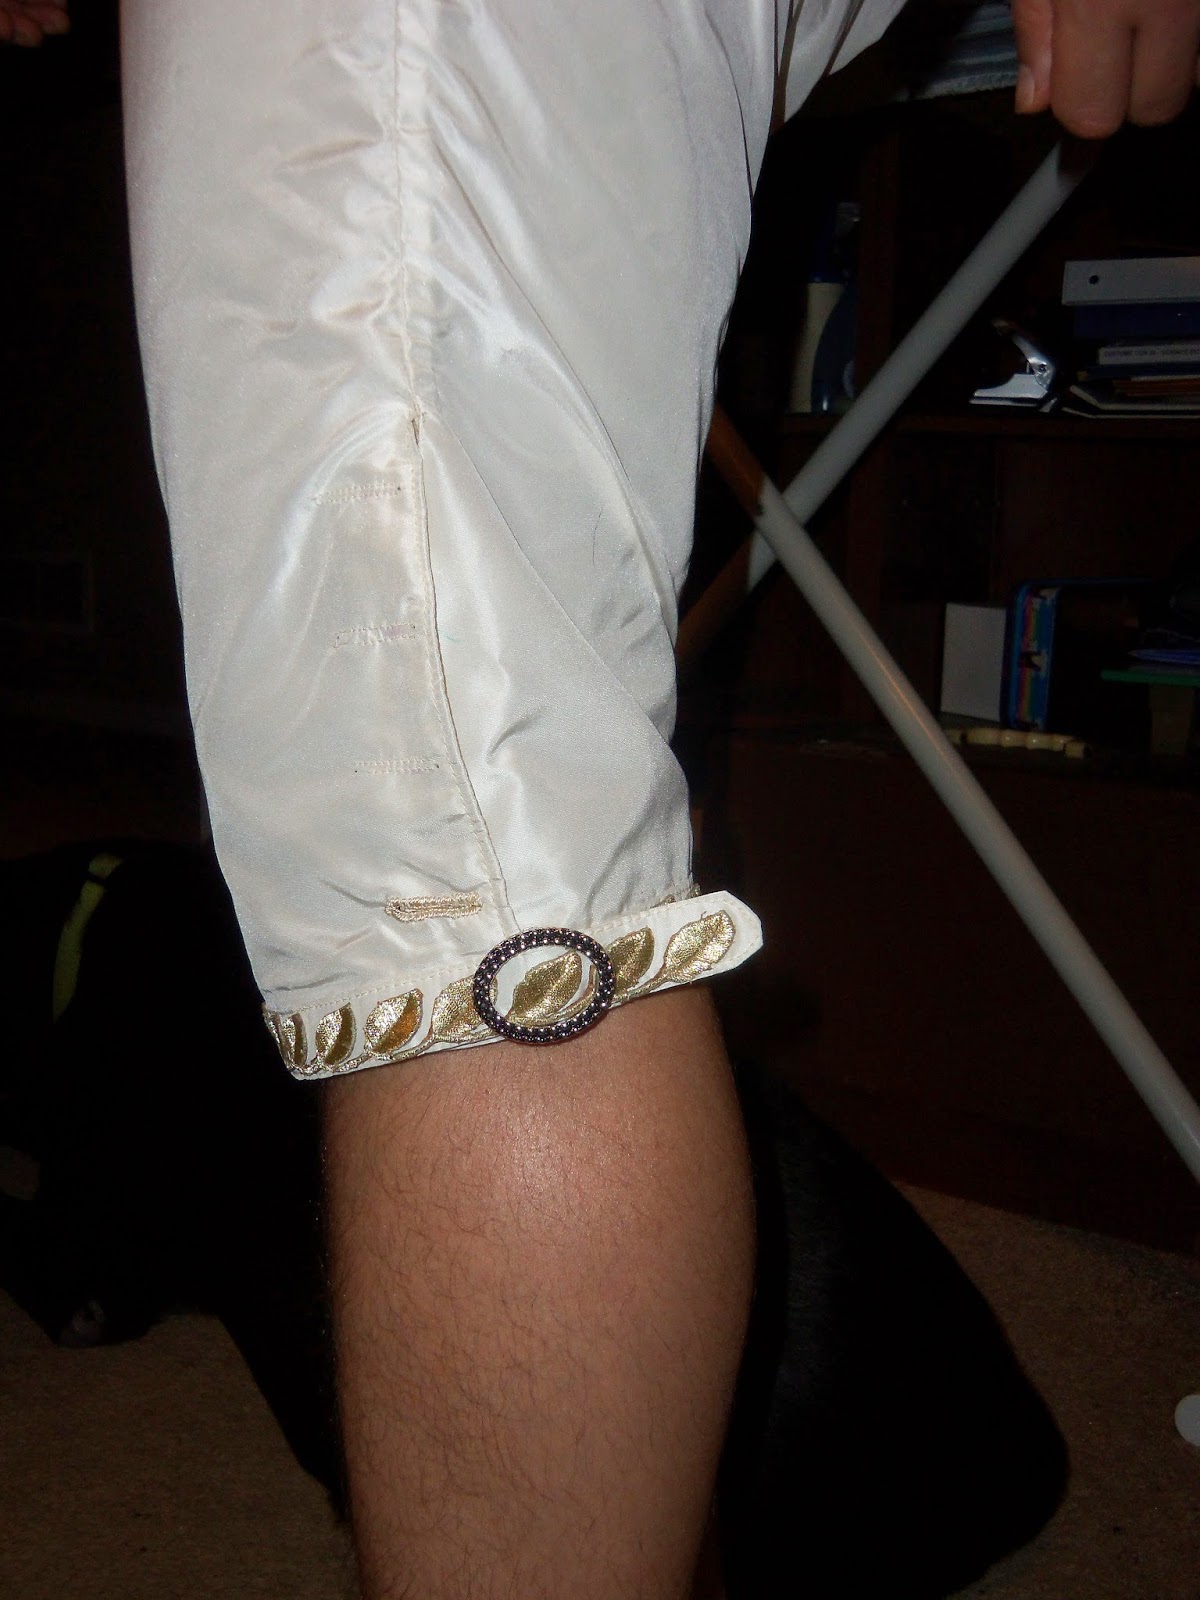
Honey's court suit coat still needs buttons, and the trim could use a bit of a touch up with a hot iron.
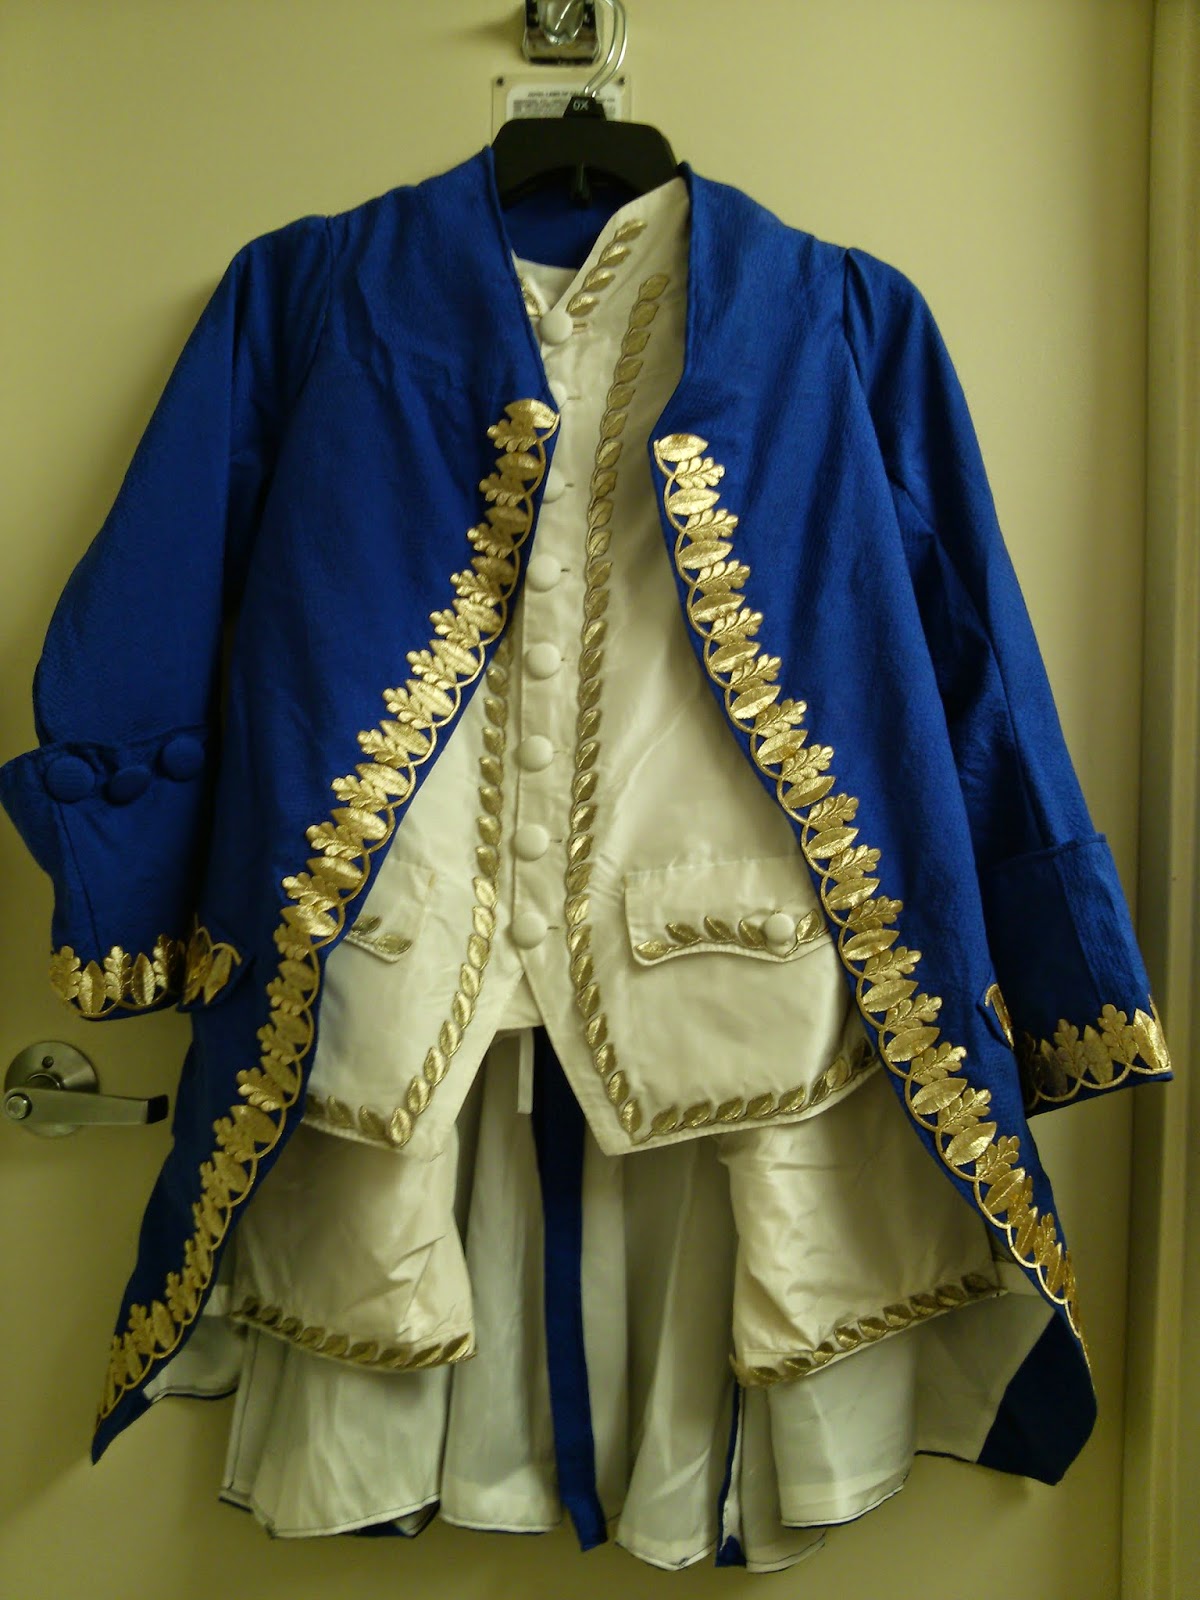
And a sneak peak at Honey's court suit.  Despite being a "last minute" project, I'm still just tickled at how it turned out.

Pretty much everything needs a good ironing, but other than that, everything was finished on time!  Thanks in no small part to our summer house guest and sewing buddy, Bethany, who stepped in when life frazzles made personally finishing everything an unattainable goal for me.  She took my mock up for the coat for the court suit, cut and assembled all the layers (including those persnickety cuffs) and had it ready for me to hem/trim/top-stitch and throw into a suitcase.  PLUS, she styled a wig up for Honey to wear with said court suit, so that now we can be a pair of poncy ash blondes together.  Plus plus, having another costumer hanging about all summer was infinitely handy for all of those little conundrums like "How should I shape this?" or "Do you think this goes like this or like that?"  Seriously sped up the process to have a constant source of "no, that's fine; keep going," on hand.

It feels weird to be going to a con "alone" for the first time in, well, perhaps ever.  I often travel or meet up with some assortment of my 'usual crowd', whether it's Costume Con, Dragon*Con, Arisia, or any number of smaller cons we've hit up along the years.  It really hit me when our plane landed at LAX and, other than the sister-in-law who so graciously volunteered to pick us up at the airport, we had no one to notify of our arrival.  There was no coordinating of dinner plans or making last minute supply runs.  While my Honey is accompanying me to the Gala, he's not attending the con itself and it hit me that I don't ACTUALLY know anyone else here.  Despite knowing that I'm approaching a long weekend at a hotel filled with people who geek out about costumes just as much as (if not possibly more than) me, I'm finding myself feeling just a tad bit lonely.  I am terribly non-assertive when it comes to interacting with new people, so if you see me standing about, please come say hello.

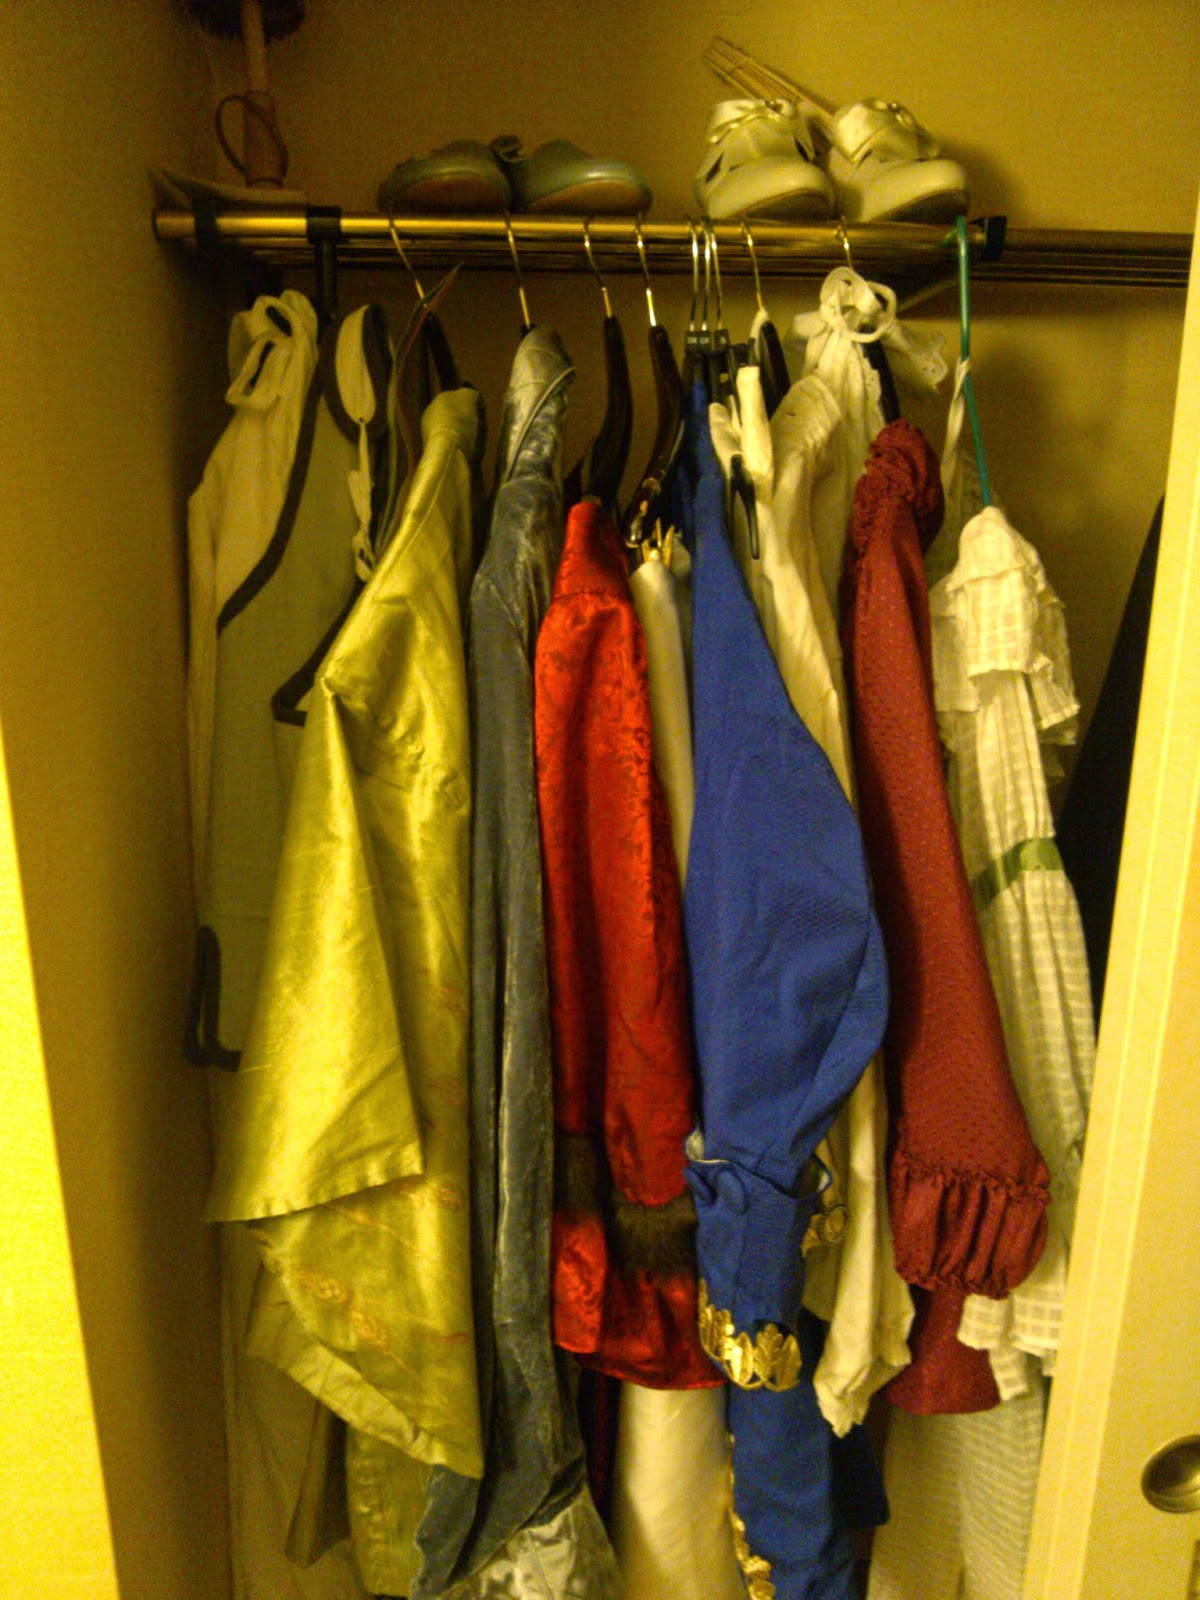
This costumer's closet.  Wow.  I'v been working my arse off since January.
It feels like it should have taken up more space than that.
From left to right we have:
Thursday Pool Party (purses and parasols): hibiscus kimono w/ crane parasol
Friday Night Social (club "ice"): Mr Freeze's 1920s smoking jacket (let's hope I don't regret wearing velvet)
Saturday Gala (If the Shoe Fits): His & Hers 18th c Court Ensembles
Sunday breakfast (Underdressed): 18th c short gown w/ cotton petticoat & white work apron
Sunday Tea (Ladies' Day at the Ascot): 1780s Chemise a la Reine w/ hedgehog wig and bergère hat

That's one ethnic, one cosplay (that doubles as 1920s), and three plus one from the 18th century (and a narrow few decades of it at that).  It was odd to be packing and have no corsets, hoops skirts or bustles in the pile.  I kept feeling like I was missing something.  For some reason, it doesn't seem like a lot, even though that's five costumes for me, plus one for my date to the Gala.  I feel kind of lost, not having any plans for hall costumes, beyond probably wearing the short gown around on Sunday before changing for the tea.  I get that this seems to be less of a wearing stuff during the day sort of event, but still.  I had to plan "normal" clothes and that's just plain weird.  Maybe I'll wear around the haori jacket from the kimono and the smoking jacket if the classrooms get cold.  ;)

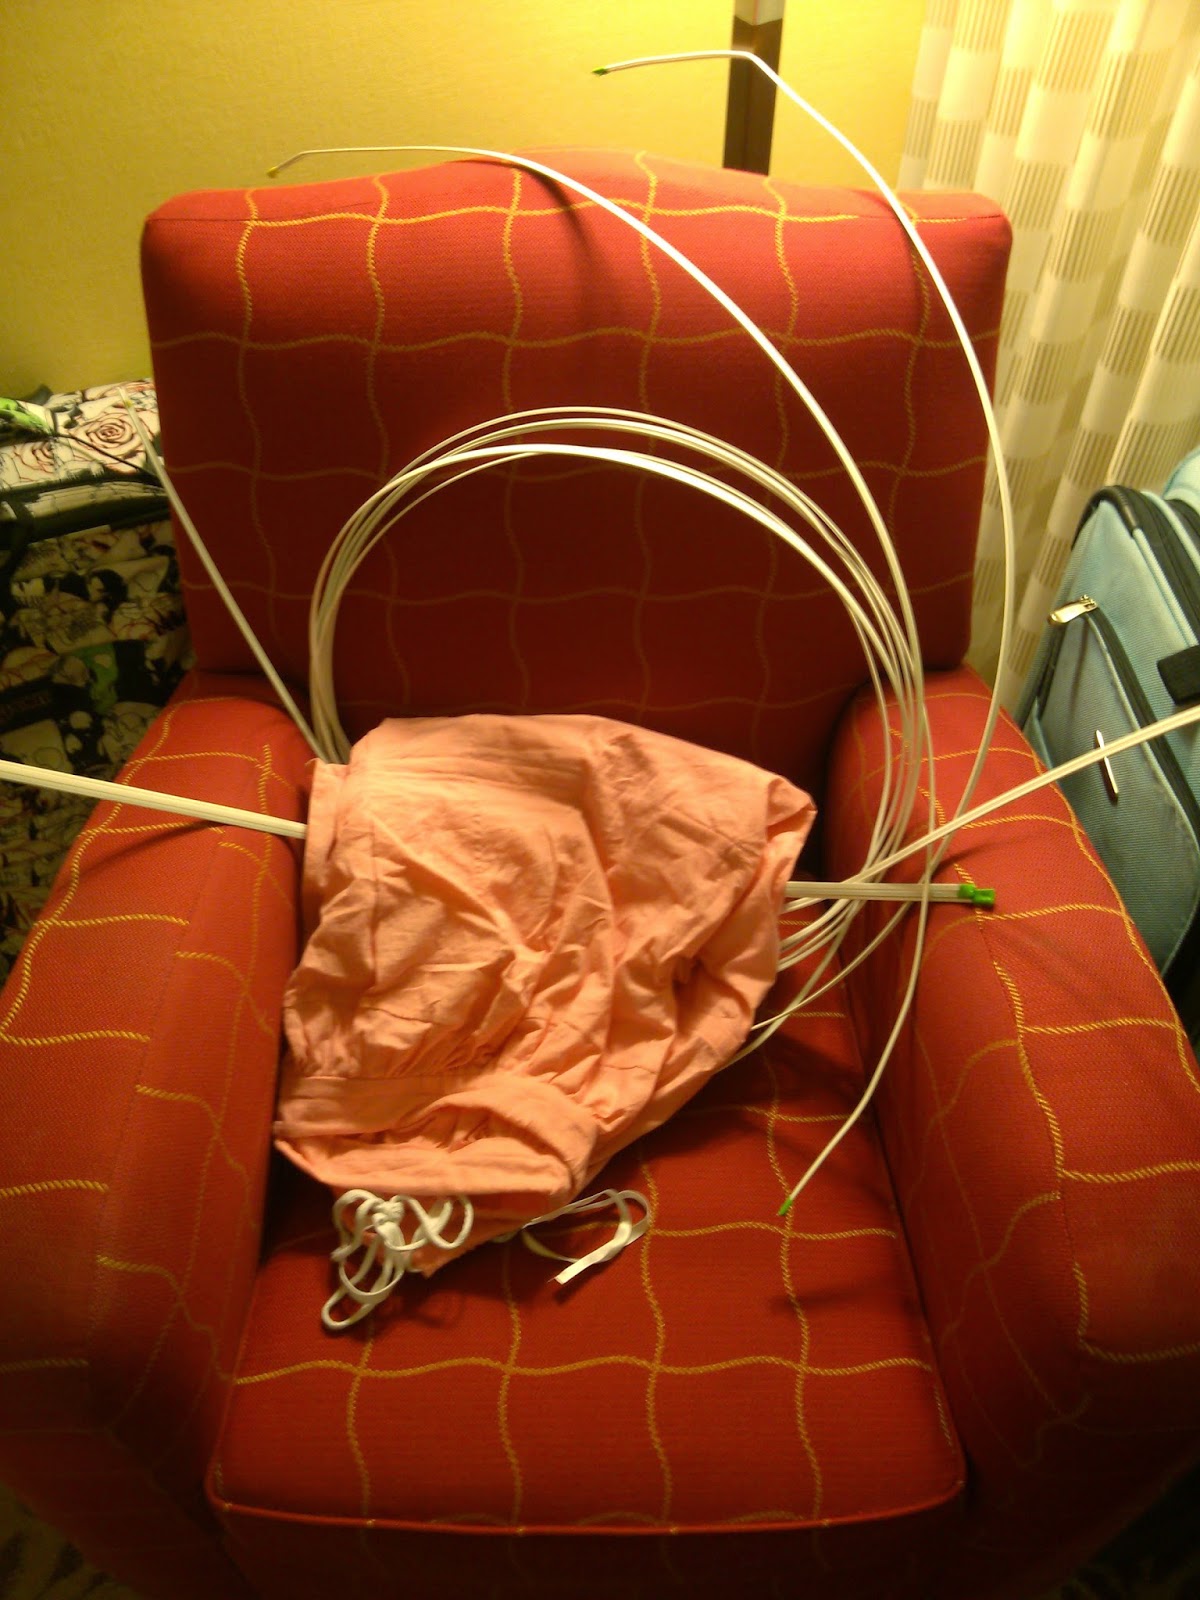
Oh.  Might want to find time to reassemble the panniers before Saturday night.  *adds that to the list*

* * *

Edited to Add:  We crossed paths with a rowdy pair in the parking garage today who are also first time attendees.  Great big scary world just got the teeniest bit smaller.  :)

Tuesday, July 22, 2014

Sewing Update: late 18th Century "Hedgehog" Wig

Styling a wig to wear with my recently completed chemise de la reine was one of the many "short projects" that I had on my to do list to get ready for Costume College.  I needed something that would look a bit like this:  

Adélaïde Labille-Guiard, Marie-Thérèse-Victoire de France, dite Madame Victoire (1787)
Anne Rodbard, Mrs Blackburne, ca. 1787.

Go big or go home, right?  Frizzy fluff-tacular with trailing barrel curls in the back.  Not possessing a significant amount of hair myself, I had to go to a full wig.  I started with the "French Curl" wig from Amphigory, mostly because I already had one on hand that had out-lived it's original purpose.  It was my default generic Victorian-ish thing for a few years and the trailing curls in the back were starting to get a bit mangled from being pinned up into elaborate up-dos.  So, yay for re-using.  


I'm liking this cut/style for a starting point not only because of the curls, but because of the LENGTH of the curls.  On the crown of the head, the hair comprising the curls was only about six inches long.  In the middle, it was ten.  And I didn't measure the trainling ones in the back, but as you can see, they were fairly long.

Here's what I started with.  A little worse for the wear, but still serviceable.

I took a hand full of the nicest-looking of the trailing curls and wrapped them in a plastic bag for safe keeping.
This way, I wouldn't damage them in the back-combing adventures to come.  You can see where the teasing process has started on the left.

Midway through teasing the wig beyond all recognition.  I was seriously giggling my way
through this process, because it felt so awful to abuse the wig in such a fashion.
All I have to say, is thank goodness I never had to do such an atrocity to my own hair.

Opps!  Missed one.  I went over the entire head a couple of times, and any pieces where I could identify an individual curl got teased again.

Once I'd achieved a satisfactory amount of fluff, I needed to manage some width.  So I took the longest pieces of fluffed hair and pinned them back up into wig's foundation with wig pins.
Pinning up sections of teased curls with a wig pin.

Now it's time to see how it looks on my head.

Urh my god, it's so fluffy!  I felt ridiculous.  Seriously, I did this in the middle of the night and it took every ounce
of self-restraint I had not to wake everyone up and show them my ridiculous hair.


Trying it with the hat and that is MUCH better.  I'm going to the leave the trailing curls bagged up
until I get to con.  The less opportunity to mess them up, the better.

All of the tips and instructions I could find on the internet recommended using ridiculous amounts of hairspray at every stage in the styling process.  As I still need to pack this sucker for flying across the country, I'm not going to be able to store it on the wig form and protect it's shape.  (All of the space/wig heads available for such endeavors are already earmarked for the wigs of ridiculousness that goes with the court ensembles for the gala).  Instead, I'm just packing plenty of cheap hair spray and the styling combs and will touch it up when I get to the hotel.  As there's nothing much to be done with the curls hanging down the back, I've left them bagged up as well.

And that's one more thing checked off the to do list.

Monday, July 21, 2014

WIP: Man's 18th Century Court Suit

We're into the home stretch of getting ready for Costume College.  People at work have started noticing that I've got a vacation coming up, so they're asking about where I'm going and those inquiries usually lead to questions of "Are all of your costumes done?"  I usually just laugh and try not to cry.  Costumers are NEVER done.  We just run out of time and sequins.  There's no time for a proper write up, of anything, and it feels like most everything is in a state of almost done, so how about a photo-heavy sneak preview of what I've been working instead.

Honey is getting an 18th century court suit to be my escort to the Gala.  I had to start the costume from scratch and did so at T minus 28 days before con.

Linen shirt, linen stock and fall-front silk tafeta breeches.


The breeches were lined in cotton flour sack material from my grandmother's stash.  While the opacity was necessary, it adds a touch of bulky that, when combined with the extra roomy seat of the style and the "plastic-ish" shwerpiness make them kinda diaper-like.  Oh, my honey must love me, to wear something so unflattering.

Final fitting of the waistcoat before buttons and top-stitching.  I ended up trimming off about two inches of the upper neck area where it's folding back in the photo.  Adding a safety pin to close the cuffs really helps the look of the sleeves.

Adding the waistcoat does help tone down the ridiculousness of the bum fluff.  Not that the whole thign won't get covered up by a coat, anyway.  I saw it written in somebody's blog that the terribly unflattering seat of the pants just helps encourage the modern gentleman not to do anything so terribly inappropriate as take off their coat.  :)


And a shot of the knee band and buckle, of which I am terribly proud.  I found that lovely bit in the jewelry section intended as a photo fram for a necklace.  The plastic backing was held in place by a horizontal metal band, so rip out the plastic and trim off the loop for the necklace and Viola!  We have a buckle.

Since the fitting photos, I've finished up the buttons and button holes on all three pieces, as well as the top stitching on the waistcoat.  Now I just need to find some white tights that'll pass as stockings and finish up the coat, and that outfit will be done.  And by "finish the coat", what I really mean is "stop procrastinating because you think it's going to be hard and just get on with it already.  I have the mock up cut out, so at least it's started.  I don't fly out for another eight days yet.  I've got plenty of time.

I think.

Thursday, July 17, 2014

HSF #13 Under $10 - Man's 18th century Stock

At first I was despairing when I thought that NOTHING of the gentleman's court suit I was working on would count towards any of the current challenges. (not paisley or plaid and CERTAINLY not cheap). But then I realized that one of the accessories that I was considering certainly would and all was saved. 

My honey's court suit needed neckwear, so a stock it would be.  I mostly followed the garment detailed in Costume Close-Up (only with WAY less pleats).  I happen to be one of those people who abhore ironing, so I chose to sew down all of the pleats.  I went with the terribly mathematically accurate method of using the in- and outside of the presser foot to measure my pleats.  There is a strip of linen scrap left over from the shirt that forms the interlining of the stock and the base to which the pleats are sewn down to.
Measuring up from the bottom one half the width of the presser foot anchors the inside of the pleat.


Flipping the outer layer back down away from the interlining and sewing one quarter the width of the presser foot makes for a (relatively) sharp crease when the layer is folded back up.

I ended up straying from the instructions in the book when it came to the back closure.  Not wanting to put out the money for an authentic reproduction stock buckle, I took myself off to my local crafting supply store and found a set of metal buckles intended for scrapbooking. 


$3.49 for a set of 8?  Don't mind if I do.

I also had to deviate when it came to the tabs for buckling.  I had a lot of trouble getting a linen tab to taper off sharply enough to be able to fit through the buckle.  After my first couple of failed attempts, I got frustrated and just cut the damn thing off, fitting a piece of silk ribbon into it's place.  The ribbon was easier to thread through the buckle and could be cinched blindly while worn for easy adjustment.  Not the prettiest bit of sewing I've ever done, but it'll do.
The largest was a touch small for the stock, but it was light weight.  As my honey was already concerned about stuff wrapped snugly around the neck, I decided not to use something small.  Although, in retrospect, this size might have gone better on the knee band of the breeches and the fancy buckle I used there would go better on the stock.  Ah well.


Only downside to sewing down the pleats is that it makes the finished product a bit stiff.  Or else I've made it too wide for my Honey's neck.  Probably a bit of both.  Either way, I'm going to run the whole thing through the wash a couple of times, to see if I can't get it to give up a bit of the fight.


With the coat collar covering some, and a wig covering most of what's left, the back closure really isn't going to be seen all that much.  I'll probably just have him tuck the ribbon tail into the neck of the waist coat and call it good.

For the HSF: 
What the item is: Man's Stock (formal neckware)
The Challenge: Under $10
Fabric: handkerchief weight linen outer, mid-weight linen interlining.
Pattern: Costume Close--Up #24
Year: later half of the 1700s
Notions: poly thread (internal stitchings), linen thread (top stitching), a scrap of silk ribbon to replace a too-thick tab and a buckle from a set intended for scrapbooking.
How historically accurate is it? the part you'll be able to see is pretty spot on. I used the machine to sew down all of the pleats so that I wouldn't have to re-iron every single one of them whenever it was washed. But I didn't want to put out for a proper recreating stock buckle and so used what I could find. Plus I didn't size down the tab sufficiently for easy buckling, so I had to replace the tab with ribbon. I'll give it a six out of ten.
Hours to complete: about three
First worn: another piece ready to pack for Costume College.
Total cost: uses mere scraps of a $15/yd piece of linen. Even counting the full cost of all of the buckles in the set that i didn't use, we're still at under $5.

HSF 12: Shape and Support - Bodice to the 18th Century Court Gown

I'm playing a bit of catch up as far as the blogging goes.  I leave for Costume College in two weeks and my summer thus far has been absolutely packed with sewing and other costumer prep for it.  I've thus far been able to find a current project that applies to each of the recent Historical Sew Fortnightly challenges, so at least I'm caught up there.  Challenge 12 was Shape and Support and, while I hadn't finished the court gown for the Bodice challenge, I was able to buckle down and get it done for this one.  I was originally intending to wear this over stays, despite most references to court gowns stating that this wasn't the case.  To be honest, I just wasn't sure that I could get the support that my plus size figure needed without them.  However, once I started putting the layers of the bodice together, the whole thing started feeling way too bulky. (My stays are fully boned, and with cane.  So they are a tad thick.)  I already had already made an interlining layer which had a handful of bones set into it, so I went back and added about ten more and then left the front three inches of the lining and fashion layer separate so that I could tightly lace the inside closed, then pin the outer layer into place.  Adding in four inch wide facings to the linen lining and silk outer was necessary to hide the raw edges, as well as the unsightly (and somewhat doodled on) cotton canvas interlining as well as the last of the pepto pink cotton sheeting that I'd been using to flat line the silk.  Come to think of it, that's four layers of fabric.  No wonder it felt so bulky over stays.


I chose to attach the overskirt to the bodice along the back half of the waist line instead of finishing the waist band of the skirt and wearing it over tabs.  I liked the added security of knowing that the top and bottom wouldn't separate while sitting or dancing.  The front half of the waistline of the overskirt was faced and finished and still needs a hook to anchor it at the side.  The open front will then pin closed under the front edges of the bodice.  This also gives the added bonus that I can adjust where the fur trim on the open front comes out from under the bodice so that I can keep the look of a solid strip of trim down the entire body.  The bodice still needs a bit of fur trimmings to make it look like the inspiration painting, and then I'm going to attach my engageants to the dress sleeves instead of the chemise, but it is otherwise done. I'm pretty stoked about it, as the bodice was the part of the project that I was dreading the most.  (Not knowing how to do something usually results in a frankly astounding amount of procrastination on my part.)


One of my goals for this project was that any stitching which could be seen on the finished garment had to be done by hand.  This made the bodice a cumbersome project, but I really am pleased with how it turned out.  I managed the edges by turning under the linen lining and whip stitching it to the interlining.  The edges of the red silk were then turned under and stitched into place.  With hand sewing, I find that I have a lot more control over how the edges of my fabric meet.  It's much easier to make minor adjustments between stitches, as opposed to just pinning everything in place and hoping for the best under the speed and indiscrimination of the machine.  Also, hand stitching makes all those pretty little stitch marks that I love so much.  


Info for the HSF:
What the item is: bodice to an 18th century court gown
The Challenge: Shape and Support
Fabric: red silk jacquard flat-lined to cotton sheeting (the pink stuff left over from the pet  panniers!), lined with coffee-stained linen and sandwiched in the middle is a boned layer of cotton canvas interlining.
Pattern: I used JP Ryan's Robe Anglaise as a starting point, adjusting the lower edge to end at the waist in the back.
Year: 1770s
Notions: reed boning, boning channels, silk buttonhole thread for the lacing eyelets and cotton thread for the top stitching.
How historically accurate is it? I had to do a lot of guessing when it came to construction techniques of a court gown, but the overall 18th century-ness of it is pretty good. All hand sewn, excepting the construction seams and boning channels, which are now sealed up insde the layers.
Hours to complete: hmm... maybe 20 or so.
First worn: for the Gala at Costume College in T minus 16 days...
Total cost: probably around $50 for this part.