Monday, July 20, 2015

Hand Hemmed Handkerchief Instructions

As promised, the photos to accompany my hand-hemmed handkerchief workshop that I taught at Costume College over the weekend.

'Squaring' your piece of fabric by drawing out a single thread.

Cutting along the cut line left by drawing that single thread gives you a perfectly straight line.

Measuring in one inch to draw another thread, then drawing three more threads
towards the center of your work, giving you a 'ditch' of  drawn threads.

Each edge is folded over about 1/4 inch, working around your handkerchief, then folded over again until the folded edge lines up with the outer edge of your ditch of drawn threads.  You have to work sequentially around the piece, otherwise, the raw edges won't tuck in nicely at the corners.
Gently unfold your edges and identify the outermost square out of the nine part square left in each corner.  Carefully trim this square of linen out to reduce bulk at your corners.

Refolding the hem and pining in place.  Press with the iron if necessary.

Anchor a single length of waxed thread inside the folded hem where it won't be seen.
Your thread should come out of the folded edge near the gap made by the crossed ditches.

To begin your first stitch, take the needle down through the gap, going under four threads, then coming back up. 

Gently tug the thread to the right to make a small gap between threads.

Take the needle back down through your first hole, then back up through the second, re-tracing the original path.  Only this time, when you come back up to the top side of the work, catch a thread or two of the folded edge of the hem with your needle.

Your thread has wrapped around the four threads in your ditch, pulling them into a wedge shape.
This is the end of the two parts of the hem stitch.

To begin the next stitch, take the needle down through what WAS your second gap from your first set of stitches.

The second part of the second hemstitch on this example.

Repeat your two-part stitches until you get to the end of your work or run out of thread (which will happen on larger pieces).
If you run out of thread, just anchor the end of your thread under the fold of the hem as you did in the beginning.  Then anchor a new piece of thread to continue stitching.

When you get towards the end of a row, you will be picking up a few threads from the cross-ditch instead of a folded edge.

To continue the hemstitch across the corner, use your needle like an awl to shimmy a hole four-threads wide,
by deep enough to encompass all three of the layers folded up at this point.


You may not be able to take the "down and back up" in once stitch like you've been doing thus far without the gap you've made shifting on you.  If so, just take your needle straight down and all the way through your work, then come straight up from the bottom.  It's a touch slower, but you'll only be doing this at the very end.

When you've completed your row, you can either pass your thread through the middle of the corner and begin work on your next row, or you can anchor the thread by taking 3 or four short stitches back and forth within the corner.
 
If you decide that this corner nonsense is too fiddly, don't sweat it.  You can also secure the hem on the corners with a series of neat whip stitches.  Only someone examining your work very closely would be able to tell.

It's not such a big deal on work with a narrow hem, but if you're doing something larger like a table cloth or pillow case, you can use a whip stitch  to close up the open edge at the corner.  Totally up to you.

Monday, July 13, 2015

A quick-n-easy way to store pre-cut corset boning is... not what I'm supposed to be working on right now.

Getting ready for a big costuming con is always a maddening thing.  It seems like the to do list gets more things added to it than get crossed off.  And my attention flits from one project to another so often that I feel like I'm always working, and yet never getting anything all the way done.  Plus, I never get around to taking the time to take any good pictures, so even the stuff I'm getting done doesn't get shown off.  I suppose that when I'm quiet around here is probably when I'm getting the most things done.  I just can't seem to share any of it until after the con has come and gone.

The Sunday breakfast at Costume College has a Regency theme this year, and my only Regency piece was a ballgown.  So, something new had to be made.  And with the ballgown I wore a pair of wholly inadequate short stays, so new stays were on the docket.  And a new chemise.  And perhaps a day cap.  Ok, so I was building an entirely new outfit from scratch.  My sanity is clearly in question.  Here, have some ridiculous fitting pics to giggle at.  The chemise is straightforward, and the cap is exactly as ridiculous as I intended.  Once I get a nice, clear photo of it, I'll put it up on the Historical Sew Fortnightly group for the Accessories challenge.


Collapsing bust cups.  Not groovy, yo.  I went back and put some corded channels over the bust to give a bit of added shape, then put in an additional boning channel.  Not extending over the hips made the stays super comfortable and way easier to fit.  Back looks good, except for the boning is too long going into the straps.  I either need shorter boning, or I need to learn to hold my shoulders back, because when I pull them back, it looks fine.  An extra snug bodice on the dress might aid me in that respect, but I might try to shorten the bones, anyway.


Anywho, so of course, my brain decides to take a little detour on a a quick-and-easy side project that: fit an immediate need, used up a bit of stash and was started and a finished in a matter of hours, making me feel like I'm at least accomplishing something.  While trying to figure out what boning lengths I had and what I needed to order, my frustration level with my current mode of storage for corseting bits reach critical mass.

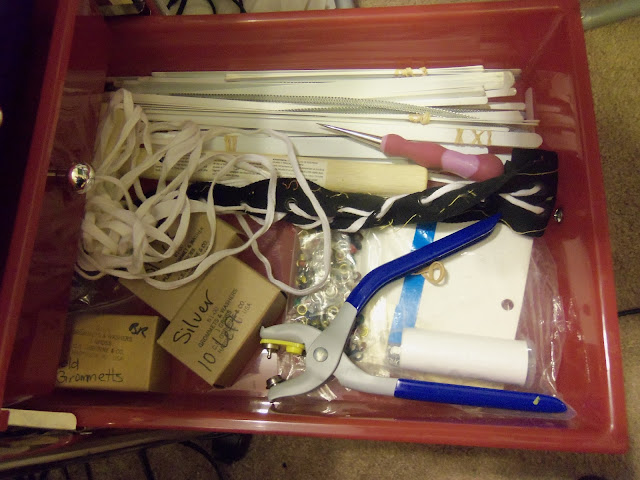
Seemed like a good idea at the time, but hella hard to dig out the lengths I'm looking for.


The concept came from the ideas for rolled up storage of knitting needles and crochet hooks that I've come across over time.  There are no pictures of the pieces, but it's pretty straight forward.  Cut two rectangles of the cotton canvas left over from the stays project; wide enough for one inch per number of differing lengths of boning I'm likely to have on hand and tall enough to accommodate my longest bones, plus a few inches for seams and wiggle room.  Lay the two pieces on top of each other.  For the top piece, cut it in half at an angle, on a line drawn between marks 2 inches shorter than the shortest and longest bones.


Bind the angle cut side of the 'top' piece with bias tape from the Grandma stash.  Lay canvas pieces together and sew 1 inch channels through both pieces.  Lift the needle and skip over the top of the channels, but go ahead ans sew across the bottoms.  They're going to get bound, anyway.  Cut the loose threads at the top of the channels on the right side of the project, but...

Leave the threads on the back of the project in place to prevent unraveling.

Sewing across the bottom of the channels, within the 1/2" seam allowance of the binding.


Lay the two layers of cotton on top of a fashionable outer fabric and sew
together with binding around all four sides

Add a ribbon to one edge for securely tying the rolled case.

And the genius moment, use up the leftover bits of bias tape by making a loop for hanging and...

Viola!  Store hanging up to keep boning from sliding out and free up space in the drawer.


You like that striped yellow cotton?  Me too.  I picked it up from the Scrap Swap at Figments & Filaments this year.  The other 5 3/4 yards of it is getting made into the Regency day dress that goes with the foundations pictured above.  I like how the projects pair up like that.  Makes me smile.