As promised, the photos to accompany my hand-hemmed handkerchief workshop that I taught at Costume College over the weekend.
 |
| 'Squaring' your piece of fabric by drawing out a single thread. |
 |
| Cutting along the cut line left by drawing that single thread gives you a perfectly straight line. |
 |
Measuring in one inch to draw another thread, then drawing three more threads
towards the center of your work, giving you a 'ditch' of drawn threads. |
 |
Each edge is folded over about 1/4 inch, working around your handkerchief, then folded over again until the folded edge lines up with the outer edge of your ditch of drawn threads. You have to work sequentially around the piece, otherwise, the raw edges won't tuck in nicely at the corners.
|
 |
| Gently unfold your edges and identify the outermost square out of the nine part square left in each corner. Carefully trim this square of linen out to reduce bulk at your corners. |
 |
| Refolding the hem and pining in place. Press with the iron if necessary. |
 |
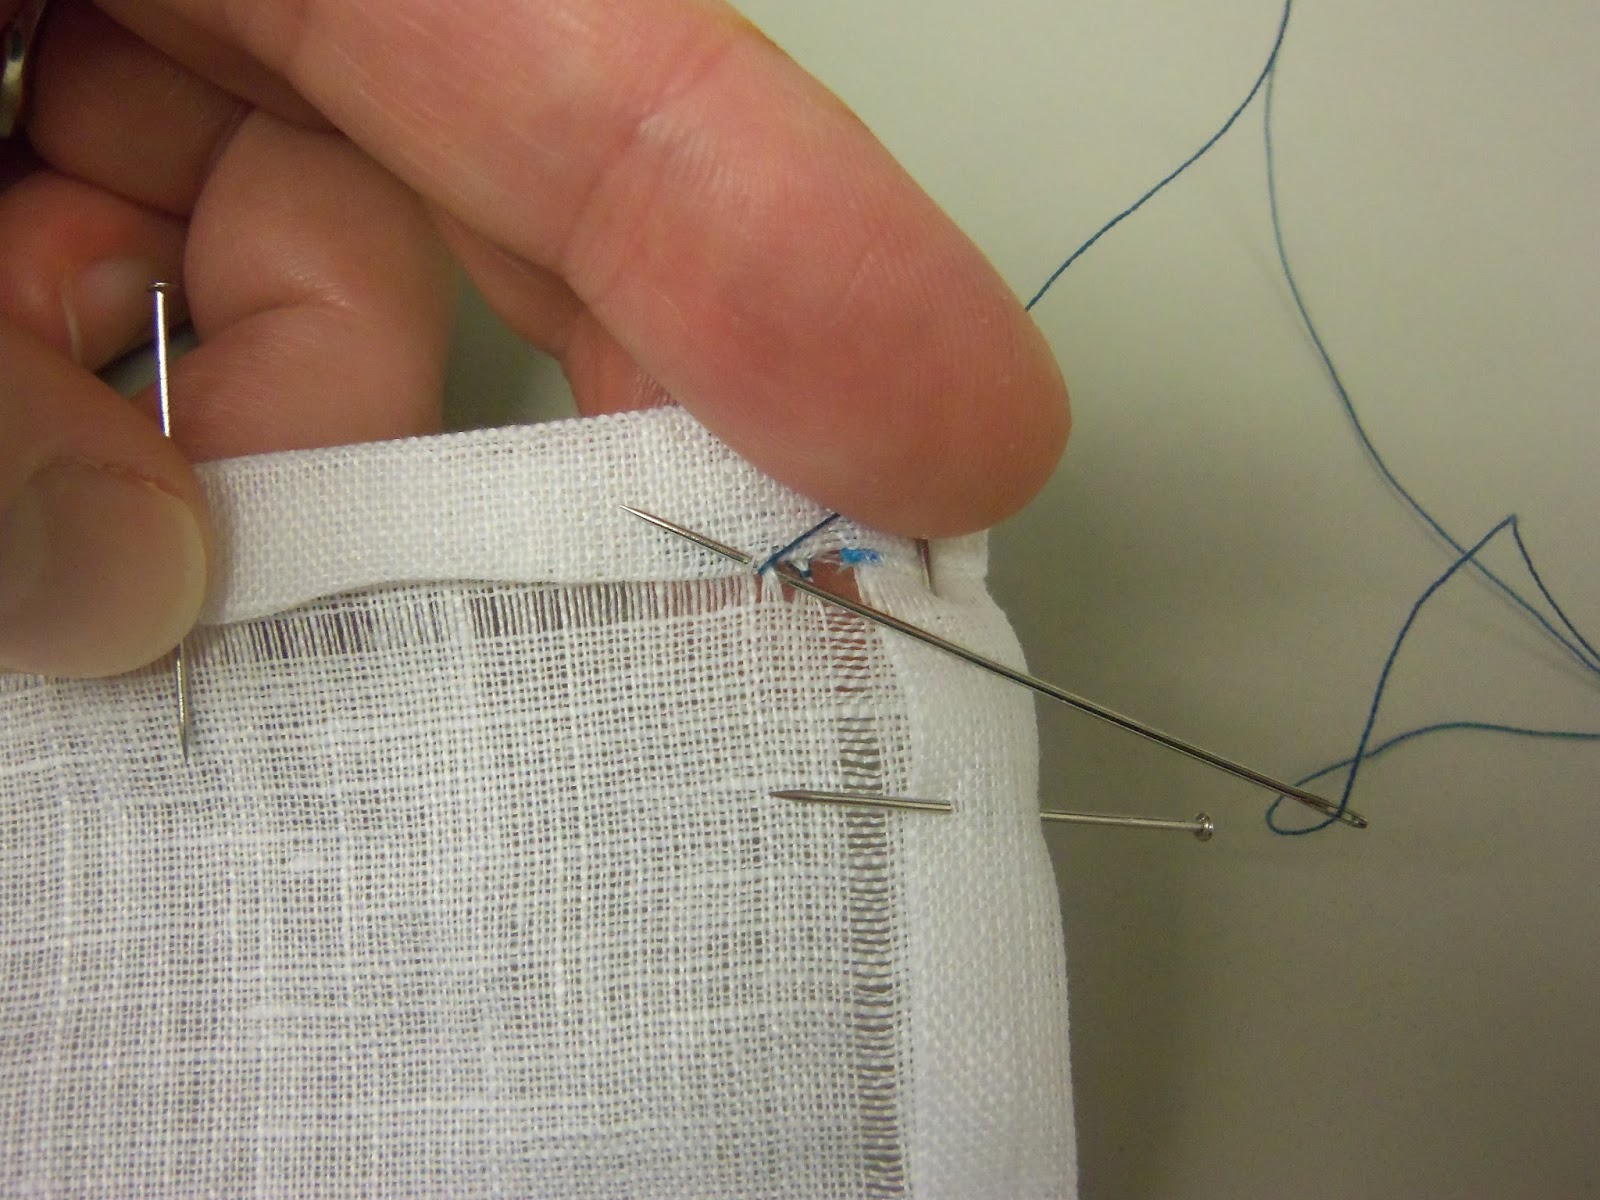
Anchor a single length of waxed thread inside the folded hem where it won't be seen.
Your thread should come out of the folded edge near the gap made by the crossed ditches. |
 |
| To begin your first stitch, take the needle down through the gap, going under four threads, then coming back up. |
 |
| Gently tug the thread to the right to make a small gap between threads. |
 |
| Take the needle back down through your first hole, then back up through the second, re-tracing the original path. Only this time, when you come back up to the top side of the work, catch a thread or two of the folded edge of the hem with your needle. |
 |
Your thread has wrapped around the four threads in your ditch, pulling them into a wedge shape.
This is the end of the two parts of the hem stitch. |
 |
| To begin the next stitch, take the needle down through what WAS your second gap from your first set of stitches. |
 |
| The second part of the second hemstitch on this example. |
 |
Repeat your two-part stitches until you get to the end of your work or run out of thread (which will happen on larger pieces).
If you run out of thread, just anchor the end of your thread under the fold of the hem as you did in the beginning. Then anchor a new piece of thread to continue stitching. |
 |
| When you get towards the end of a row, you will be picking up a few threads from the cross-ditch instead of a folded edge. |
 |
To continue the hemstitch across the corner, use your needle like an awl to shimmy a hole four-threads wide,
by deep enough to encompass all three of the layers folded up at this point. |
 |
| You may not be able to take the "down and back up" in once stitch like you've been doing thus far without the gap you've made shifting on you. If so, just take your needle straight down and all the way through your work, then come straight up from the bottom. It's a touch slower, but you'll only be doing this at the very end. |
 |
| When you've completed your row, you can either pass your thread through the middle of the corner and begin work on your next row, or you can anchor the thread by taking 3 or four short stitches back and forth within the corner. |
 |
| If you decide that this corner nonsense is too fiddly, don't sweat it. You can also secure the hem on the corners with a series of neat whip stitches. Only someone examining your work very closely would be able to tell. |
 |
| It's not such a big deal on work with a narrow hem, but if you're doing something larger like a table cloth or pillow case, you can use a whip stitch to close up the open edge at the corner. Totally up to you. |